Just A Few Scraps of Stained Glass …

You just never know where a few scraps of stained glass will lead to…Blue and Orange stained glass abstract, Helen Bushell, summerhouseart.com

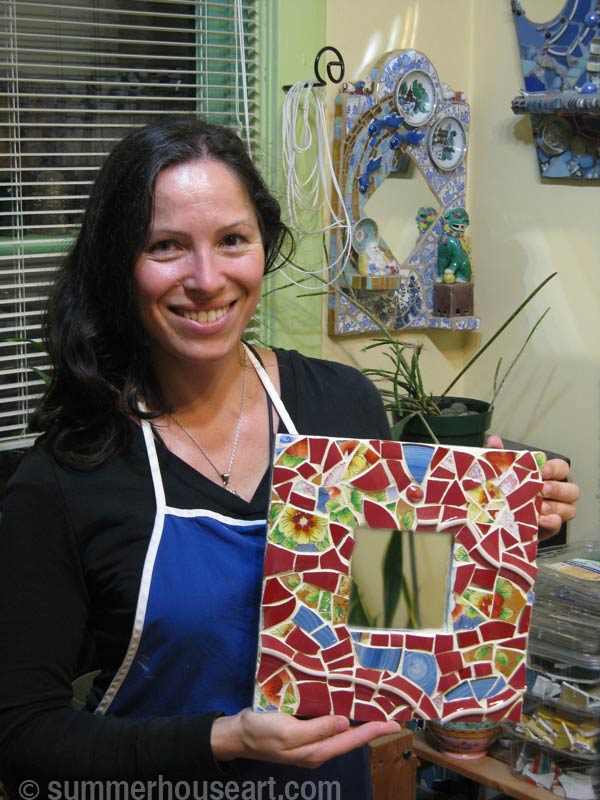
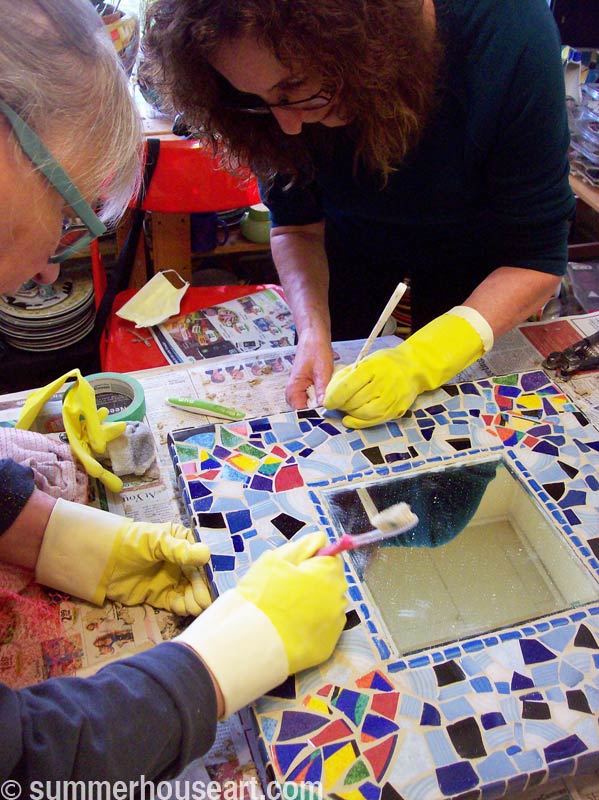
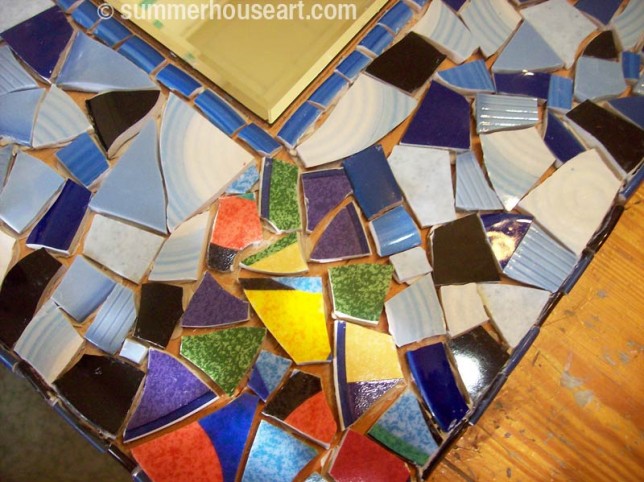
I’m one of those people who never throws much out. As artists, we can see potential in old chipped dishes, old furniture, old scraps of paper and magazines, and even old scraps of stained glass. Back in 2010, I’d been given lots of small stained glass scraps by someone who was cleaning out “junk”. Well, as it’s often said, one persons junk is another persons treasure. My friends know me well, and later that year, I got a couple of boxes of stained glass scraps for my birthday and I did make some mosaics with these scraps.

Abstract glass mosaic, Helen Bushell, summerhouseart.com

And then, everything sort of sat around for a bit. But I did happen to have an old illuminated sign box that I use as light table. Now the thing about colored glass, what really excites me, is what happens to all that color when light shines through it.

So a few years ago I started to have some fun applying shards of glass to glass, first old windows then those glass frames you used to be able to find where you have to sandwich the picture between two sheets of very thin glass. Now, I wasn’t interested in creating the usual stained glass where you surround the piece with leading, because what really interested me was the layering of color in the light. And I got a bit frustrated gluing glass on glass until either Will or my son Dave, walked by and said, “Well, why don’t you just glue glass to both sides of the glass?” Well, duh. And that is how I got onto gluing glass on both sides of the glass.

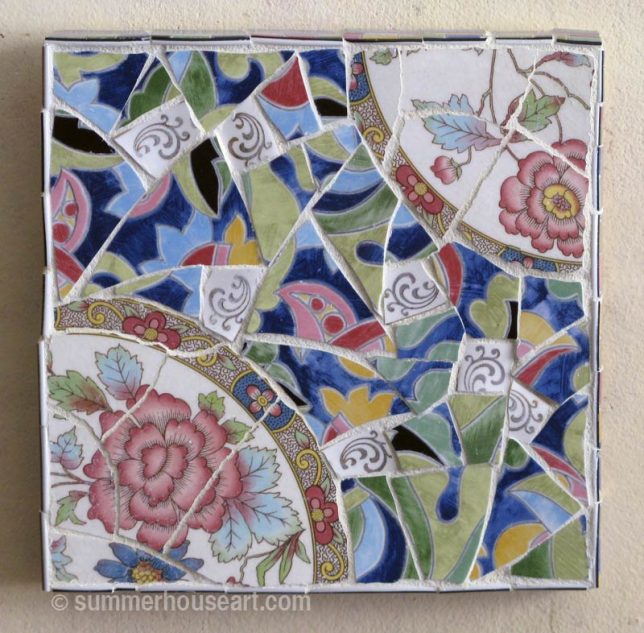
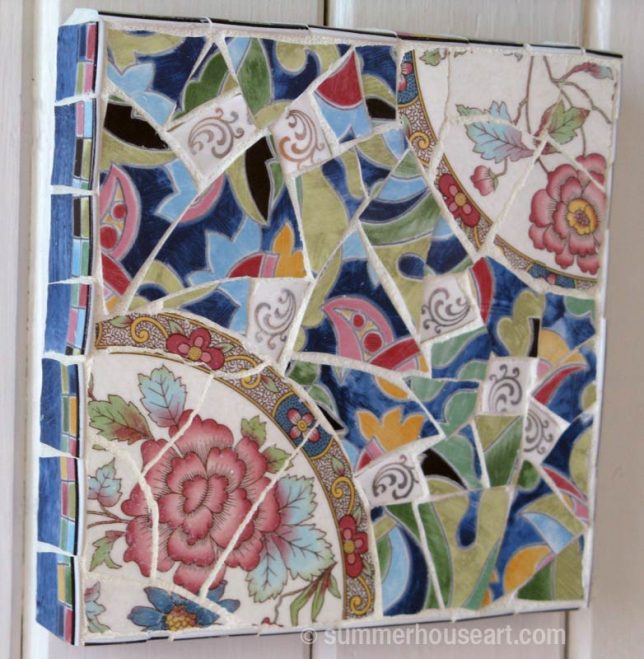
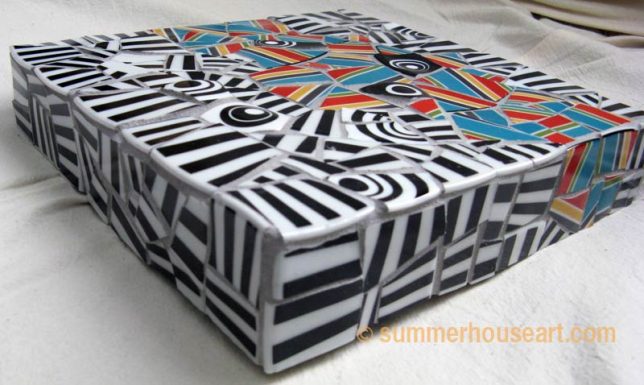
Also, I wasn’t interested in creating pictures with glass. What I played with was just using the scraps as they were and creating abstracts with them. Which turned out, at least to me, rather well. I loved the look and the windows have been sitting on windowsills in the house ever since I made them. Here’s another view of the glass piece at the top of the post.

Abstract Glass in Window, Helen Bushell, summerhouseart.com

Now the beauty of having a mind that’s open to possibilities is that you never know where you will end up next.

I’ve always wanted to do more with those compositions, and I looked at light boxes and all sorts of things for a while and then just sort of forgot about it all. Then a few weeks ago I was looking at prints, and print files and looking around for what I could convert into prints. And in one of those ah hah moments my eye lit on the stained glass comps in the windows of the kitchen. So, together with Will, who is more of a master of photoshop than I, I played around with it and found that the glass transformed really well into abstract compositions on paper. Which we immediately ran through our new printer and loved the result.

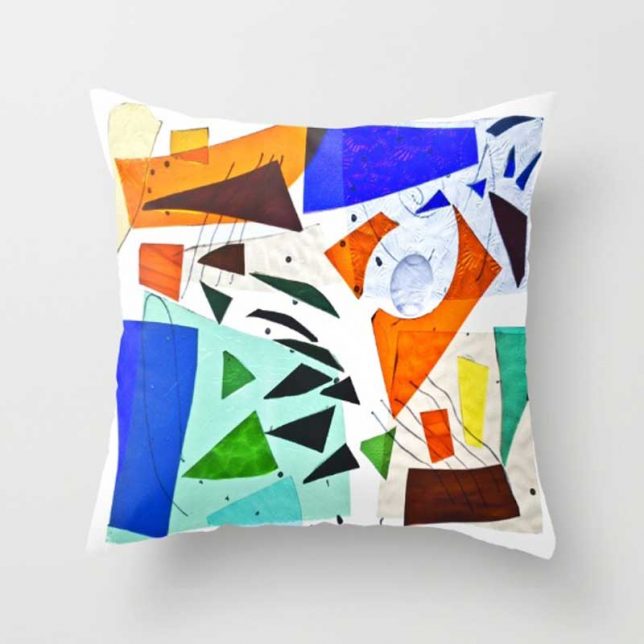
We do have some print on demand shops, one being our shop on Society6. So today, I’m happy to show the first of these new Stained Glass Prints,

composition-in-blue-and-orange131768-framed-prints Society6

already converted into a few fun home decor products, one a pillow, and much more to come yet. Just click on the pics to go to Society 6.

stained glass society6-pillow by summerhouseart.com

 BTW if you’d like to comment, and we do appreciate comments, please just click on the title to bring up the post with a spot for comments at the bottom.)

Save

Save

Save

Save

Save

Save

Save

Save

Save

Save

Share

Two Students Create Two Very Different Mosaics

I teach Pique Assiette mosaics, a type of mosaic made with broken dishes,  in my tiny, little studio, a sunny former bedroom in a 1922 house. This little room has a big work table and is full of dishes and supplies for all the art forms I indulge in. It’s just the right size for mosaic classes for one or two students, no more. And that’s the way I like it, because it allows me to really teach to the needs of each person and it also allows each student to do exactly what they want, or at least have a chance to discover what they want. And such was the case with Irina and her work mate, Jessica.

Jessica knew exactly what she wanted to do from the first class. She had been inspired by an image of a horse, one from a logo of a computer game her husband liked. So we loosely followed that and created a plywood backing shaped as a shield. The shopping class was easy since she’d already decided to look for white and blue dishes. The trick with a piece like this is to create lots of texture and color interest by intuitively and loosely mixing up the shades of white and blue dish shards. It did become rather a big project and she even had to run out to buy more dishes to finish but she did get a sense of how to create a lovely surface. The mosaic took more time to do and required a bit of delay before grouting. But I’d rather students had the extra time to work and finish what they envisioned in an enjoyable manner.

Here she is, looking pretty happy, after the grouting was finally done, with the mosaic on my easel.

Student Jessica with finished mosaic, summerhouseart.com

The finished piece has this lovely ancient look and feel, a beautiful roughness that the original logo never had.

Student Jessica's Finished Mosaic, summerhouseart.com

Irina, was, much like most of my students, not quite sure of what she wanted to do. This is where the shopping class often shows the way, when you find some dishes or colors you like. Making a mosaic with broken dishes is much looser and intuitive than the traditional mosaics. Mosaics done with glass tesserae, can be quite tight and often lend themselves to very symmetrical designs. I encouraged Irina to tap into the intuitive flow of the patterns and arrange the pieces until they “felt” right. She was really terrific about trying all sorts of arrangements. But I think, as the crunch came to finish in time to grout, she just finally stopped trying to get it perfect and just let the “flow” happen. And I’m so glad she did!

Here she is working hard cleaning off the grout in the last class, still wondering, would it all work and would she like it.

Student Irina, cleaning grout, summerhouseart.com

Well, I think she’s looking happy with the result, don’t you?

Student Irina with her Mosaic, summerhouseart.com

And here it is, a closer look at finished mosaic.  I think she did the most wonderful job, creating a lovely, colorful flow of flowers and colors. It’s just a small piece, but it’s got a real song to it.

Student Irina's Finished Mosaic, summerhouseart.com

Two students, two very different results, but both learning how to use their intuition and how to be loose with the shards of broken dishes and by doing so, finding the flow in creating. Turned out perfectly I’d say!

(BTW if you’d like to comment, and we do appreciate comments, please just click on the title to bring up the post with a spot for comments at the bottom.)


Save

Save

Save

Save

Save

Save

Save

Share

The Lucky Finds of a Dish and a Fish

Mosaic Student Dianne's mosaic dish, summerhouseart.com

This very beautiful mosaic is the work of my Student Dianne. As the title of this post suggests, it’s the result of a couple of lucky finds; a lovely pewter dish and a dish sporting a fish.

In my mosaic classes, I teach a type of mosaic called Pique Assiette, which is making mosaics with broken dishes. On the first class, after I’ve totally overwhelmed someone ( in a good way of course ) with all the mosaic possibilities, given them a very brief taste of how dishes break, and what to look for, we set off to Thrift stores to shop. And that’s when the fun begins. First, it’s all about looking for dishes and colors that spark something for you. Then second, it’s all about luck and finding something that makes it all happen. Dianne was very lucky. On the shopping class she found the very unusual pewter dish. The design on the edge was fantastic and we both agreed that the dish itself would make a great place for a mosaic. Then, during the week, she was lucky again and snapped up a dish with a crackle design surrounding a fish.

The first class was a time of trying out all sorts of ideas. From creating a totally abstract design, without the fish and then finding a way to incorporate the fish at the edge of the plate and working all the other colors and textures around it.

A lot of designing is just about trying things out. Laying out pieces and looking and wondering. You have to follow your instinct. And sometimes, I’ve even taken up pieces I’ve glued down and started over. When Dianne returned the following week, the first thing she said was that she was glad I’d told her about removing pieces and starting over even after gluing them down. Because she’d done a lot of that. I could totally understand her progress since it is much like mine. I’m slow and thoughtful and I just keep rearranging until it “feels” right. So it was great to have a student who gets that idea. And as you can see, all that rearranging and listening to whether it “felt” right had a wonderful result.

The last week, we grouted and again were lucky as I’d just tested a grout called silver and it was perfect to pull together the silver of the dish with the mosaic itself. Here it is ungrouted.

Mosaic Student Dianne's mosaic dish, ungrouted, summerhouseart.com

And here is a pretty happy Dianne with her lovely mosaic…

Mosaic Student Dianne with the finished mosaic dish, summerhouseart.com


I happen to know that Dianne is already planning another mosaic and I can’t wait to see what she does next.

(BTW if you’d like to comment, and we do appreciate comments, please just click on the title to bring up the post with a spot for comments at the bottom.)

Save

Save

Save

Save

Save

Save

Save

Save

Save

Save

Share

A New Direction: Creating Small Mosaic Studies

Floral mosaic study, Helen Bushell, summerhouseart.com

 Lately all you hear is declutter, declutter, throw out, lighten your load, etc, ad nauseam. Recently, I even saw a book that claimed your health would improve by throwing things out. It’s the latest trend.

Well, I happen to be one of those people who hardly ever throws things away. You may think you are throwing something out but it has to go somewhere, like the garbage dump, if it can’t be recycled. As they say, there really is no “away”. We do, however, recycle a lot. In fact, we hardly ever have any garbage for the garbage people to pick up.

I make Pique Assiette mosaics, which means, creating mosaic surfaces from broken dishes. So, essentially, I’ve been making art from all those dishes that others got rid of. I suppose I really should be thankful for all those people who donated all that “clutter” to thrift stores.

Over the years of making mosaics, I’ve accumulated quite a lot of leftover bits and pieces that didn’t make it into the latest mosaic. It’s not clutter. It’s all sorted by color and pattern and stored in recycled salad containers. As I say, there is a lot of it. I just can’t throw it all out. I always have a feeling that someday I might need a certain color or pattern. Of course, whenever I can, my students benefit from my stash of broken bits should they need some color or maybe a floral pattern to augment their pieces.

Which brings me to this latest little mosaic at the top of the post. Looking at all my lovely stash of bits and pieces, I’ve decided to start creating small mosaics. This one is just 6 inches by 6 inches. For the time being I’m planning to make little studies, putting together all those small and precious bits I’ve been saving. It’ll be a nice change from the larger projects I’ve done before. Who knows where it will end? Or how many I’ll make or if maybe I’ll have a show of small mosaics somewhere or maybe post them on our Etsy shop.

This little mosaic, with it’s floral design, will be a gift for a niece’s wedding. Something small and I hope, precious, that she can enjoy in her new home.

Floral mosaic study, Helen Bushell, summerhouseart.com

(BTW if you’d like to comment, and we do appreciate comments, please just click on the title to bring up the post with a spot for comments at the bottom.)

Save

Share

An Experiment in Too Many Stripes

Stripe mosaic, by Helen Bushell, summerhouseart.com

 I do have sort of a weakness for the black and white stripes. I like to add just touch of stripes here and there, in a lot of artworks. They just jazz up a pattern or surface.  We make a type of mosaic called Pique Assiette, made with broken dishes. So you can imagine how excited I got on spying a whole stack of dishes with black and white stripes in the thrift store. But, believe it or not, I actually left them behind, on the shelf, when on a dish buying trip with mosaic students.

In the end, of course, I just couldn’t resist. I did get exceptionally lucky when I went back on the seniors discount day and found them still there and promptly snapped them up and also got 30% off! Always nice to get a discount, you know.

So now I had this huge stash of black and white stripes to work with. It occurred to me that instead of using them for just an accent here and there, that I could go mad and also have some fun experimenting with using way too many black and white stripes, just to see what would happen…. especially with a few other dishes to take it right over the top! That’s me, just an artistic rebel, ha, ha.

I’d started with just the stripes, the black and white with a “river” of colorful stripes and it just needed something. Which was when I noticed I did just happen to have a few of these bits of cups with black and white bulls eye on them.

Choice of dishes for mosaic, summerhouseart.com

Finally, almost done with the tedious breaking, gluing and fitting. You’ll have to excuse the glue everywhere.  There’s just no way to avoid that messy gluey stage.

mosaic, pre grout, by Helen Bushell, summerhouseart.com

And now a new decision to make.  What color grout?  And here Will came to the rescue, by Photoshopping a few choices.

Grout color test, summerhouseart.com

Since I was already over the top, I did consider really colorful grout. Then black too, but I decided that the uneven black paired with the very straight black on the dishes just wouldn’t work. In the end, I came to the conclusion that the pale grey set off all the pieces and that I really couldn’t/shouldn’t push the composition any more than I already had.

Here it is again, Finished!

Stripe mosaic, by Helen Bushell, summerhouseart.com

And a side view too. 

Striped mosaic, by Helen Bushell, summerhouseart.com

I’m quite happy with it, oddly. I know it’s over the top, too much pattern, eye popping, on the verge of looking like camouflage, but it has a nice sense of fun to it. The size, by the way, is 8 in x 8 in.  Still haven’t come up with a title….

Oh, Will just came up with a perfect title…..”One, Two, Many”

(BTW if you’d like to comment, and we do like comments, please just click on the title to bring up the post with a spot for comments at the bottom.)


Save

Save

Save

Save

Save

Save

Save

Save

Save

Save

Save

Save

Share

Two Very Different and Unique Floral Mosaic Table Tops

What I like about my mosaic classes is the way it’s never boring for me, as a teacher. Unlike many instructors, I’m never constantly teaching the exact same project, over and over again. With my classes, each student gets to pick their own project and I just basically facilitate them in their plans. However, that said, students sometimes do pick the same type of thing to create, but I find that they never ever do the that same thing in quite the same way!

For instance, quite a few students do pick a table top as their first project, since it’s a nice sized first project. But, I have to add that each one ends up creating something totally unique and very different. And that’s what keeps it all interesting. For instance, Gail and Jane, two students who took classes separately this spring both decided to make mosaic table tops.

Gail had actually come to her first class with just one thing on her mind, which was to reconstitute a treasured plate, that had been accidentally broken. But I knew that she would have lots of time after doing that and I urged her to do something more in the classes, and create another project. After our shopping class where she’d found lots of floral themed dishes, she decided to create a table top. Hers is a lovely floral arrangement that incorporated whole plates surrounded by a mixture of colors and textures. Turned out great didn’t it?

Student Gail's Mosiac Table top summerhouseart.com

And yes, we did come up with a scheme to resurrect her other treasured plate too. Luckily, I found another wooden plate to glue it on to and she surrounded the original plate with a complimentary mosaic border.  She was happy to be able to display it again. A success, we think.

Student Gail's scenic plate with mosaic border, summerhouseart.com

Now Jane, my last student, also ended up deciding to do a floral table top. But, here, the similarity ends. Her design is unique to her own vision and very different again. Jane came to the 2nd class after the shopping class with a plan of action. She’d sketched out a garden picture, complete with flowers springing up from grass and dirt, all against the backdrop of a blue sky. It all came together beautifully. Each flower, a distinct set of floral dishes and the sky is a mixture of dishes in all sorts of textures but all various shades of blue. The whole arrangement worked brilliantly!  So there we have it, two floral Pique Assiette table tops but each totally and beautifully unique.

Student Jane's mosaic table top, summerhouseart.com

Save

Save

Save

Save

Save

Save

Save

Save

Save

Share

The Happy Vintage Radio Robot Collage

When birthdays roll around, we’ll sometimes go all out, gather up the glue sticks, scissors, lots of old magazines and go mad with collage and create original birthday cards. This May, our grandson’s birthday called for something just a bit special, like maybe a something bigger than a card. And, being creative grandparents, we spent a whole day having fun, cutting out and sticking down bits and pieces and created a poster of a Robot! And not just any old robot either. This guy is not just a collage, he’s an assemblage of all sorts of parts!

Radio Robot Collage by summerhouseart.com

He’s got Vintage radios for head and torso. He’s got a moped headlight on his shoulder, candle sticks for antennae, watch parts and even an old flashlight for hands. He’s got a car grill and Bar-B-Q for torso parts. He’s got swirly eyes and lightning bolts. He’s got car wheels to roll around on and at the very top of his head flashes a light bulb, for when he’s having great ideas.

And when we were all done, and just before we’d sent him off, by special post, folded very carefully into a big brown envelope, we scanned him and saved a file just for us. And we played around creating new versions of him.

And then it occurred to us that he was so much fun that we should share him with everybody. And so here he is, Mr. Radio Robot, now available on Society 6 as a print or a beach towel.

Radio Robot Beach towel on Society 6 by summerhouseart

And on RedBubble as a lovely poster that anyone can share and decorate their kid’s rooms too. We created lots of versions on other products too.

Radio robot poster on Red Bubble by Summerhouseart

Our grandson doesn’t mind. He’s got the original. And best of all, he liked it so much he wants to make one himself! Can’t ask for more than that.

Share

Upcycling to Create a New Boho Daybed

Before: the old couch summerhouseart.com

Ah, Before and After. This is the story of an old hide-a-bed couch being replaced with an up-cycled Daybed very thriftily made and done up in Boho style.

After: New Daybed summerhouseart.com

 The old couch, with its unbleached cotton cover hiding stains, old age, many, many years of wear, not to mention large shreddy bits made by long gone cats, just had to go! It just so happened that we had most of the components for a new daybed, stored in the basement, waiting to be transformed. Something much more comfy and better looking than a lumpy, old hide-a-bed. We’d just been waiting for a little time to tackle it.

First, had to get the old couch hauled away by a company that would make sure it all got recycled. We had the rails of an old Ikea single bed, missing the slats. Not sure, but I think they may have been used for some other project. We had a couple of substantial wooden chair or couch arms that one of our sons had found years ago and brought home.

Will, stapling the slats made from pallets, summerhouseart.com

We had saved the two foam seat cushions from the old couch to make new back cushions from. We cut those in half with an old electric carving knife and made four cushions from them.

Old foam seats now backs for new daybed, summerhouseart.com

Will, in the mean time had ingeniously figured out a way to attach the arms of the chair to the rails of the bed. And like so many people these days…. he recycled some pallets into slats for the bed. The only new thing we ended up getting was the actual foam mattress. An Eco foam mattress, so no off-gassing etc.

The aforementioned unbleached cotton cover was sewn into “new” covers for the foam. And the material from a thrift shop duvet cover became new covers for the cushions.

And finally, a chance to get creative with all my fabric stash, collected from garage sales and thrift shops. Chaos while deciding on the fabrics I’d use.

Fabric chaos, deciding on fabrics for new pillows, summerhouseart.com

Lovely new pillows, in the Boho Style.

2 new Pillows for the Boho Daybed, summerhouseart.com

Love how the fabric looks with an iris.

Iris with new pillow fabric, summerhouseart.com

And tah dah! New daybed! We love it! Finally a place for napping where you can actually stretch right out and really relax. Makes a nice couch too.

New Daybed, summerhouseart.com

Save

Save

Share

We’ve Got a NEW Shop on Etsy called FoundMadeArt!

Beach necklaces by Will Bushell, summerhouseart.com

We’re a couple of artists who are always open to new ideas, new avenues even. In the last few years we’ve been exploring some new ways of selling our work online. We’ve got lots of work up in some Print on Demand Online shops like our Summerhouse Art on Society 6, Summerhouse art on Zazzle and Red Bubble. It’s been a bit of learning curve but lots of fun too.

Which brings me to our latest venture….FoundMadeArt

So, a little lead in….  We’ve always been in love with beach combing. I’m one for watching tide charts and finding just the right day to head out to Sidney to look for beach pottery and beach glass.

Sailboat in Sidney BC summerhouseart.com

And we’ve made a few things like Bird baths

New Mosaic Birdbath by summerhouseart.com

and mirror frames with it.

Beach Pottery Mirror by Helen Bushell, summerhouseart.com

One day Will started playing with the idea of making jewelry from driftwood and beach glass. Off he went researching and learning everything he could about wire wrapping online and at the library.  Honestly, there is nothing that hasn’t got a tutorial about it somewhere. We love that generosity. And with his natural sense of design he was soon creating some really lovely necklaces.

Beachcombing treasure summerhouseart.com

 Which brought us to where to sell it all? He’d made quite a few. So we looked into Etsy. This time though, we couldn’t use our usual name of Summerhouseart since it had already been used in one form or another. But Will soon came up with the perfect new name. So, drum roll…… our new shop is called FoundMadeArt.

I love the new name since its all about finding things, like beach glass and driftwood and making something artful with it. And it leaves a lot of scope for other things that we like to work in too, like collage, assemblage and mosaics. The plan is to start with jewelry now and add a variety of other “found art” as we go along.

Here is a little introduction to what he’s been creating lately. We like to think of it as Surfer, beach jewelry. You can just link to the Etsy shop by touching the pic. BTW, you may notice in the photo of us, we look kinda young. But never mind, we decided to use it anyway since that’s how we still feel as long as we stay away from mirrors. Young at heart, that’s us.

 SOLD Pink Sea Glass Pendant by Will Bushell, FoundMadeArt Etsy shopDriftwood pendant by Will Bushell, FoundMadeArt


Sea Pottery Pendant by Will Bushell, FoundMadeArtSea Glass Pendant by Will Bushell, FoundMadeArt


Save

Save

Share

Another Student Enjoying Mosaics

Summerhouseart Student Tanya's mosaic mirror

The first class in my mosaic classes is all about possibilities. First, I like to show students as many possibilities of what they can do with broken dishes as I can. I give them a tour of all my mosaics, then I show them lots of books of mosaics and for about 10 minutes I give them a taste of actually breaking dishes in my studio with my two wheel cutters. And then …. we go Shopping at Thrift stores for dishes to break! Everyone’s favourite part!

Some students are overwhelmed with all the possibilities and some just get even more excited to start. Tanya was the latter. In fact, between the 1st class and the 2nd one, she made a couple of small mirrors on her own at home! For her project she chose to make a pretty good sized mirror, which was going to be bit of work. But Tanya, who has her own studio/gallery in the Yukon where she makes jewelry, is quite used to getting down to work. And that she did.

As you many have gathered, I teach Pique Assiette mosiacs, which is a type of mosaics made with broken dishes and I always encourage students, when we go shopping, to look for color and patterns they’re really attracted to. I’ve always found that you tend to actually use those dishes, and may ignore the ones that you don’t have quite the affinity for. Tanya chose a lot of blue dishes, in a variety of patterns and I threw in a little donation of one of my hoarded abstract plates to use too.

She had the mirror ready for grouting for the last class. This is us cleaning up the grout and glue from each piece of mosaic.  And yes, that is an old toothbrush I’m using, works really well for this task.

Summerhouseart Student Tanya's mosaic mirror

We’d chosen a grout that would set off every piece. A little comparison here to show the finishing touch the grout makes.

Summerhouseart Student Tanya's mosaic mirror

Summerhouseart Student Tanya's mosaic mirror

One of the things Tanya wanted was to create a mirror that could be hung either horizontally or vertically as a diamond. And for that we devised a pretty balanced design so that it would look great either way.

Summerhouseart Student Tanya's mosaic mirror

Tanya had a far reaching plan too. She wanted to offer more than jewelry in her gallery. When she posted her little mirrors and her finished class mirror on her Facebook, she was already getting orders for more! And no wonder!  I think she’s a natural at mosaic.

She’ll be heading back to the Yukon in the spring and has been busy finding more dishes to take back to her studio there to create more mosaics.  She creates some lovely jewelry too at her gallery/studio Motherlode Jewellery.


Share