Mosaic Bird Bath Delight

We’re sort of lazy gardeners. We follow the no dig, layered methods and don’t go in for applications of herbicides, pesticides or unnatural fertilizers. We don’t do a big fall clean up either. We just let the garden be at the end of the season, leave the leaves, leave the seeds, don’t take down plant growth. We just walk away and leave it all for the birds and squirrels.

And the birds reward us by coming by and eating all the seeds left on flowers and plants, the berries on our shrubs, the seeds in the trees and rooting around for insects in the layers of leaves and whatnot. We keep a set of binoculars at our kitchen window right next to a couple of bird books to identify who flies in for lunch.

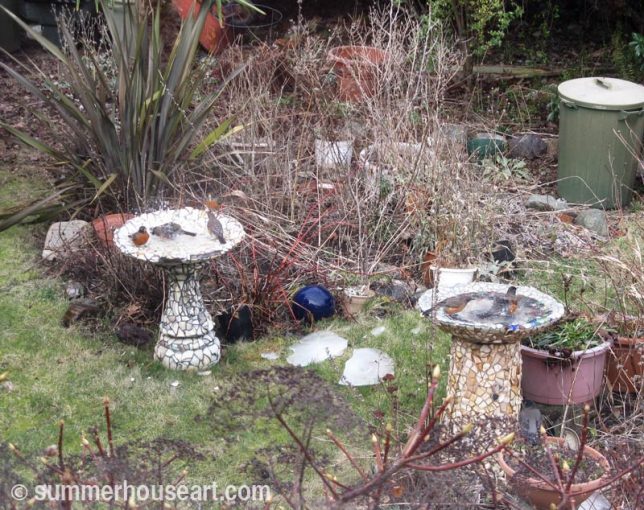
The best thing, of course, is watching our bird baths. The two baths are placed just so we can get a good view.

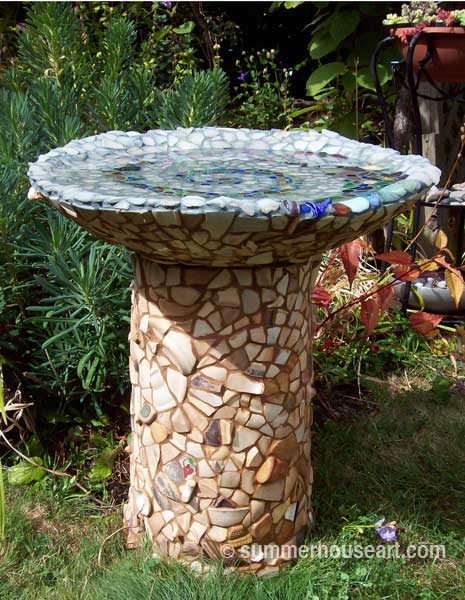
Two Mosaic Bird baths, summerhouseart.com

We’ve had a bit of cold snap here in usually balmy Victoria, and the water in the birdbaths has been frozen. Yesterday the temperature came up and with it a lot of birds in the garden, mostly Robins.

We saw one Robin trying to get drink around the ice in the birdbath and decided to do the birds a favour.

The layer of ice was taken off and the baths cleaned out and refreshed with new water. Within minutes of our return to our kitchen window we were rewarded with a steady stream of birds coming to bath.

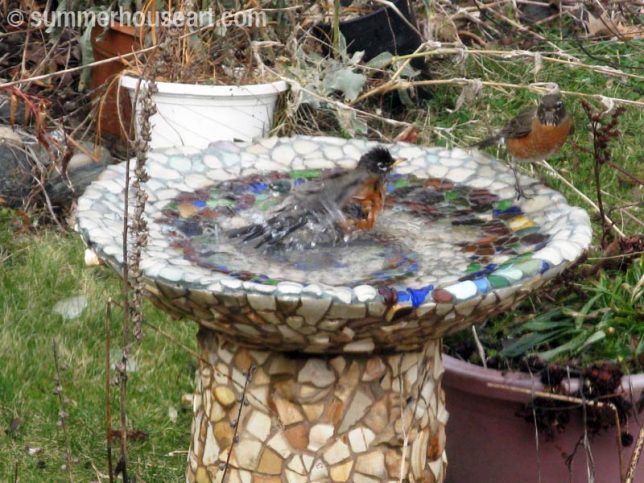
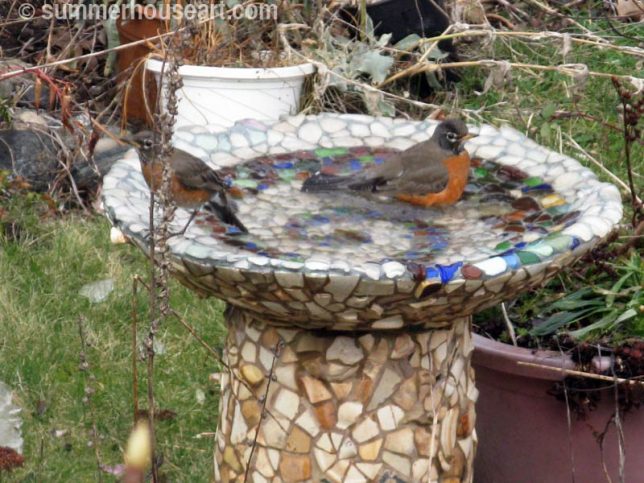
First one, with one waiting on the rim…

Mosaic Bird bath, summerhouseart.com

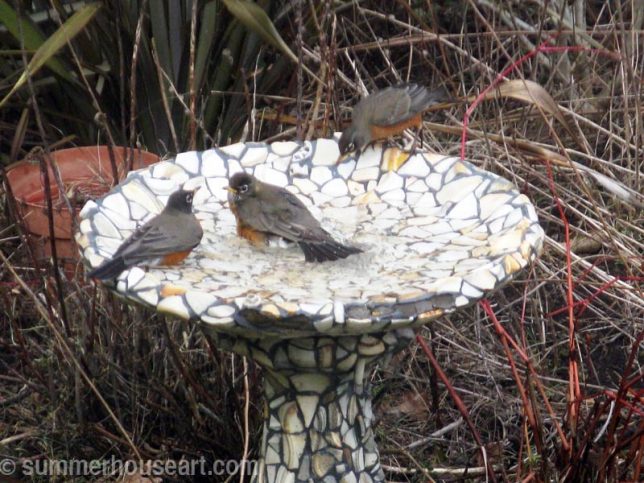
then two,

Mosaic Bird bath, summerhouseart.com

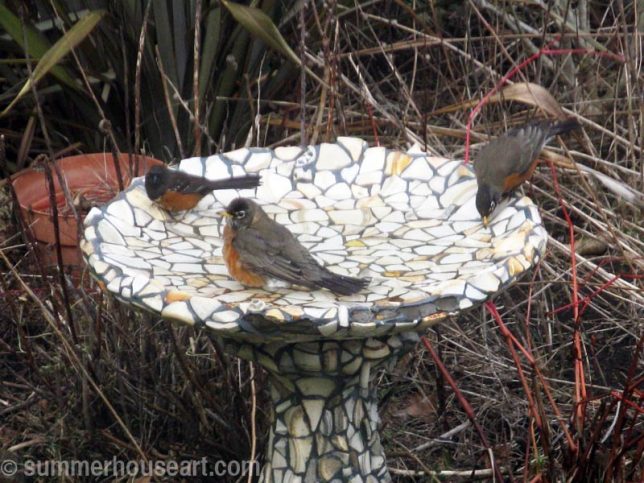
then three Robins ..

Mosaic Bird bath, summerhouseart.com

and then two Robins and a Towhee..

Mosaic Bird Bath, summerhouseart.com

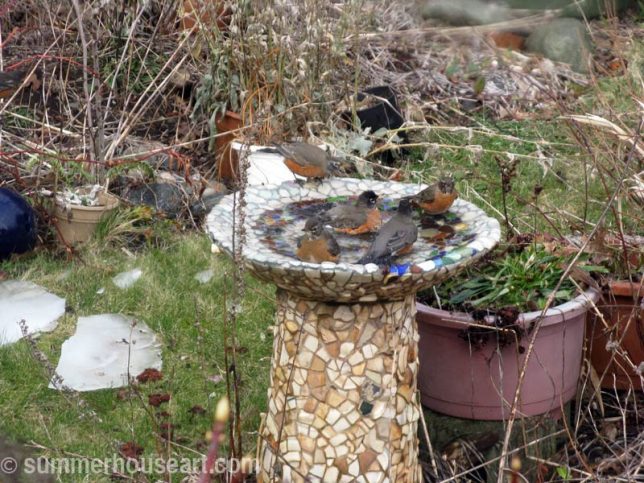
and then the baths were full of rowdy, splashing birds!

Mosaic Bird bath, summerhouseart.com

We actually had to go out two more times to clean out the baths and refresh the water and each time, within minutes, the baths were filled with splashing and happy birds, who then flew up into the trees to preen and clean their feathers. Thought I’d share our little bit of bird bath delight today. And thanks to Will for creating this little video, he says apologies for the bumpiness and bad resolution.  But hey, you know it’s just for fun.  And also big thanks to Kevin McLeod, who seems to make just the right music for us to use.  You can find Kevin’s work at incompetech.com

(BTW, if you’d like to make a comment, just click on the title.  It’ll take you to comments….and we do appreciate comments )

Save

Save

Save

Save

Save

Save

Save

Save

Share

Doing Some Artsy Experimenting with Beach Pottery

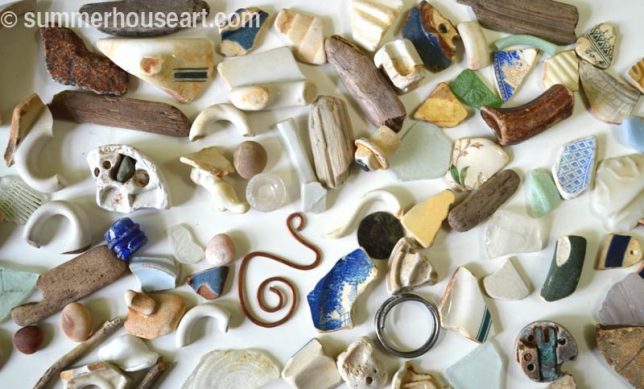
Beachcombing treasure summerhouseart.com

In the spring and summer I tend to check online for low tides. And if it’s nice out, and the tide is really low in the morning, I’ll be convincing Will that we really need to go beach combing in Sidney. Luckily, he usually doesn’t need much persuading. Now you don’t want to know how much beach pottery I’ve already collected.. ok, LOTS.

But there is something about wandering up and down on the beach, head and eyes down, with the sun and the seagulls overhead, the smell of the ocean around you, searching for those lucky finds. It’s so calming and lovely. If I’m going to have an addiction, I’ll take beach combing any day.

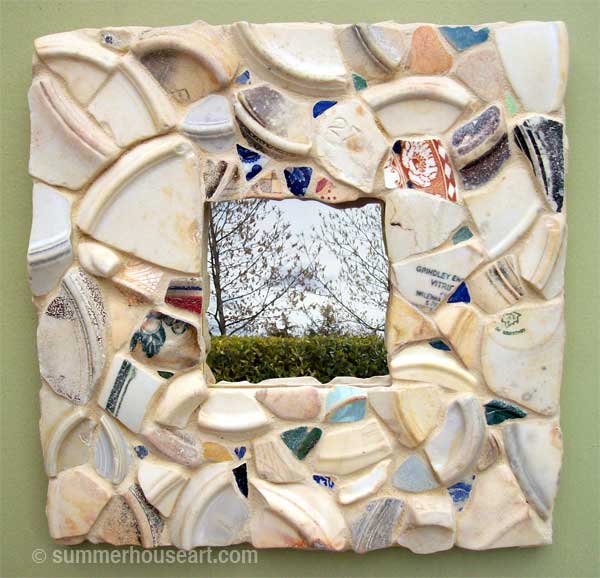
But what do you do with all these lovely finds? So far, we’ve had a good time creating birdbaths and mirror frames with it.

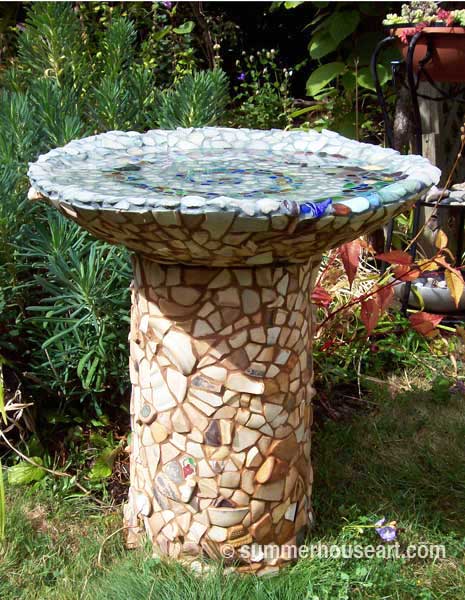
Beach Pottery Mosaic Birdbath by summerhouseart.com

We have plans, in the summer, for making a couple of garden sculptures covered in pottery.

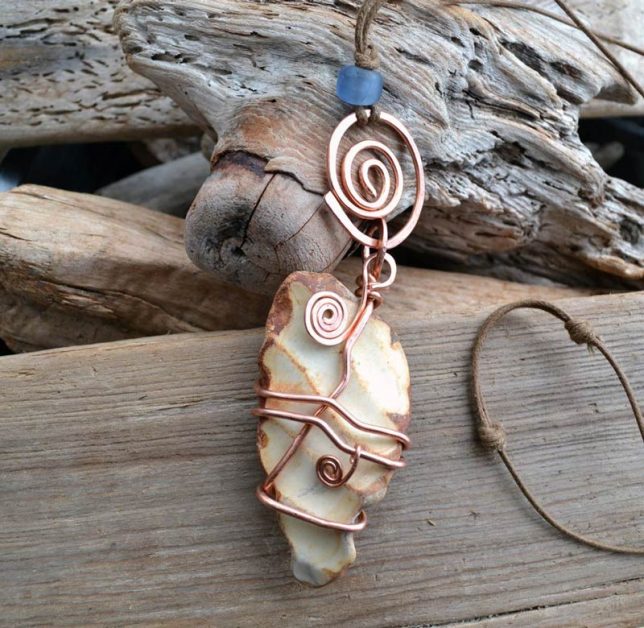
And Will has been making jewelry from driftwood and beach glass and pottery for our new Etsy shop, FoundMadeArt.

Sea Pottery Pendant by Will Bushell, FoundMadeArt

I had an idea of creating small wall pieces with the bits all arranged like a collage, but shipping weight was a problem. Then I discovered Wedi board on an online mosaic site. It’s relatively unknown in Canada, I had to search like mad and finally found a tiling company in Nanaimo that had just started carrying it. It’s a light weight substrate created for bathroom tiling, with foam sandwiched between two thin layers of cement. Trust mosaic artists to see some new uses for this product. Suddenly a lightweight substrate for outdoor mosaic instead of heavy cement board!

I thought if I created some small wall pieces, they would be quite ship-able with the low weight. Wedi board is a bit more expensive than cement board and you have to buy special hangers for it too, but I thought, it would be worth a bit of experimentation. So with thanks to my sister and her husband, in Nanaimo, who very nicely brought down the 3ft x 5ft. sheet for me when they came for tea and goodies, I had something to work with.

The beauty of Wedi board is that you can cut it with a utility knife. I decided to start small with 6 in x 6 in pieces. Then, after lots more research online ( don’t you just love youtube?) I decided to cover each piece with a thin coat of mortar to hide the grey surface.

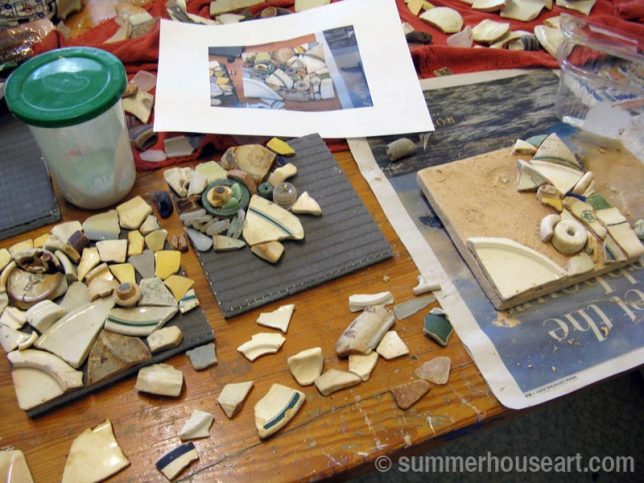
Then came playing and trying out layouts some chosen bits of found beach pottery. All, btw, freshly washed and dried to remove the salt residue. Kind of funny to think there I was washing dishes that had come from the ocean.

playing with beach pottery layout, summerhouseart.com

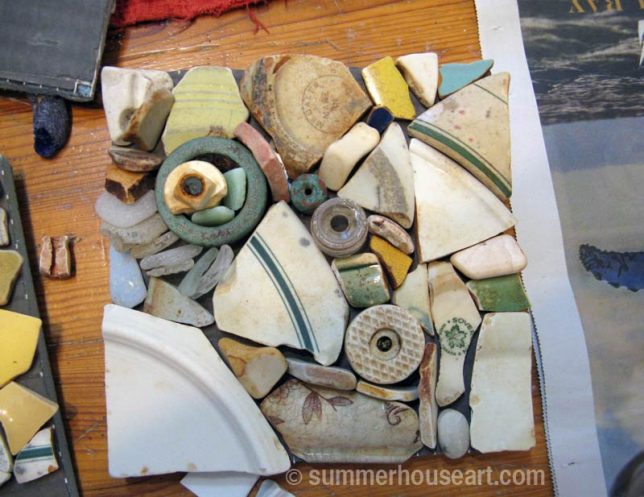
The first experimental arrangement went through lots of changes, I even took photos so I could test the look.

Beach Pottery layout, summerhouseart.com

And then, with the air getting rather blue, because of the difficulty of trying to adhere the pieces without getting mortar everywhere, the first piece was done.

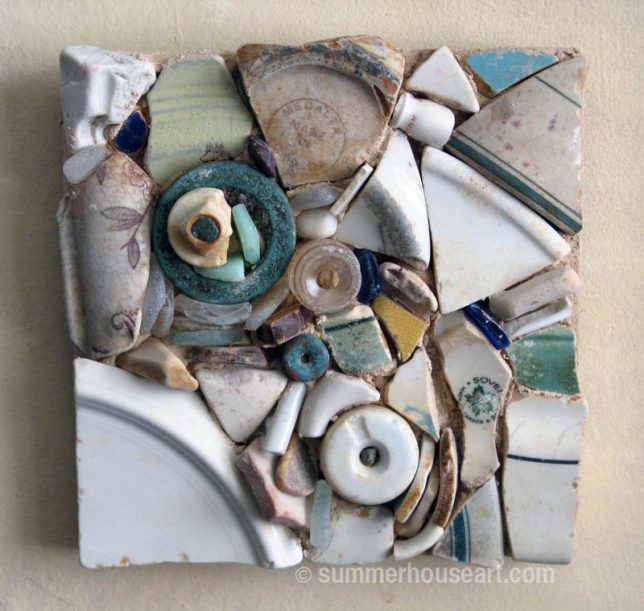
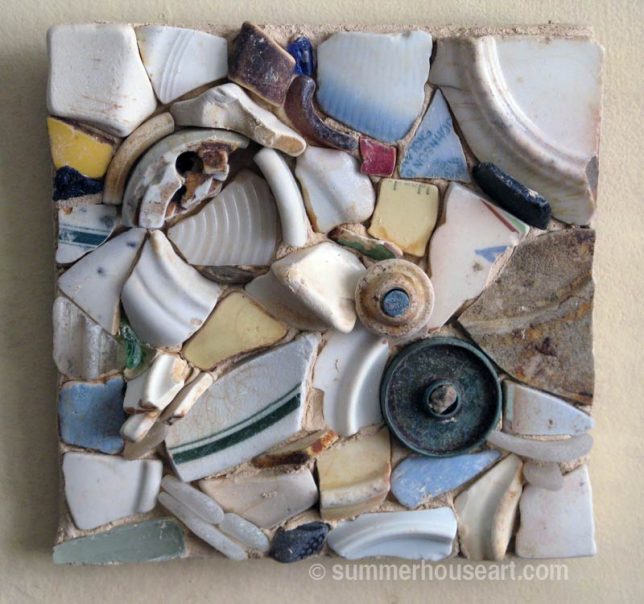
Beach Pottery wall piece, Helen Bushell, summerhouseart.com

For the next piece, I decided to wing it. I basically chose the pottery I was hoping to use and applied mortar and stuck them down with less worry about placement, using intuition and speed mainly. You don’t have much time with mortar anyway. It may be a method I’ll use in the future, when I try to create more of these little wall pieces. These are just the start of a new idea. Who knows where it will lead? One day, hopefully, they’ll be for sale on our Etsy shop. One thing I do know, is that I’ve got an awful lot of beach finds that need a home. And I do have a bit of beach combing addiction.

Beach Pottery wall piece, Helen Bushell, summerhouseart.com

(BTW, if you’d like to make a comment, just click on the title.  It’ll take you to comments….and we do appreciate comments )

Save

Save

Save

Save

Save

Save

Save

Save

Save

Share

How I arted up a Garden Gnome

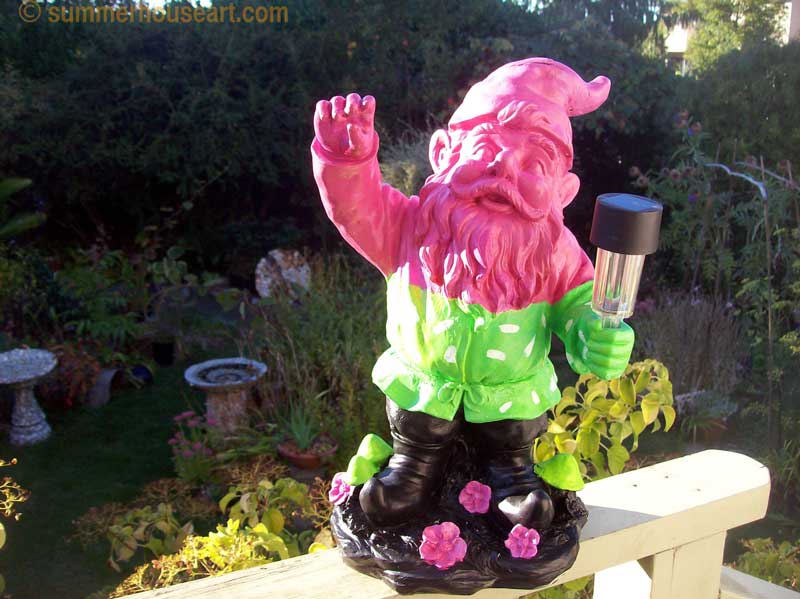
Ok, I admit it.  I bought a garden gnome at a garage sale last summer.  Will shook his head, he could not believe I actually paid for it and brought it home.  It was, I must also admit, really awful.  Made out of resin which had cracked, the paint job on it was an attempt to repair a fading mess.  It was dirty and covered in pine needles.  And then it sat on our deck all winter because, although I meant to repaint, it I hadn’t decided quite how….yet.    Until today, when it all clicked, out of the blue or pink as you can see.

gnome-landscape

OK, I also admit that this inspired paint job was not without a bit of inspiration from another artist.    One in Italy, of all places, with a web site called The Good Machinery,  that I happened to see and of course, Pin, on Pinterest.  And what this artist did with little plastic toys was, I thought, pure genius.   Well I thought so…..

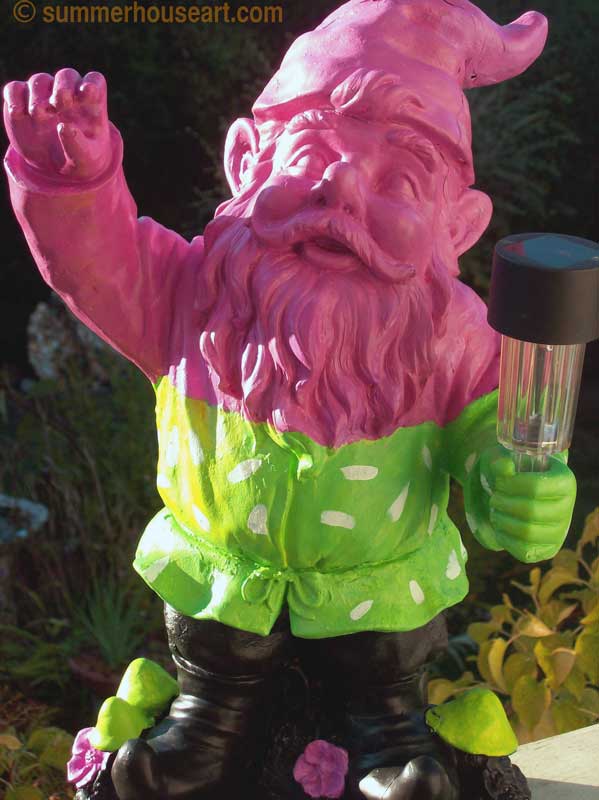
So here it is,  my garden gnome, inspired by,  but after all, totally reinvented and refurbished by me.  And it was fun too.  He did need something to hold and in another inspired moment, I fitted him with a solar garden light.  I think he’s going to fit right in.

gnome-close-up


Share

A Recycled Post about Recycling for Earth Day

Today is Earth Day or for many Earth Week.  I like to think that every day is really Earth Day.  In honor of the day, I’ve decided to do a bit of recycling.  The following is a post I wrote way back in 2010, but I think it still works.  I’d like to share a bit about how to recycle in the garden and even how to use recycled dishes to create art in the garden.

Actually, Recycling, could be the main theme of our lives.  Now it’s called thrifting too.  We’re a couple of old Hippie artists, who were there for the start of the recycling movement. For us it’s just a way of life. We buy everything used and we also get a lot of “good stuff” as I like to call it, absolutely free. Best price there is. And as I mentioned in other posts, it’s a pretty abundant lifestyle too.

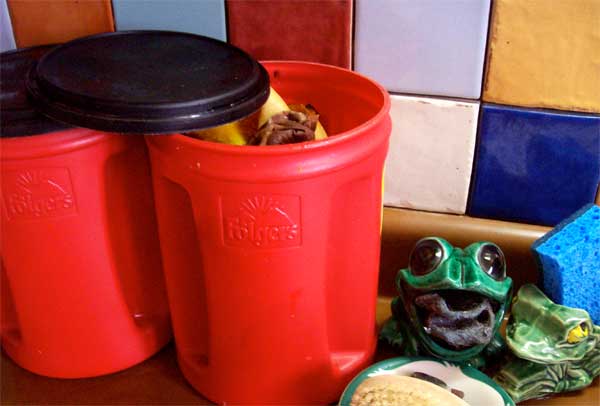
Of course we compost. Every scrap of banana peel, tea bag, coffee ground and egg shell is collected in these recycled coffee bins that I brought home from a job. The tiles on the backsplash behind them are all recycled. In fact every tile was actually free and found at garage sales or from sample boards thrown out by tile stores.

Kitchen Compost saving
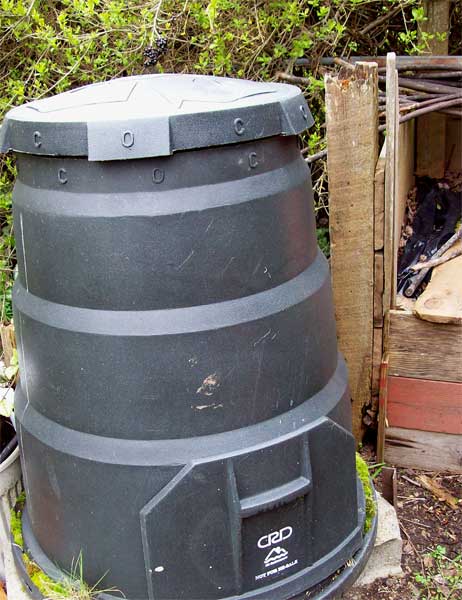
The composter the food scraps go into, was also free.  Someone in the neighborhood was tossing it. Our rainbarrel is a recycled drum formerly used for soap.

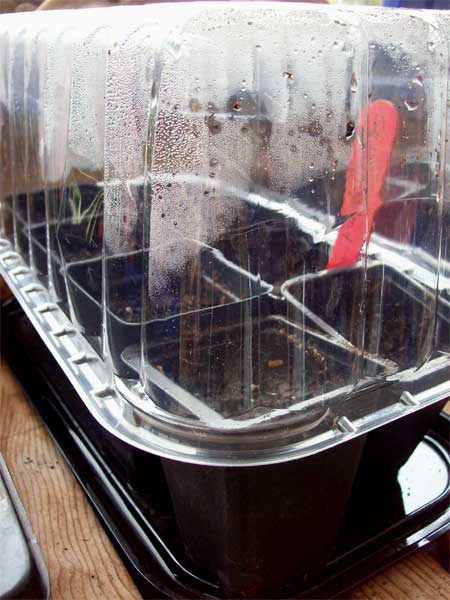
black-composterIn the green house, I recycle too. Every pot from years past is saved to be reused, trays are sometimes taped up to plug leaks but are still put to work. These Black eyed Susan vines are sprouting in cookie packaging.

cake-packaging

The seeds for the Purple Cone flower, which I am rather impatiently waiting to see sprout, are planted and living under the protection of packaging, which in its previous life housed a cake bought for my birthday a short while ago.

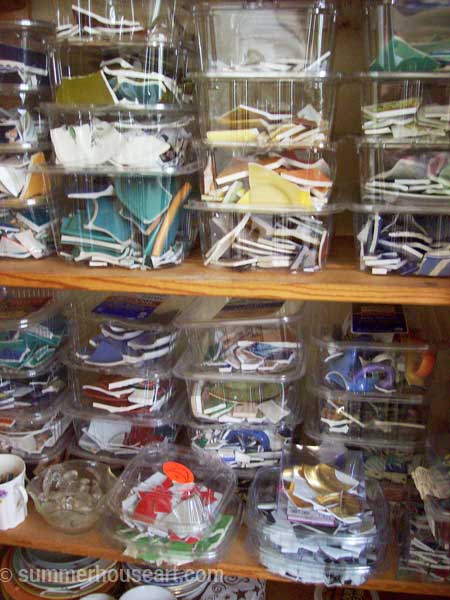
In it’s next use it may become storage for broken dish shards in my studio, like the many, many salad green containers already put to a second use.

boxes-of-shardswm
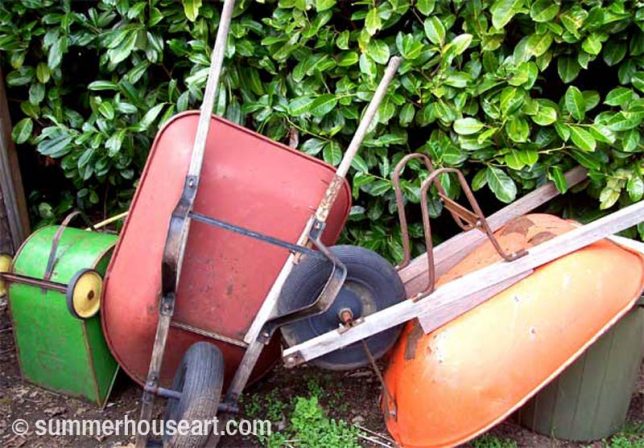
Out in the garden we have, now wait a second, I have to mentally count, at least 4 wheelbarrows. Only 3 are shown here.  All free or almost free. All recycled. I have an abundance of wheelbarrows you could say. I think they are kind of beautiful, in a sort of colorful, shabby, knocked about and used, way.

Wheelbarrow collection, summerhouseart.com


Now that I’ve reached the garden with my recycling theme, I’d like to show you a few pieces of our garden art. Now maybe art for the garden is an odd sort of theme for Earth Day but a lot of our art is made from recyled materials. The mosaic in the herb garden is a recycled chimney covered in old dishes and tiles.

Mosaic Chimney by Helen and Will Bushell, summerhouseart.com

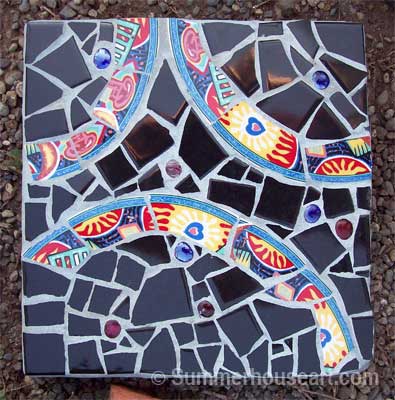
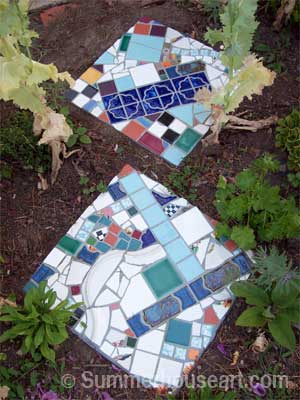
The stepping stones are all made using recycled dishes and tiles, a type of mosaic art called Pique Assiette. In fact, all of my mosaic artwork is made from recycled dishes, tiles and ornaments.  If you would like to see how to make them check my post Creating a Mosaic Stepping Stone Helen’s Way.

Stepping Stone mosaic, by Helen Bushell, summerhouseart.com

Stepping Stones by Will Bushell, summerhouseart.com

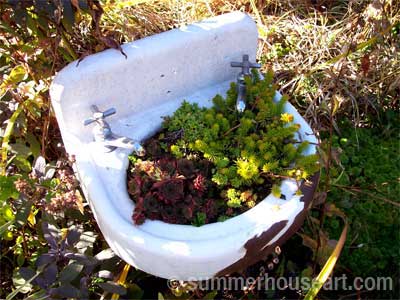
And old sink found in, I must admit, unashamedly, a dumpster dive, is home to our succulents.

Found Basin for the garden, summerhouseart.com


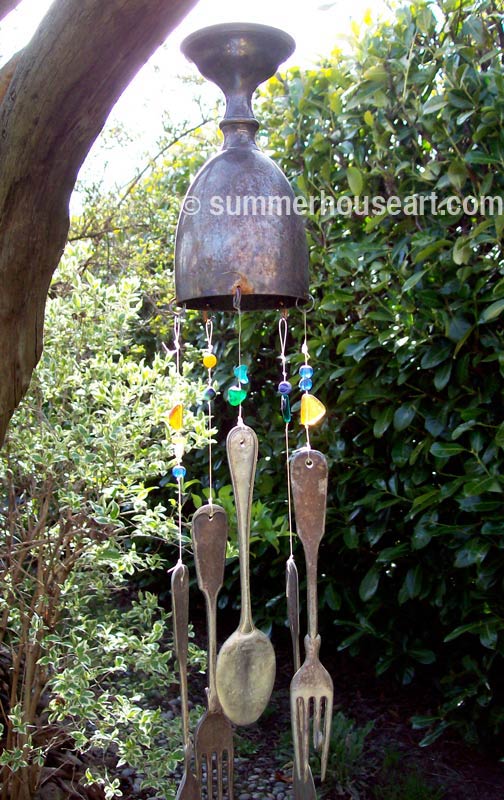
The chime that Bill fashioned out of an old anniversary cup found at a garage sale and hung with flattened silver cutlery is another recycled artwork. There’s much more art to see on one of my previous posts about garden art called Bill’s Driftwood Chair and Other Garden Art Whimsies.

Wind Chime by Will Bushell, summerhouseart.com

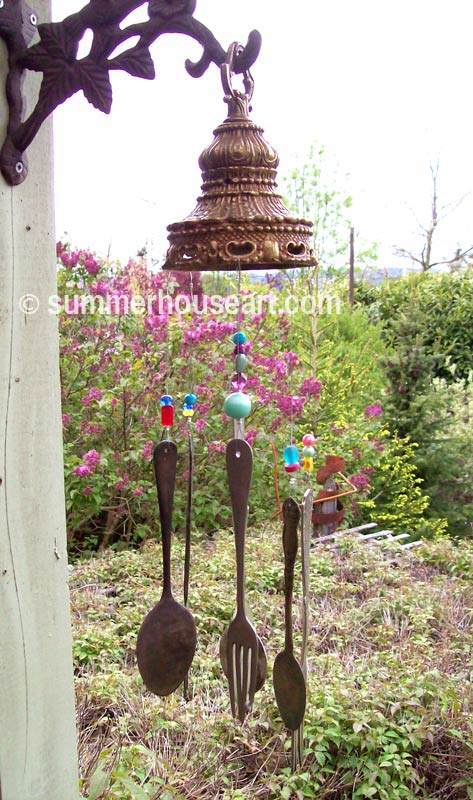
Here is another great little chime that Will made as a gift, with a metal tassel from a chandelier now no more and few beads and pieces of flattened cutlery.

Tassel Chime by Will Bushell, summerhouseart.com

There are so many things that we can recycle and reuse for our gardens from artwork to garden furniture to garden tools and implements. There really is no need to go out and buy new most of the time. I always like to say the world is an abundant place as long as you don’t mind second hand. Not buying new saves resources and cuts pollution. Buying used saves more stuff from ending up in landfills too.  And the best thing is getting out and about on the weekends looking for deals at garage sales ( we always plot the most efficient course to save gas), enjoying the  sun at a beach on the way from one sale and the next.   Life is good.  So that’s my little, I hope, upbeat, message in honor of Earth Day.  Even the post is recycled.

(BTW, if you’d like to make a comment, just click on the title.  It’ll take you to comments….and we do appreciate comments )

Save

Share

Creating Another Beach Pottery Bird Bath (and there’s a movie too!)

Low Tide, Sidney BC, photo summerhouseart.com

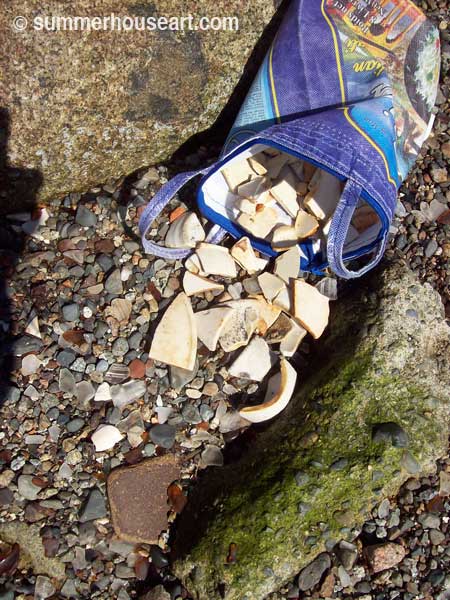
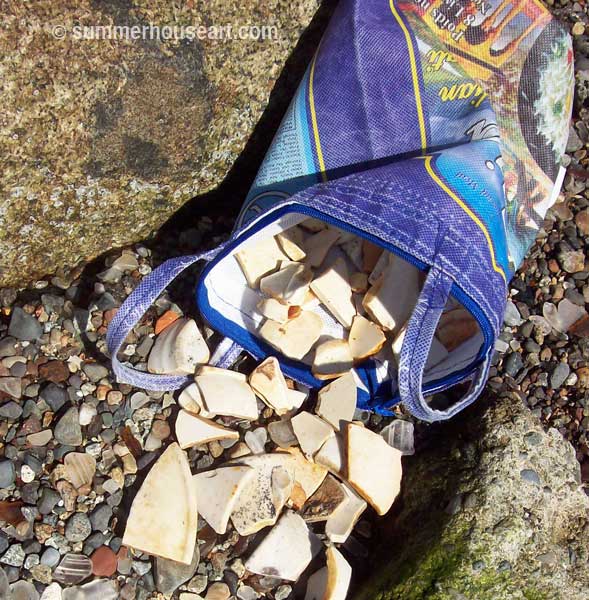
Way back in March, we happened to notice that the tides were very low and the idea struck me that we should go out to Sidney and collect some beach pottery. So off we went to the best beach pottery beach and went wild scooping up beach pottery in our little rice bags. Everyone else was looking for glass and overlooked all the lovely pottery. But we had plan for it.

Bag of beach potter shards, summerhouseart.com

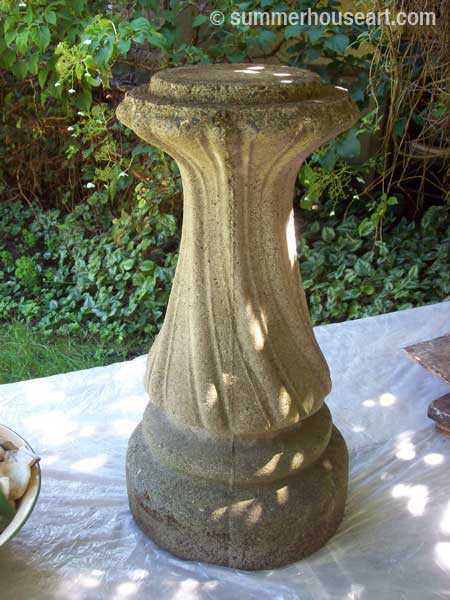
We’d made a bird bath before with pottery and beach glass. Way back when we moved into this house, we’d found, under the laurel hedge, at the back amongst a lot of debris, a birdbath pedestal. The basin or bowl was long gone and we’d put it up in the garden with a plastic bowl on top with a couple of rocks in it. Didn’t look great and the birds loved it. The pedestal had a nice classic shape but the plastic bowl made it ugly.

process, Bird Bath Helen and Will Bushell summerhouseart.com

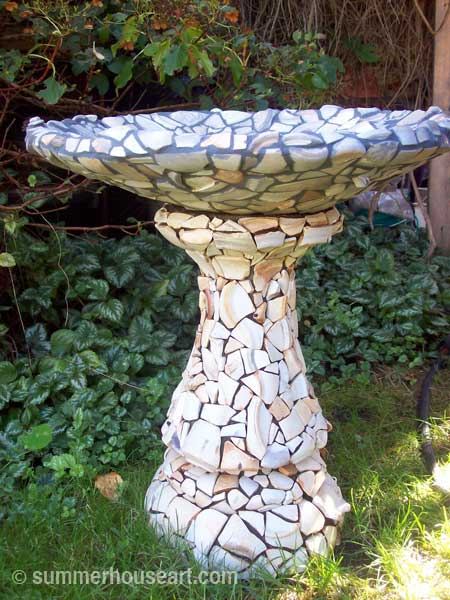
With this wonderful haul of pottery we both decided to renovate the old ugly birdbath. We started by applying a mosaic of the pottery onto the pedestal. Now I must mention that the real beauty of beach pottery is its smoothness. And to preserve that smoothness, it’s really best not to cut the pieces at all. So each piece has to be searched for, each piece must fit without cutting it to fit. It takes more time but is worth it, just for the fun of being able to slide your hands over the finished mosaic and take in the feel of pottery that’s been tumbled in the ocean for years and years.

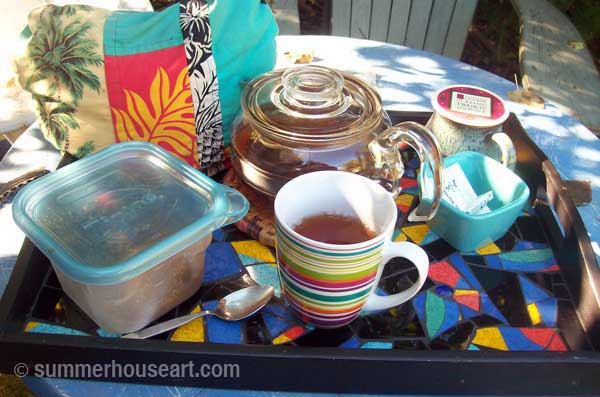
And we took our time, working on the sunny summer afternoons, playing rock and jazz on the CD player and taking lots of tea breaks with tea brought out on a favourite mosaic tray.

Mosaic Tray Helen Bushell summerhouseart.com

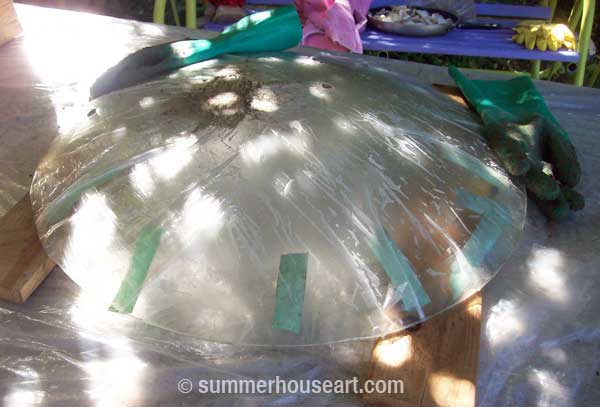
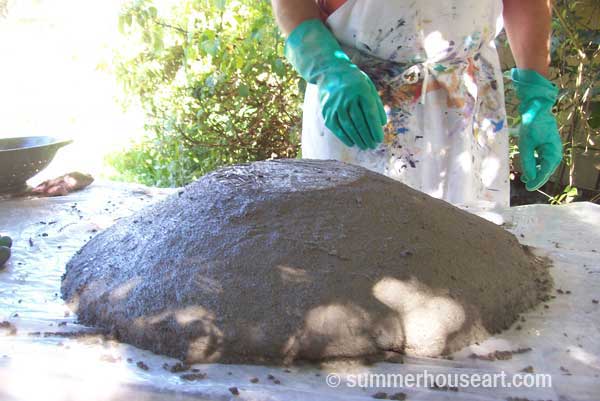
Once the pedestal was finished we had to think about how to make a basin. Luckily we’d found a perfect glass light fixture at a garage sale and proceeded to use that as a mold for the basin.

process, Bird Bath Helen and Will Bushell summerhouseart.com

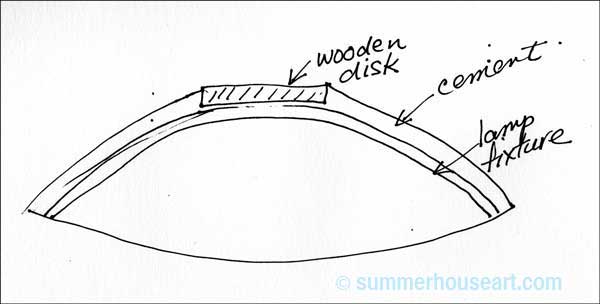
If you look at the pedestal you will notice that we were going to have to devise a way for the basin to fit over the round projection on its top. And of course we came up with a simple, and I thought, clever solution. Bill cut a round of wood that was the same size as the projection and we built the cement around it as in the little diagram.

process, Bird Bath Helen and Will Bushell summerhouseart.comprocess, Bird Bath Helen and Will Bushell summerhouseart.com

It worked really well. We did have to chisel the glass fixture out the cement but it all worked out.

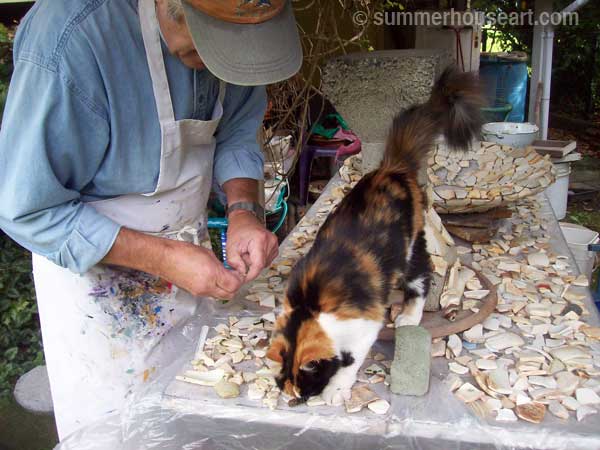
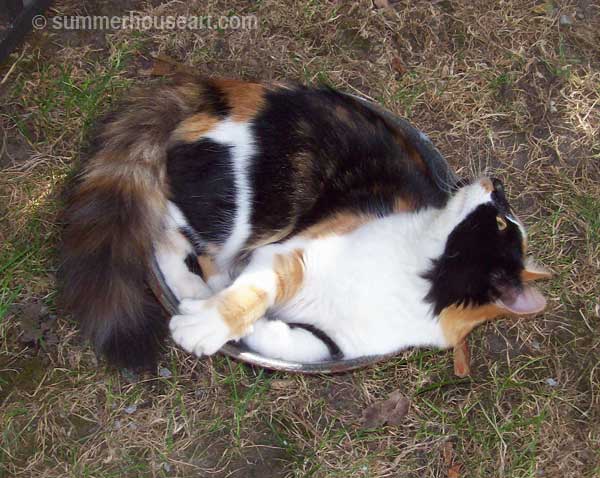
So next we started to cover the bowl with mosaic. First under the bowl and then the inside of the bowl. Around this time, Callie, our neighbour’s kitten decided to take an interest. She loved to jump on our work table and investigate. She especially liked to push pieces off the table onto the ground. And when she got tired she curled up in an old colander that we’d used to clean pottery. She’s a little character and had us laughing with her antics.

in process Beach Pottery Bird Bath Helen and Will Bushell summerhouseart.comCallie-in-collanderwm

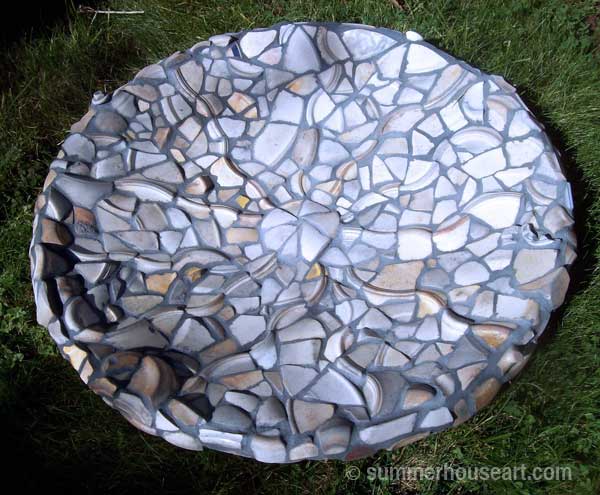
Then finally, we were ready to grout. We did the basin first. We were really pleased with the inside of the bowl and how the undulating lines created with the ridges of the pottery created a great pattern.

process, Bird Bath Helen and Will Bushell summerhouseart.com

One of the things you have to get used to with mosaic is how different it will look with grout. Sometimes I find it a bit disappointing, and have to get used to the look. Here you can see the how the grouted bowl looks against the still ungrouted pedestal. In the end though, I liked the grouted look and actually love how the use of the dark grey-blue grout set off the pieces.

process, Bird Bath Helen and Will Bushell summerhouseart.com

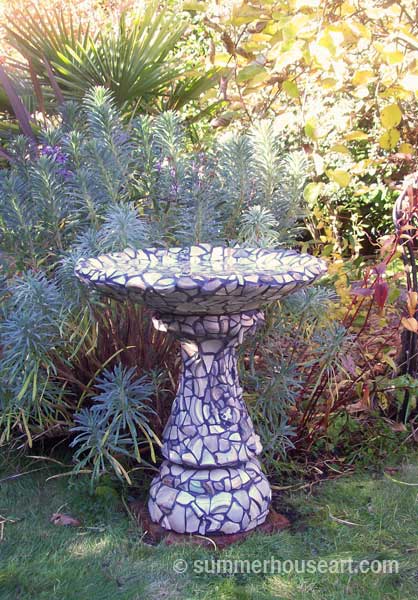
And then, the final photo, the finished bird bath. We love it and this time it only took the birds one day to use it once we put it in place after it had cured.

Beach Pottery Bird Bath Helen and Will Bushell summerhouseart.com
The new Birdbath

Beach Pottery Bird Bath Helen and Will Bushell summerhouseart.com

And just for fun, every day, as we finished up for the day, we’d take a little movie of the progress. Bill spent some fun time learning how to stitch it altogether into a little video. And then thanks to Kevin McLeod’s music, we posted it on youtube. Ok, it’s a little bumpy and handmade looking but that’s ok. It’s just like the Bird Bath. Hope you enjoy…..

Share

Bench Swing Transformation


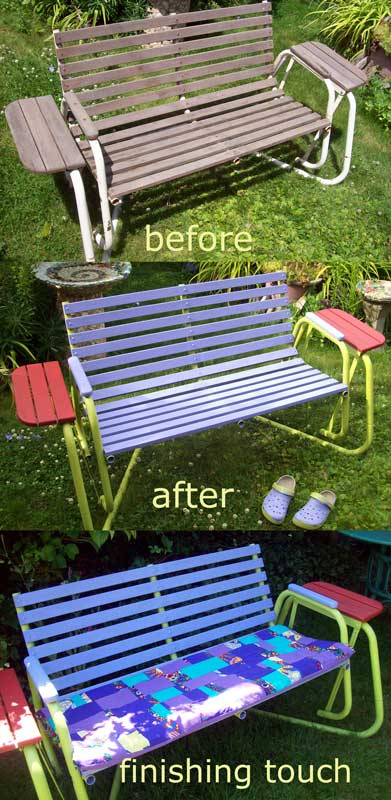
Today, a little story of a colorful “make over”, so to speak, of a tired little bench swing, transformed by taking on the colors of the garden.


beforeafterfin


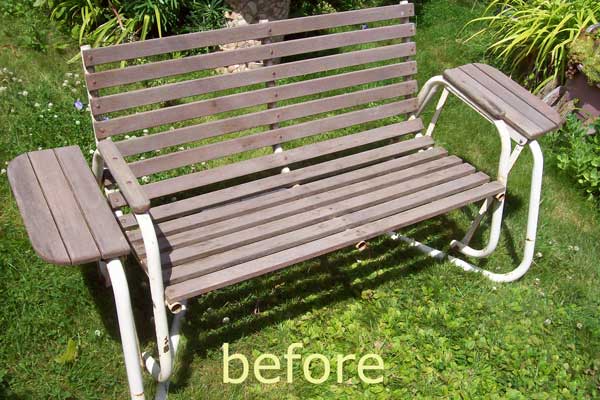
A couple of years ago, Bill and I, on one of our garage sailing Saturdays, found this old bench swing. It was kind of old and worn, kind of rusty, but I could see it, in my mind, totally transformed. And for only $7 to buy and another $7 to have delivered, well, we didn’t have to think twice.

bench-before

But as life goes on, not everything gets done right away. And so the swing was used as it was for a couple of summers, and spent it’s winters under a tarp under the greenhouse. But I didn’t forget my vision.


And finally this summer the time was right for a colorful makeover. We were planning a party and I decided, ok, this was its year to shine. So preparations were made, the tarp laid out to catch paint drips and the paint, which just happened to have been bought for other purposes, turned out to be perfect for my plan.


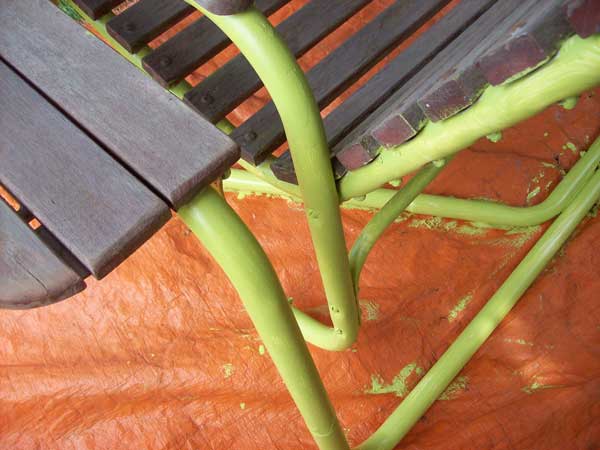
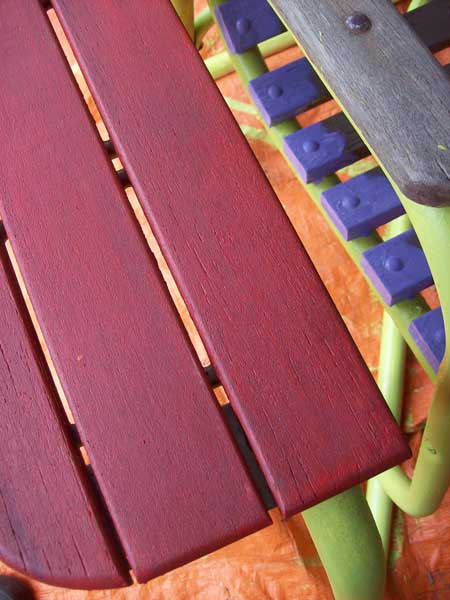
The metal framework was the first to be painted. A lovely pistachio green, painted on by brush. I’m not a big fan of spray paint, since I’ve always found a lot is wasted and it’s hard to control. Besides I kind of like the streaky texture we got and left it there deliberately.

green-frame

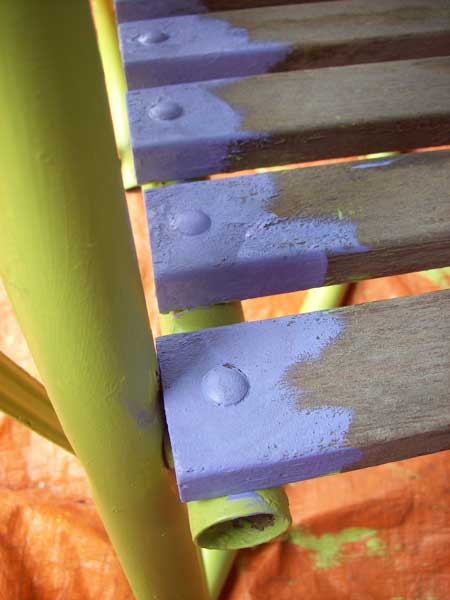
Then we started on the periwinkle blue for the bench.

blue-starting

and then the red for the side tables.

red-side-table

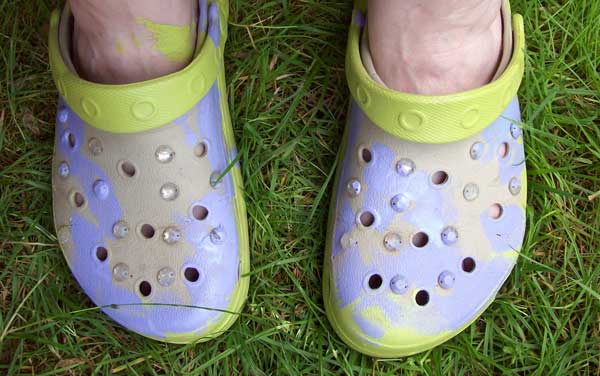
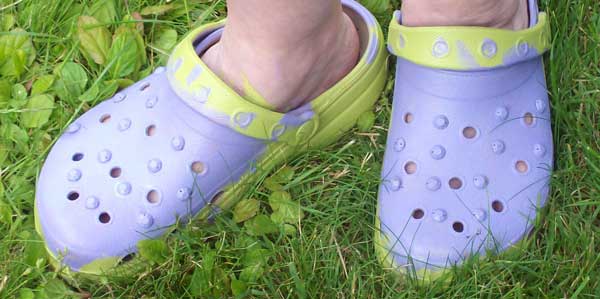
As we went along I couldn’t help doing a bit of color transformation on my old Crocks too.

shoes-a-little-paintedshoes-painted

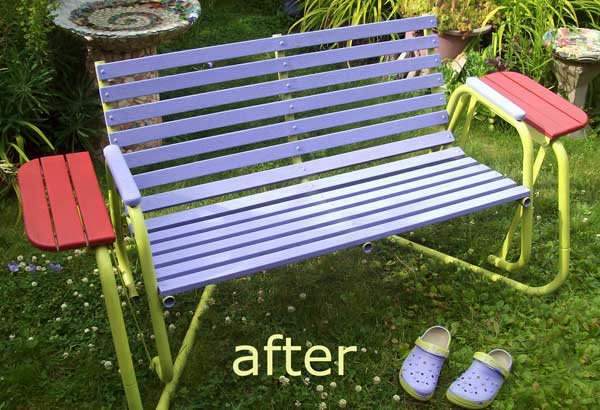
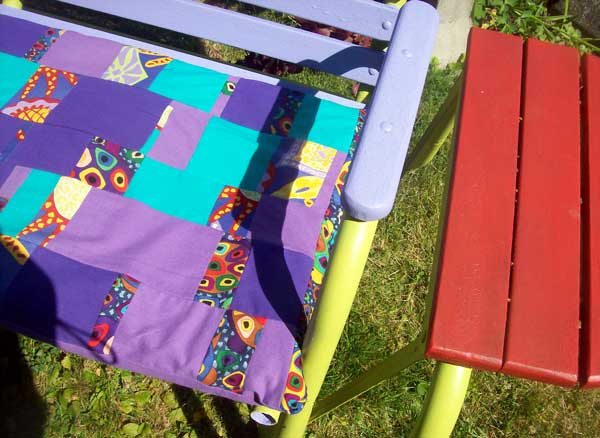
Finally, the bench was painted and looking pretty good. But, as we sat on it, I decided it needed a bit of a cushion too.

bench-after

Which led to going through my stash of fabrics and a couple of days with the ironing board and the sewing machine out in the kitchen. We’d just replaced our foam bed topper and it occurred to me that the old one would make a good stuffing for the cushion. A little more recycling accomplished.

fabric

I had a rather fun time putting together another Intuitive patchwork.

patchwork-cushion

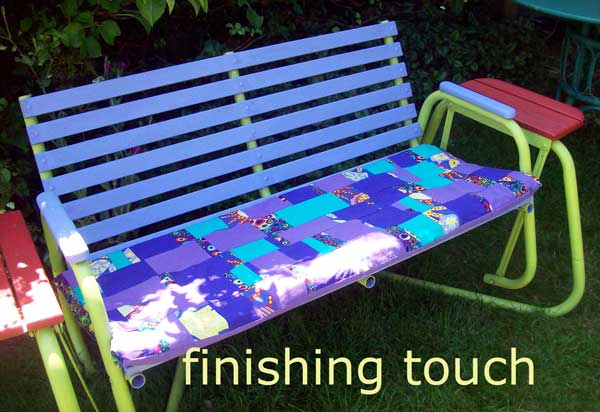
And finally, the finishing touch was complete. We’ve been pretty happy with the final result and have been enjoying a little swing on a summer day.

bench-finishing-touch

Share

Low Tide and a Haul of Pottery Shards


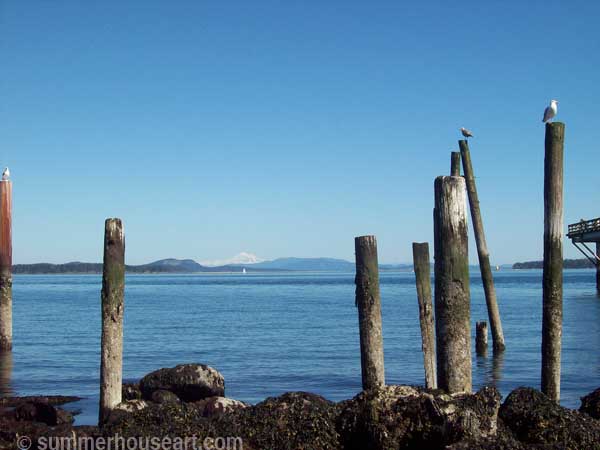
Horizon with Mt Baker, Sidney BC photo summerhouseart.com


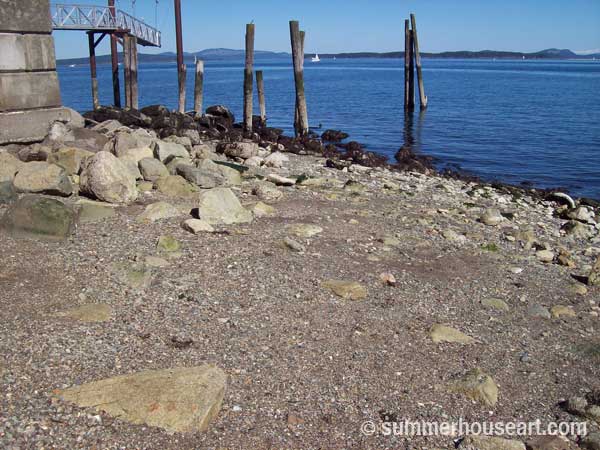
Bill has gotten into the habit lately of taking long walks by the ocean and he noticed that the tide was getting unusually low. Which of course tripped off the idea that if the tide was low in Victoria it would be the same in Sidney. And sure enough, we found that there would be an all time low tide on March 31. Easter Sunday. The lowest at 1:30 pm! And immediately set about a plan of being there to find beach pottery.

I worried, I fumed, I wondered would we be too late? There had been other low tides but at later times, times we couldn’t get there. Had all the pottery been picked clean? On the day I got us up early, Bill protesting that we had until 1:30pm. I said no I have to be there early, as it’s going out, to be there to find what I need. I had mosaic projects in mind, I needed pottery.

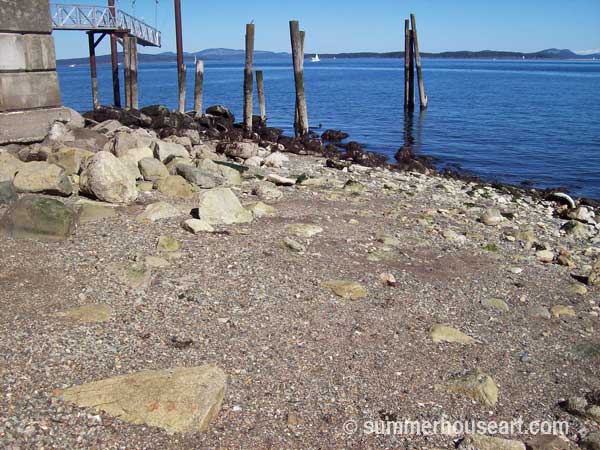
The day arrived, sunny, warm, breezy, it could not have been more perfect. The tide is usually much higher than the next shot. And we were able to get into corners and areas that are usually covered by water.


Low Tide, Sidney BC photo summerhouseart.com

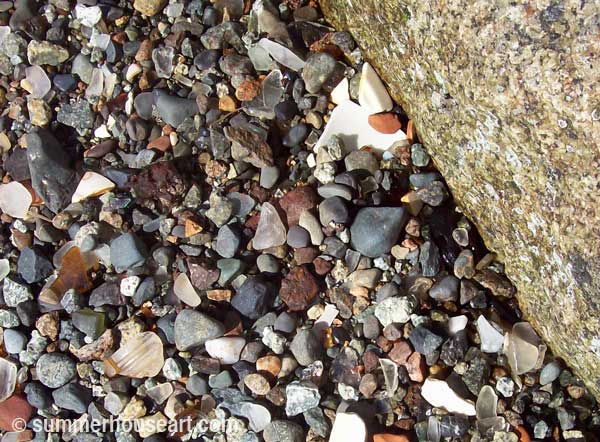
And what did I find? A beach full of pottery.

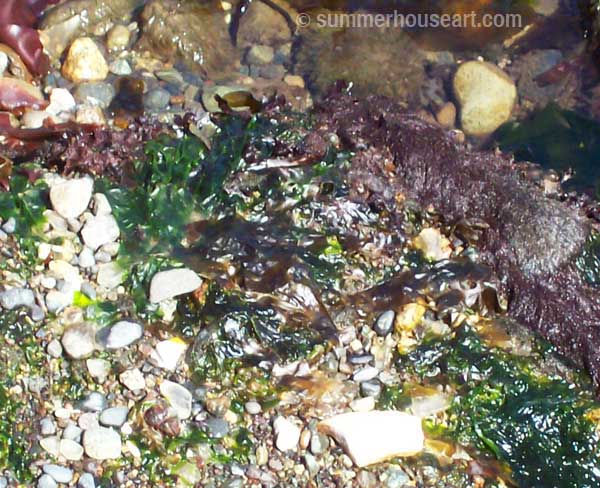
Beautiful pottery, in among the beach pebbles and beach glass, lying in the seaweed, ignored by everyone.

Low Tide, Sidney BC photo summerhouseart.com


Low Tide, Sidney BC photo summerhouseart.com


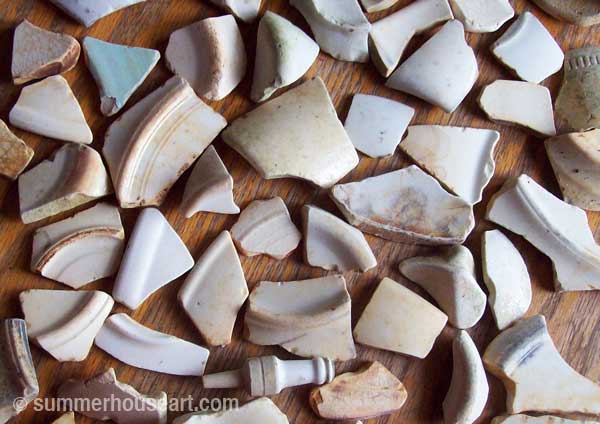
All the others searching that day were only looking for small perfect bits of beach glass in hard to find colors, or tiny,tiny bits of pottery that had a pattern on them also hard to find. But us, we love what everyone else seems to overlook. The warm whites and creams of larger pieces, the curve of the underside of the plate or saucer, the speckled surface, the bit of a cup handle, or even the remnants of a spark plug.


Beach Pottery Shards from Sidney BC, summerhouseart.com


The day was perfect, blue sky, the tide slowly going out. We took our time, enjoying every second.

Taking our best recycled basmatti rice bags to the beach we set about collecting. We took breaks from our bent over searching and sat, totally relaxed, faces to the sun, taking in the sounds of seagulls, breathing in the smells of ocean and seaweed.  We gazed at Mt. Baker, its snowy peak framed by poles set in the ocean, perches for squawking seagulls. Then back to collecting. And oh,what a lovely haul.


Beach Pottery Shards from Sidney BC, summerhouseart.com

Soon to be maybe another birdbath or column in garden. Or another mosaic frame.

Beach Glass and Beach Pottery Bird Bath by Helen and Will Bushell, summerhouseart.com


Beach Pottery Mosaic Mirror by Helen Bushell, summerhouseart.com

But the loveliest thing is the feel of beach pottery, it’s warmth, its smoothness. If you use the pieces as we do, only fitting and arranging without ever cutting them, you can run your fingertips over the smooth surface of a finished mosaic and feel the gentle curves that have been tumbled for a hundred years in the ocean.


Share

A Serendipitous Mosaic Bird Bath

Or how we made a bird bath from this, an old chimney pot,
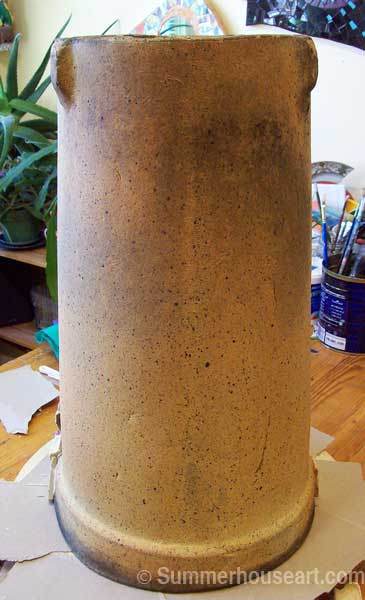
process, Beach Pottery birdbath by Helen and Will Bushell summerhouseart.com

and this, a big heavy glass ceiling fixture which we used as the mold for a cement basin
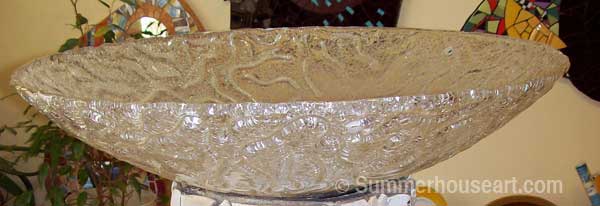
process, Beach Pottery birdbath by Helen and Will Bushell summerhouseart.com

And how all of that became this: our Beach Pottery and Beach Glass Mosiac Bird Bath
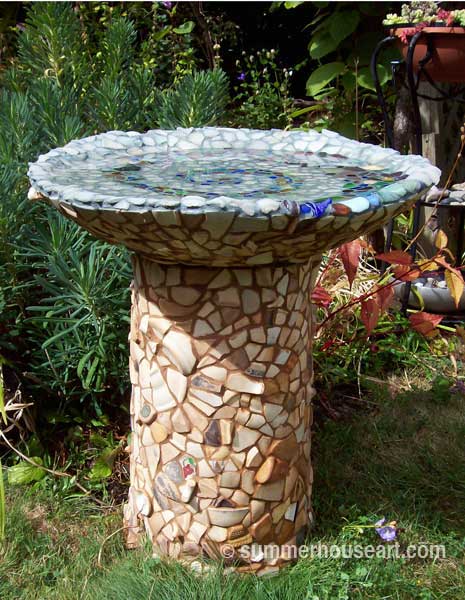
 Beach Pottery birdbath by Helen and Will Bushell summerhouseart.com

So this is the story of our Serendipitous Bird Bath, which took us over a year, what with health problems, other work and whatever, to finish.

The serendipity all started with a lucky garage sale find of the Chimney pot, above.

We immediately saw it not as a chimney pot but as a base for a bird bath. Didn’t have a top in mind yet, but we had the base. And I already knew that the base would be covered in a mosaic of beautiful smooth beach pottery with lovely beach glass inside the basin. Because as everyone knows, beach glass only looks good when it’s wet!

Of course this meant we had to go and get some beach pottery and glass but that was fun and easy. A drive up the peninsula to Sidney and the beach at the end of Beacon Ave there. A few happy hours beachcombing for shards of ocean tumbled glass and pottery. And as we do this enough, we did have a rather good stash of the stuff.

So we dove right in and covered the base in lovely, smooth beach pottery.process, Beach Pottery birdbath by Helen and Will Bushell summerhouseart.com
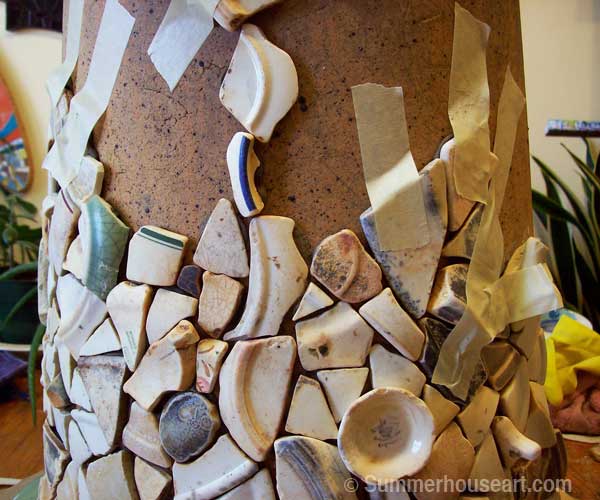
Here’s a close up of some of the pieces as they were being applied. The masking tape is hold some of the heavier pieces in place until the mortar sets. Since this will be outside in all weathers, the pieces are affixed with a stiff mortar mix. The method by the way has already been covered in a past and popular post on how to make stepping stones Helen’s way.

Of course we still were not sure about the basin and were thinking up ideas for something to cast, when serendipity happened again. On another garage sailing trip, we found this rather large and heavy piece of glass meant to be a huge ceiling light fixture. We got it for about $5.
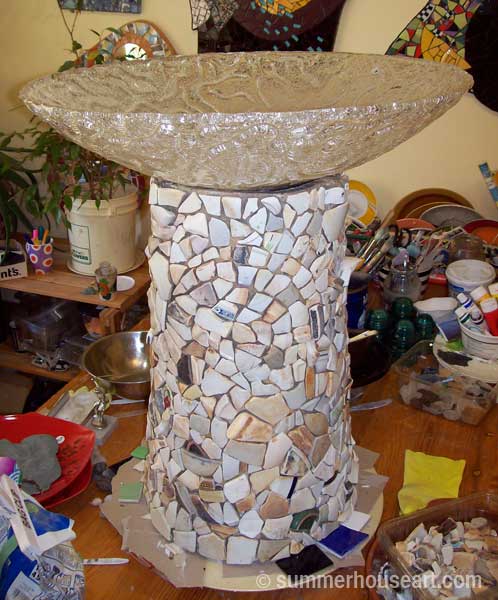
process, Beach Pottery birdbath by Helen and Will Bushell summerhouseart.com

Now you may think we used the glass fixture as a top but  it wouldn’t have been strong enough or able to survive cold winters without cracking and breaking. No, we used it as the mold for a cast in cement for the birdbath basin.

Here is the glass fixtures covered in a garbage bag, ready to be the form for our cement bird bath basin.
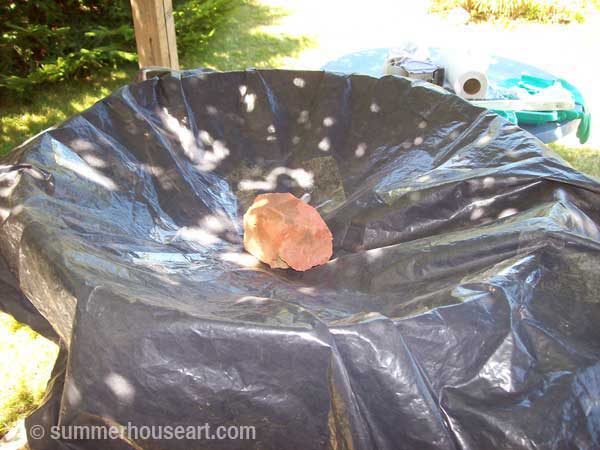
process, Beach Pottery birdbath by Helen and Will Bushell summerhouseart.com

We mixed up the cement and added fiberglass fibres to give it strength.
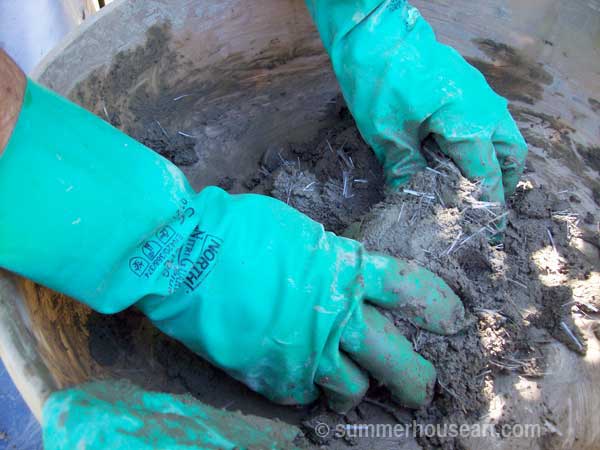
process, Beach Pottery birdbath by Helen and Will Bushell summerhouseart.com

process, Beach Pottery birdbath by Helen and Will Bushell summerhouseart.com

Here it is after the glass fixture and garbage bag are removed. I’m still trying to decide what to do with the glass ceiling fixture, maybe it may find itself covered in stained glass one day…..who knows. Ideas are percolating.
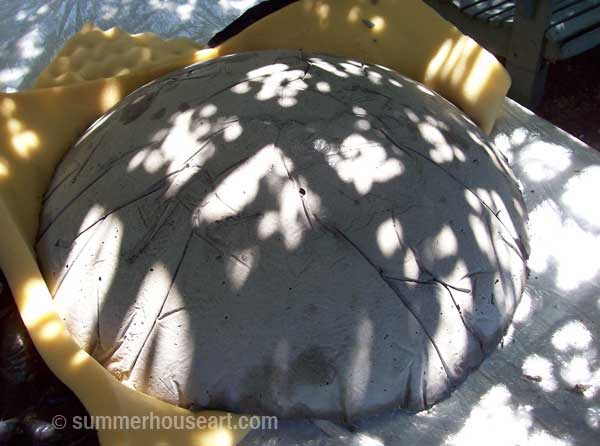
process, Beach Pottery birdbath by Helen and Will Bushell summerhouseart.com

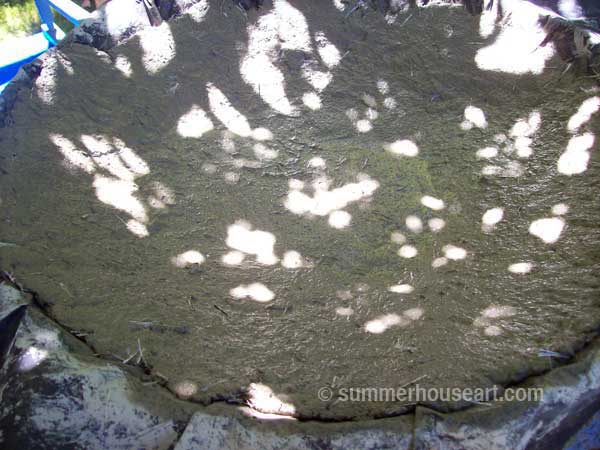
The underside was also covered in beach pottery, except for a circular area in the middle that was left without mosaic. That was left to create a place for the top to fit over the column.   Which left the inside of the basin to do. That actually sat on our kitchen table for ages while we tried to find time and energy to start on it. Not to mention decide on the design. Luckily we’re pretty used to using our kitchen table for everything else but supper and are quite happy eating supper on the couch in front of a movie borrowed from the library. The whole house is pretty well studio space, everything has to have flexibility. Anyway, by November, Christmas was looming  with the attendant big dinner so the push was on to finish the basin.
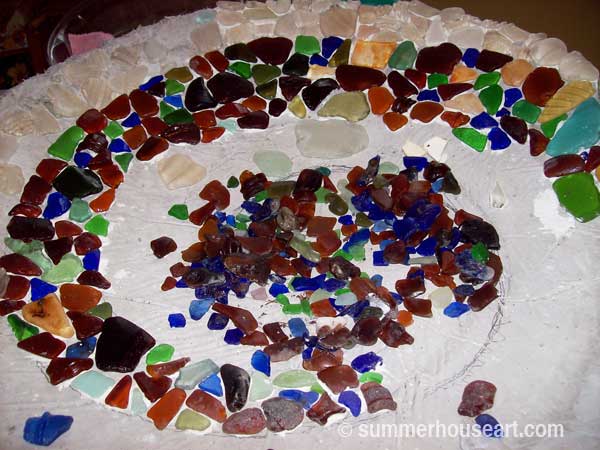
process, Beach Pottery and Beach Glass birdbath by Helen and Will Bushell summerhouseart.com

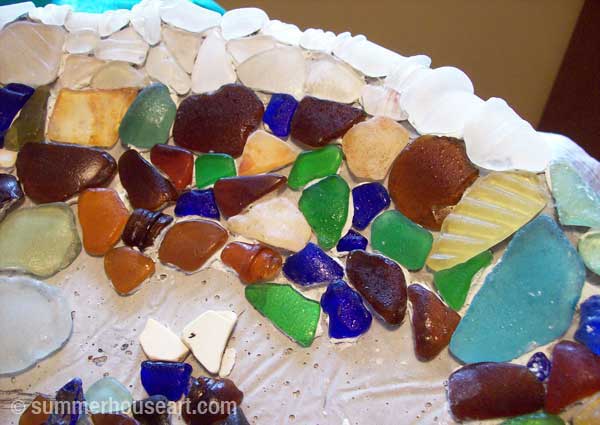
A spiral pattern emerged.  And a couple of close up shots of how I arranged the edges with curved bits of beach glass.
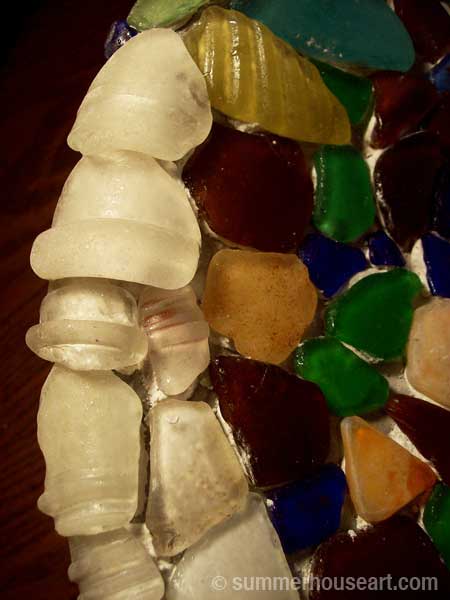
detail, Beach Pottery and Beach Glass birdbath by Helen and Will Bushell summerhouseart.com

process, Beach Pottery and Beach Glass birdbath by Helen and Will Bushell summerhouseart.com

We used a white mortar to fix the glass to the cement. I’ve often had students ask me if they can use beach glass in a mosaic. I always discourage it. Here’s why. On the left beach glass as it is. On the right, beach glass sprayed with water. As I said earlier it really only looks good wet. Plus the other problem is that it is very pitted and the grout sits in it. You have to be prepared for that look.
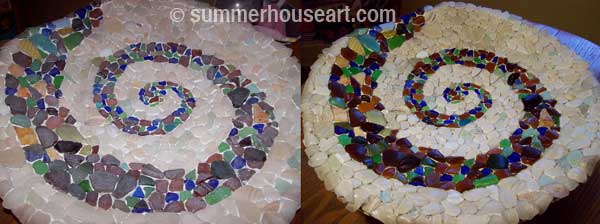
process, Beach Pottery and Beach Glass birdbath by Helen and Will Bushell summerhouseart.com

And finally, more than a year from the time we started it, we finally got around to grouting both pieces.

Of course I set up the table with a tray of tea and cups ready for our breaks. I knew it was going to be a long day with a real need to take a few breaks to rest our backs and hands as we grouted and then had to clean grout off each bit of pottery shard and beach glass. If you look closely, you’ll see that we left a space on the underside with out mosaic where the basin fit over the base.
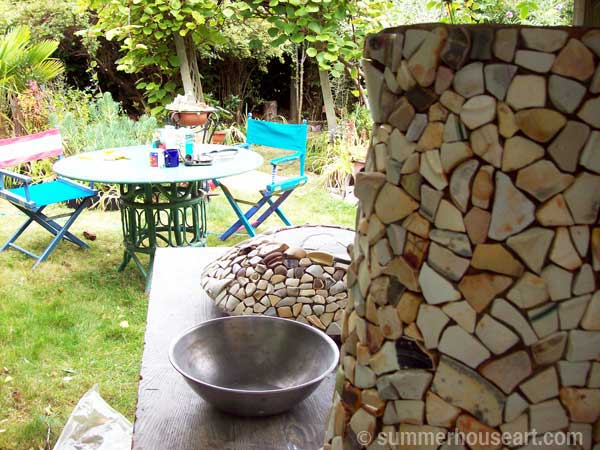
process, Beach Pottery and Beach Glass birdbath by Helen and Will Bushell summerhouseart.com

All worth we think. Here it is finally set up, from above.
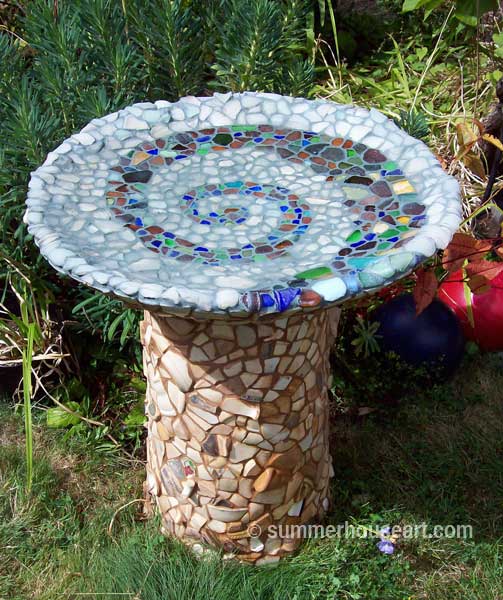
 Beach Pottery and Beach Glass birdbath by Helen and Will Bushell summerhouseart.com

From the side

 Beach Pottery and Beach Glass birdbath by Helen and Will Bushell summerhouseart.com

and here is the basin from above filled with water, just what the beach glass needed to shine. Still waiting for the birds to appreciate all our work. But enjoying it all the same.  Update October 22:  A Robin was seen having a good old splish splash bath just a few weeks ago and now all the garden birds are enjoying it too.  We’re both happy that it’s been accepted and enjoyed.
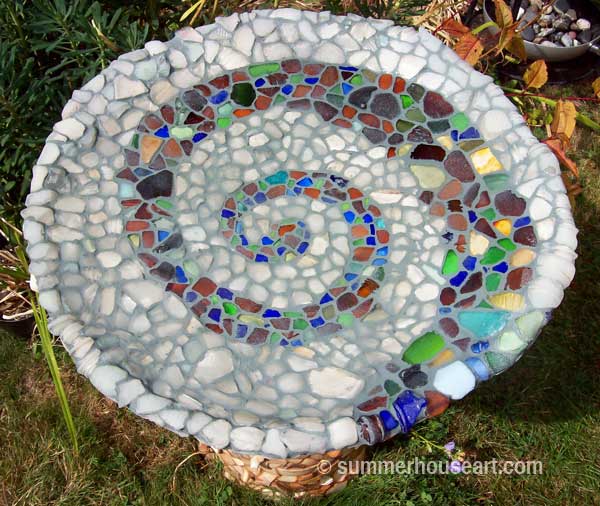
 Beach Pottery and Beach Glass birdbath by Helen and Will Bushell summerhouseart.com

(BTW, if you’d like to make a comment, just click on the title.  It’ll take you to comments….and we do appreciate comments )

Save
Share

Garage Sale Loot, A Russian Tall Ship and a Real Find – Paxton Chadwick’s Illustrations

dog-garage-sale-sign

Last Saturday, unlike my last entry, was the most perfect summer day ever, sunny, warm and just generally full of promise. A good day for garage sailing.

I always have this little superstition that you must find something at the first sale or it won’t be a good day. OK I made up that superstition myself but it often proves true. Garage sailing, as I’m fond of saying is a lot like fishing, sometimes you catch something, and sometimes no luck at all. If we don’t find much I just pocket that weeks garage sale allotment and save it for the next week. The first stop yielded three big pots of plants for the garden at $1 a pot! Now that’s a good start. And we were off to find even more good loot.
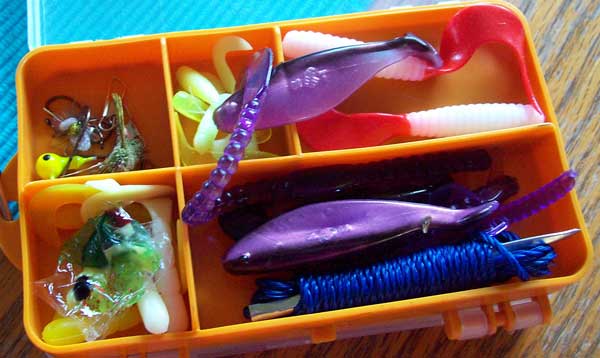
And speaking of fishing we found these colorful lures, which will make a nice present for Eric and Scarlette, the avid fishers of the family. Personally, I just like the colors.

lures

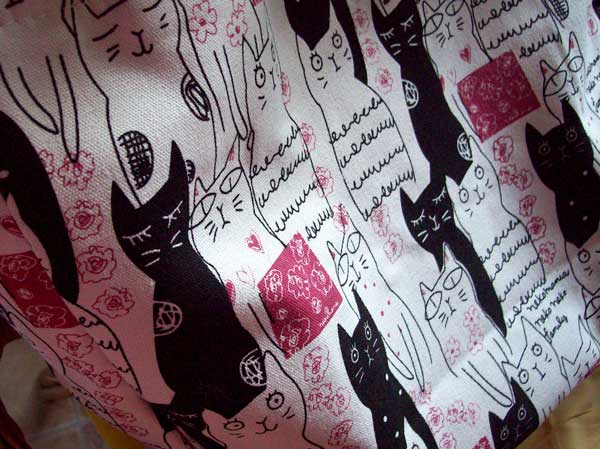
How do you like the Garage Sale sign at the top of today’s post? Oddly enough this sign was for a garage sale to raise funds for a group that rescues street cats. Anything to do with cats is something I’ll support and I found a lovely Cat bag and a book of Cats in Art cards. That’ll make a lovely gift for some cat lover don’t you think?

cat-bag

We found a garage sale given by a fellow who claimed that he “used to go garage sale-ing”. How is it possible to be a former garage sailor? I can’t imagine stopping. It’s hard enough to wait for spring and the season for it.

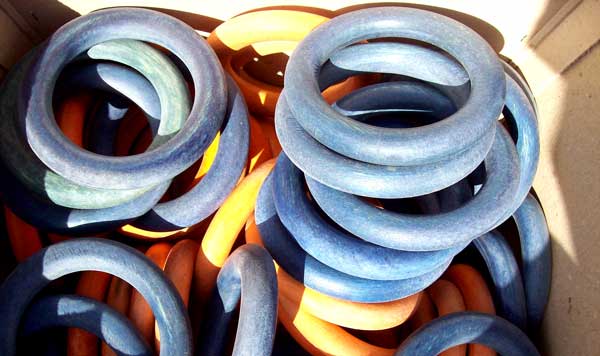
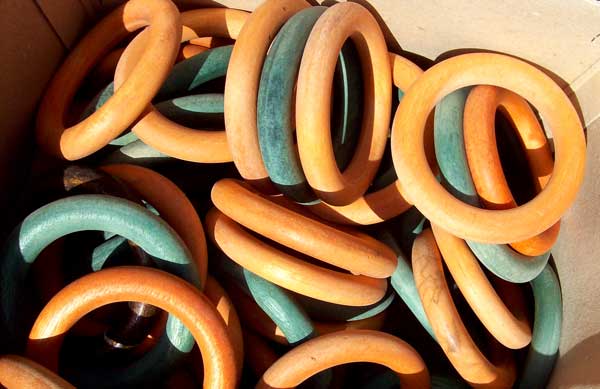
Like a true bargain hunter he had picked up these wooden rings from a friend who was closing up a shop. No idea what they were for… we all guessed for macramé. But they were so lovely that I had to take a couple of photos.

blue-yellow-rings

yellow-grn-rings

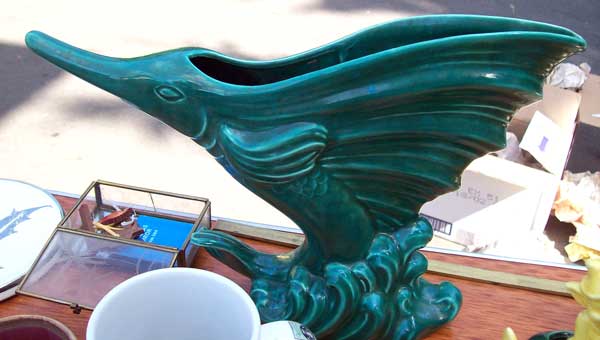
And also a pic of this ornament, which I suppose is supposed to be a Sword Fish. But just a pic, didn’t buy it. I’ve been trying to leave something for others, you know.
dolphin

Then as we drove on to James Bay by way of the Harbour we spied sitting moored a HUGE three masted tall ship. So of course, we had to go and check it out. Turns out it was a Russian Training ship in port just for a few days. They were giving free tours to anyone who wanted to check it out. It was called the Pallada. I’ve left the cars in the photo just so you can get an idea of the size of this ship.

Pallado Russian Tall ship

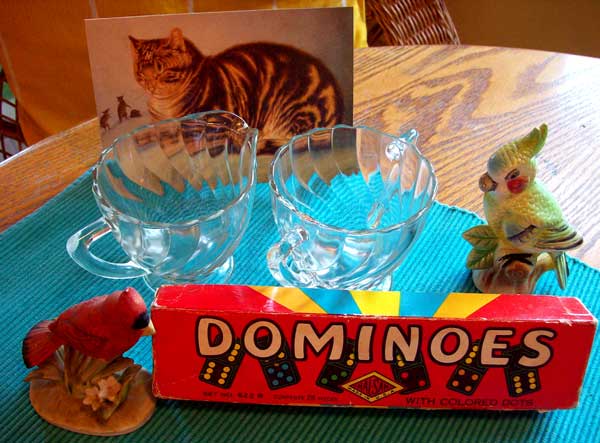
In James Bay we found a few more treasures. This little arrangement of garage sale loot shows the vintage colored dominoes I found. We played Dominoes later that night and I must admit Bill won 4 times in a row. A rematch is imminent. Plus I found a glass cream and sugar set, which reminded me of my childhood for some reason. The birds were from the same sale as the dolphin pictured earlier and may feature someday in a mosaic. The cat card is from the book of Cats in Art cards found earlier. This is my fave card in the bunch.

cat-card-dominoes

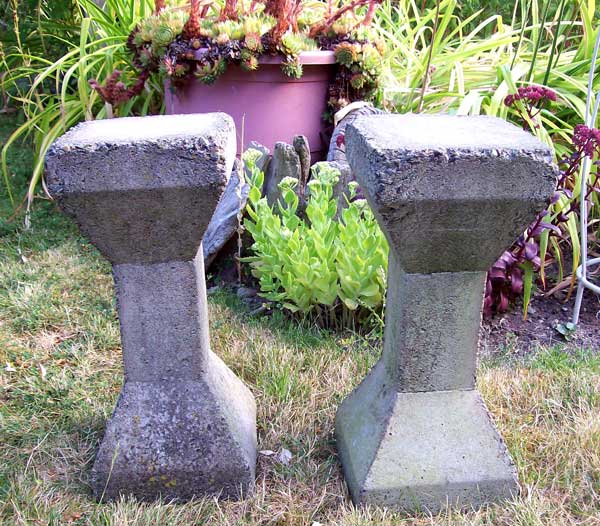
Also found these cement pillars which will end up mosaic-ed soon, I hope and become rather nice plant pot stands.
cement-pilars

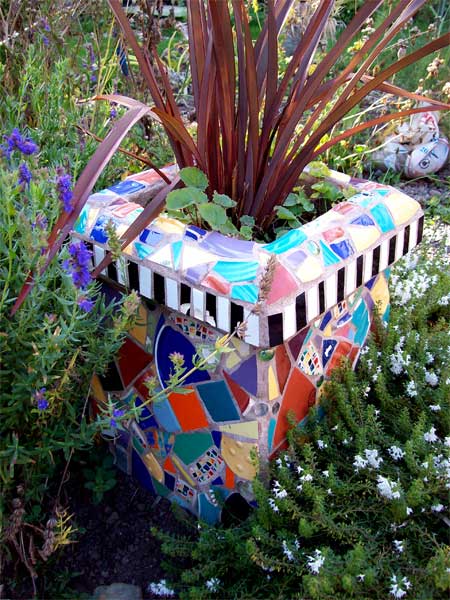
To get an idea, here’s what happened to a chimney we did years ago.
mosaic-chimney
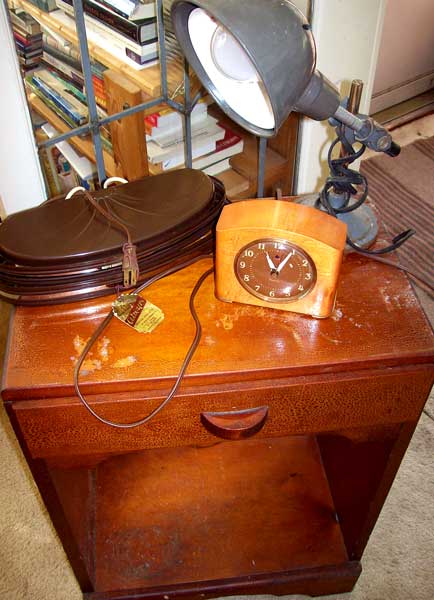
And yet another little arrangement of treasures. The bedside table will I think get redone and painted, but I’ll leave the drawer which has the greatest texture. We had to snap up these vintage lamps and clock too. Bill is planning to rewire the clock. He loves these old clocks and this one has a most lovely shape.

tablelamps-clock

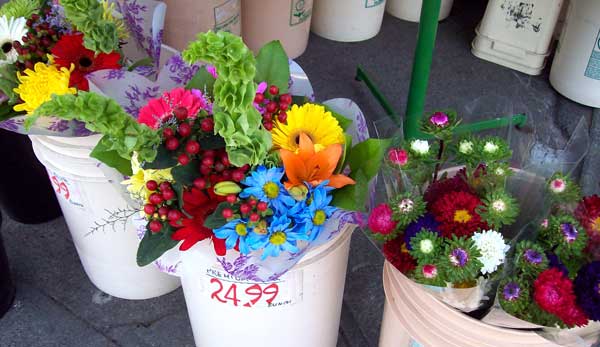
In Fairfield, I had to snap these colorful buckets of flowers. This store has always been here, a spot I always slowed down to enjoy when walking home years ago when we lived in this area .

flower-stand

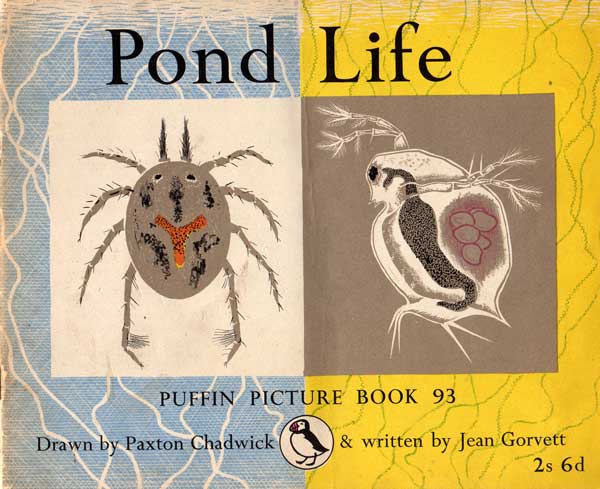
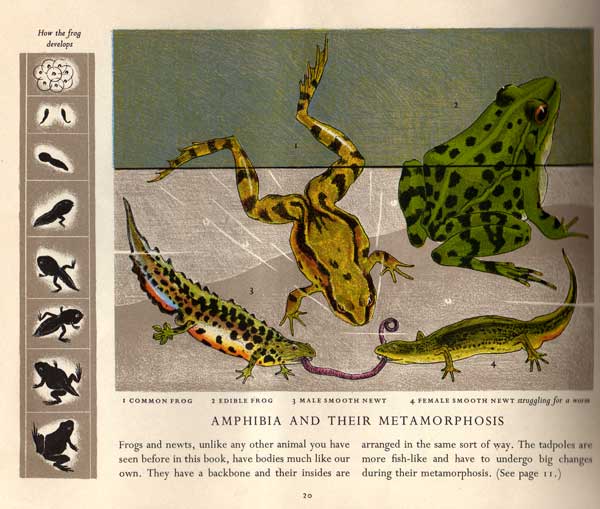
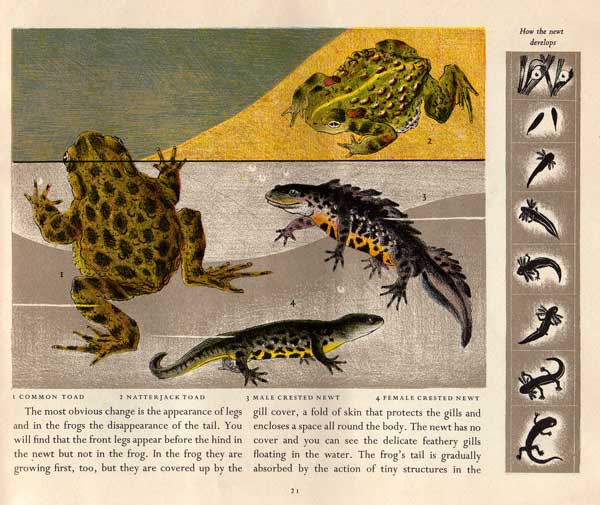
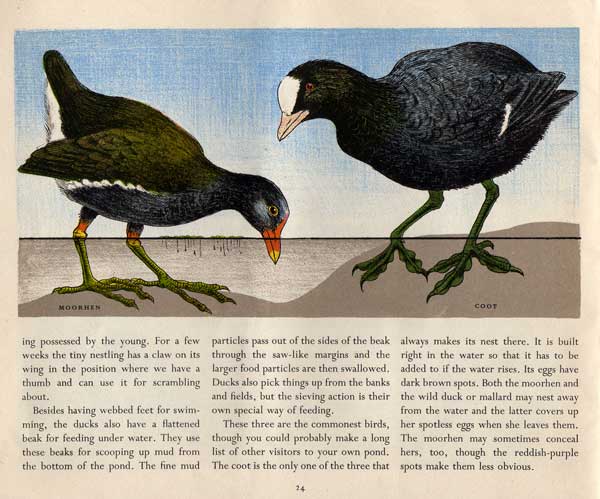
But now, for the best, which I have saved for last. For those of you who already know of Paxton Chadwick, this won’t be a surprise. You may enjoy reading a bit more about him, since not only was he a very talented illustrator but oddly enough a Communist in England. What I found out about him could only be found on Communist or Labour blogs.  I’d never heard of him before, but when I found this little beat up book illustrated by him I was enchanted. They have the look of printmaking to them, almost wood block. The detail is fantastic and the colors, well, just enjoy. Now I’ll have to find other books done by him for Penguin Books in England so many years ago. This book was published in 1952. So I leave you enjoy just a few of these fabulous illustrations. I did find a few more illustrations here on Google images. And all this enjoyment for only 50 cents!

pond-life-scan

frog-left-page

frog-right-page1

dragonflies-yellow

divng-beetles-on-purple

moorhen-and-cody

water-vole

Share

A Few Hearts, A Few Flowers and Suddenly – Happy Valentines Day!


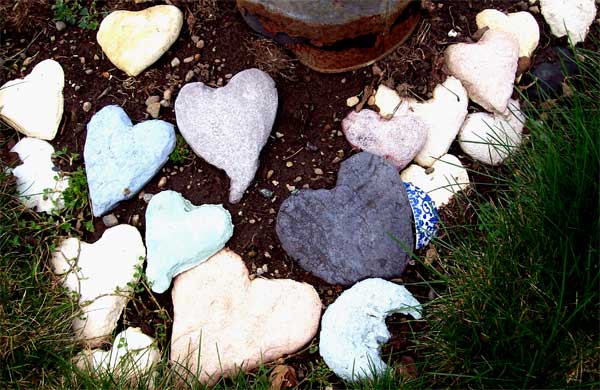
garden-hearts

Anytime that I’ve grouted a mosiac and had a bit of grout left over, I’d just shape it up into a heart and let it set. Somehow I’ve gotten quite a little collection of cement hearts to put in the garden. In summer they’re often lost in the strawberries and the flowers.

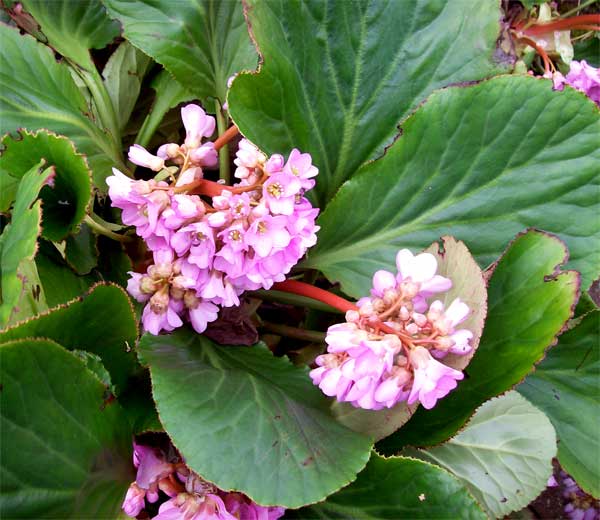
Then of course, being Valentines day, we need a few flowers too. These lovely Bergenias blooming this week in our front garden fill the bill.

bergenia

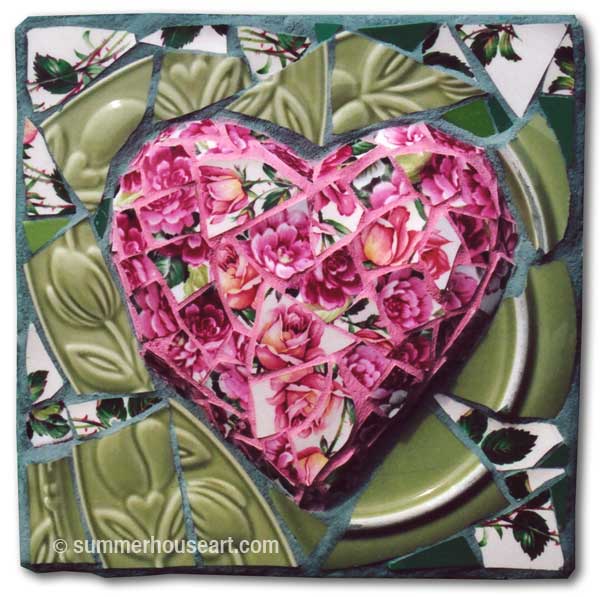
Quite a while ago, I took one of those little cement hearts and pasted it down to a little board. Then I had some fun creating a Rosie Valentine with a few broken dishes.

mosaicheartwm


if you’d like even more hearts and valentines today, have a look at an old post of mine about my collection of heart boxes, “A clutter of hearts”, that I posted last July.

Happy Valentines Day!

Share