Making the Switch from Fabric Collage to Small Paper Collage

Here we are, Will and I, basically still at home, staying safe. Making little forays out now and then for curb pick up or quick shops, masked up, sanitizer hand cleaner at the ready. Summer has zoomed by, today the calendar says it’s the start of Fall. But, the time has not been wasted and has been, for the most part, put to good and I may say, even enjoyable, use. The upside of being an artist I suppose. We’re rarely bored, even stuck at home.

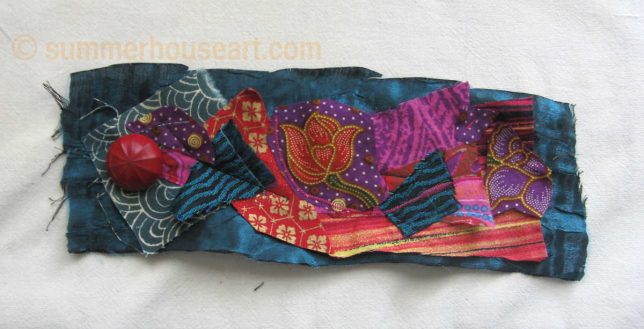
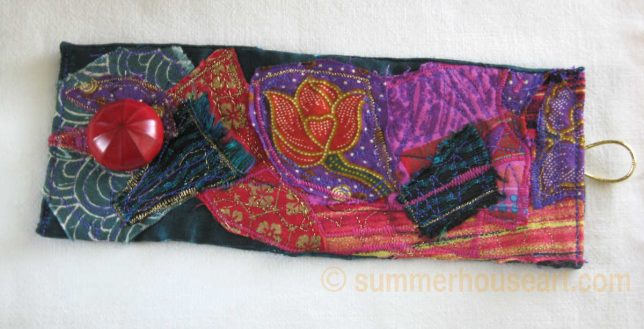
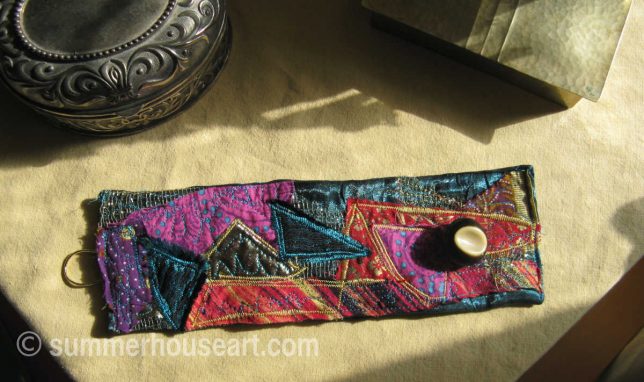
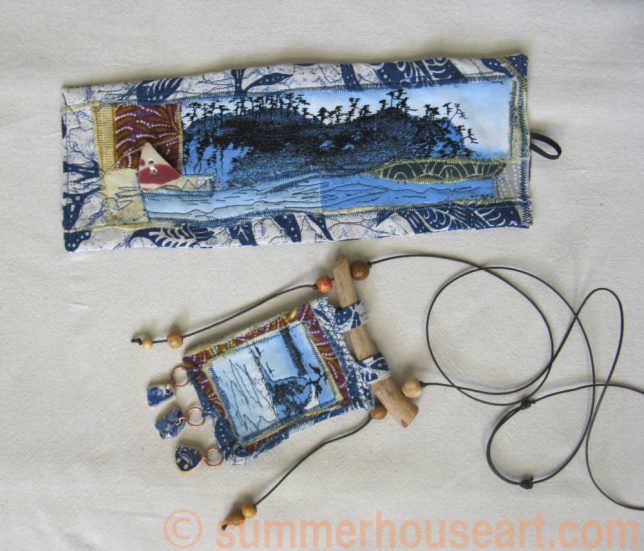
I’m taking a short break from the frustrations of dealing my new sewing machine, all that thread changing, stitch setting, constantly reading my instruction manual. Lol. Yes, sewing is not second nature to me. Even though I love playing with the fabric, pushing scraps into pleasing collages. And even though I love zooming around, the feed dogs down, drawing and scribbling with threads and stitches, I said to myself, enough! Time for a change…..

Fabric collage creation in my studio, Helen Bushell, summerhouseart.com

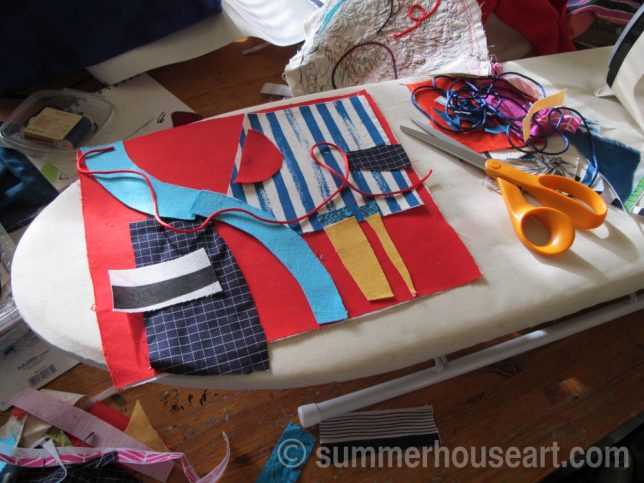
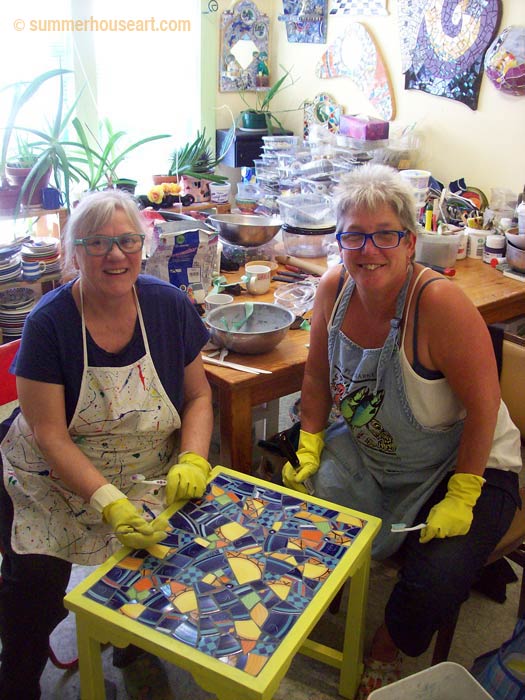
So, I decided to transform my little studio from a sewing studio into a paper collage studio instead. Luckily, I’m quite organized, but then, I have to be. My studio measures about 10 ft by 12 feet (3 x 3.5 m). It’s full to the brim with shelves stacked with dishes for mosaic, a large easel for painting, shelves holding fabric scraps, paints, brushes, glue, tools. All this not to mention, 3 or 4 sewing machines, one new but most rather vintage bargains found at garage sales and thrift stores brought back to life by Will’s talent with oiling and cleaning, So after the work table is cleared, the fabric packed into recycled plastic storage bins, the little ironing board folded and put away, it’s just a matter of bringing up the boxes from under the work table full of folders of paper scraps and voila!, I have the paper collage studio!

Creating paper collage in my studio, Helen Bushell, summerhouseart.com

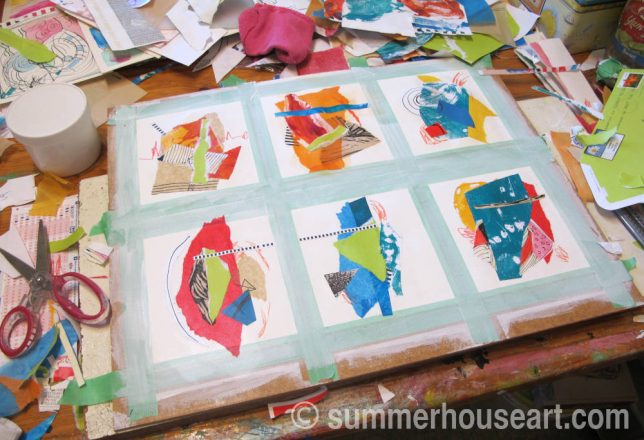
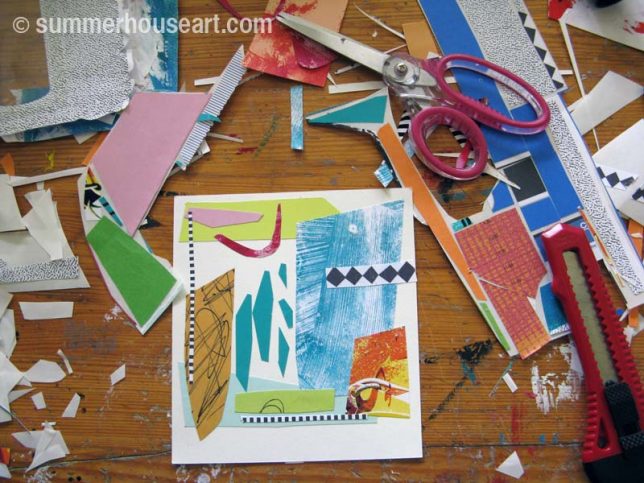
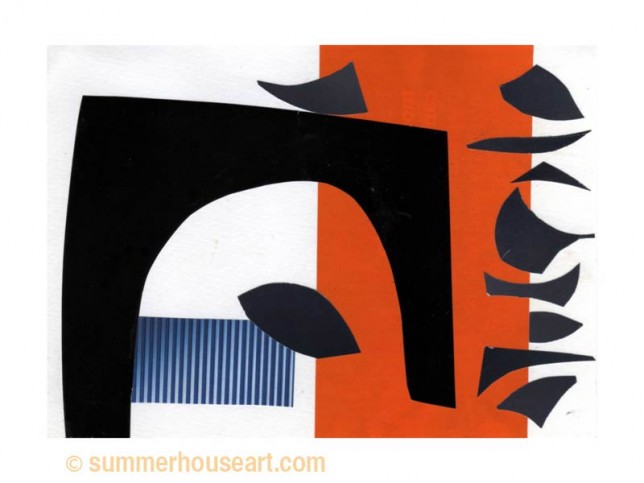
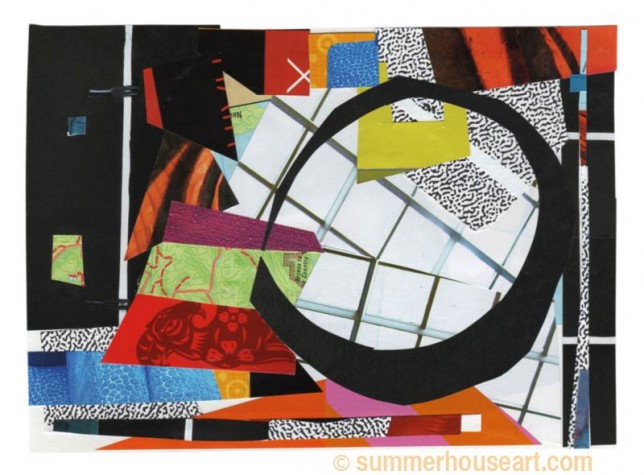
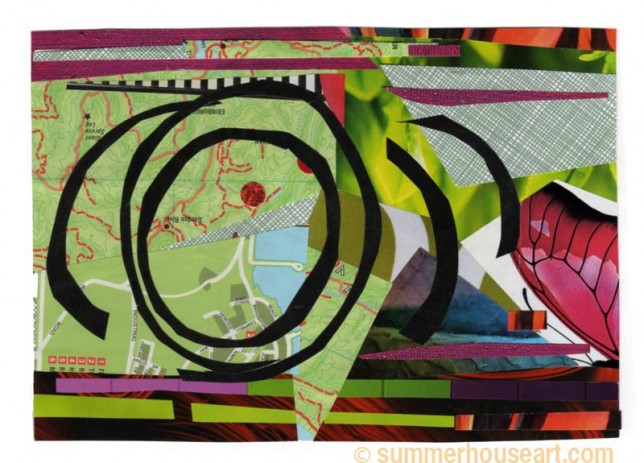
Most of my paper collage is made with paper design and textures of my own making. I’m not one for using much from old mags. Lots of mark making is saved. I do like to create abstract collage and for that I need lots of colour and texture. So, every time I paint, before I clean off my plate of leftover wet paint, I use paper from old envelopes, junk mail, whatever and rub the the paper on the leftover paint. It makes amazing one off prints and you get some interesting textures. These are all saved for later use in paper collage. So, before you know it, the table is now piled high with scraps of paper, pencil crayons and matte medium.

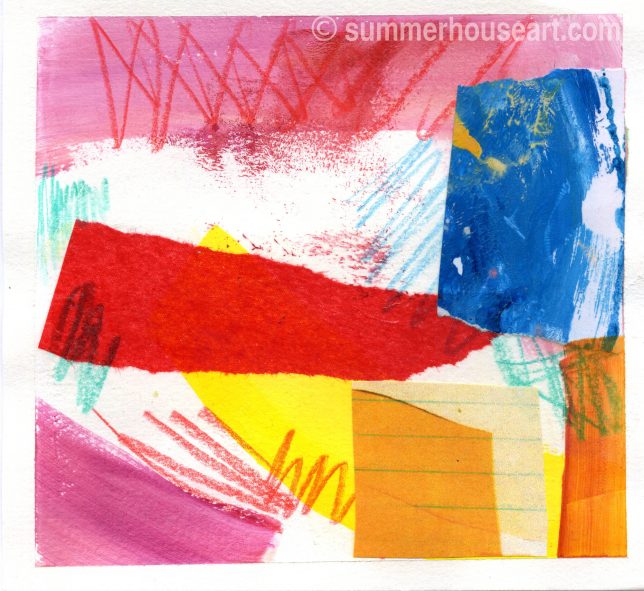
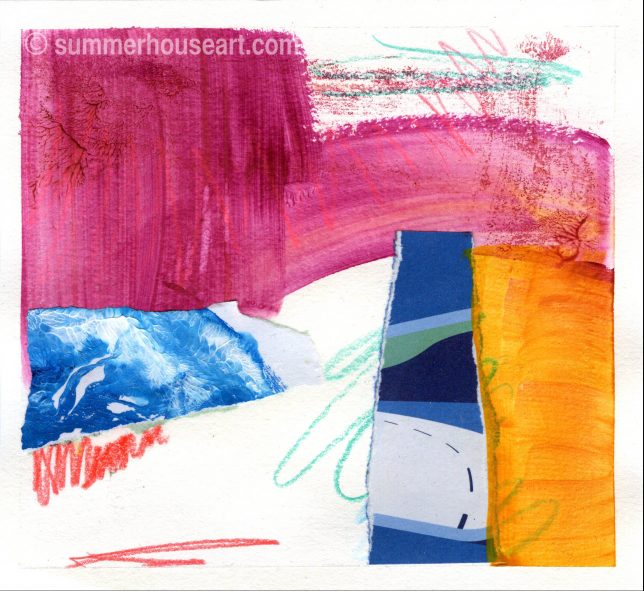
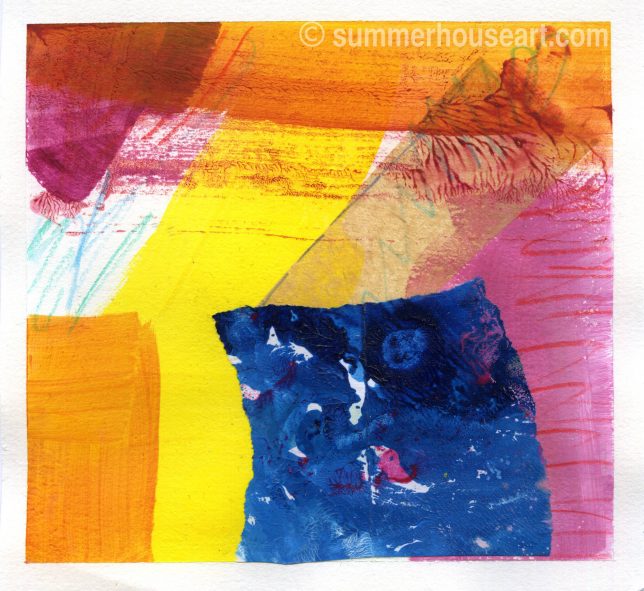
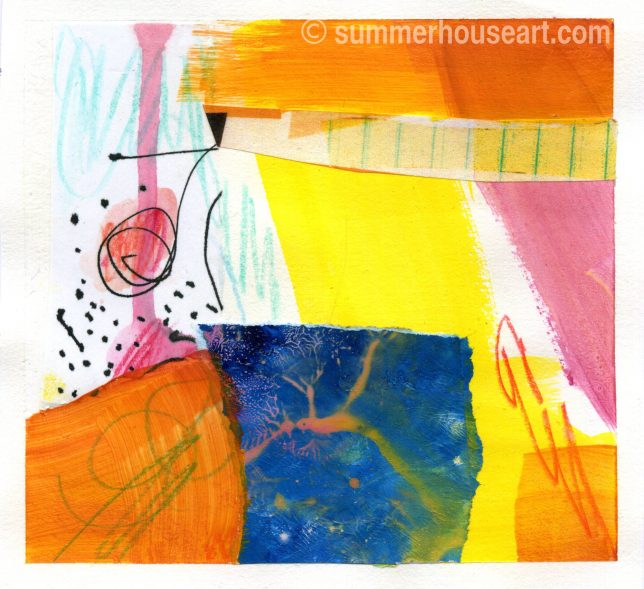
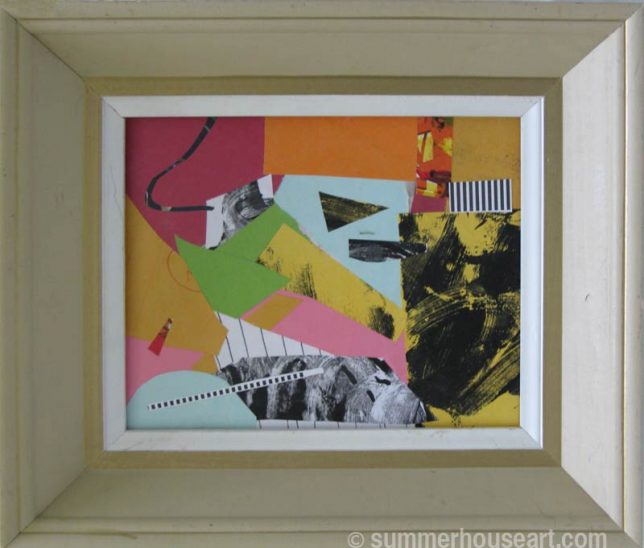
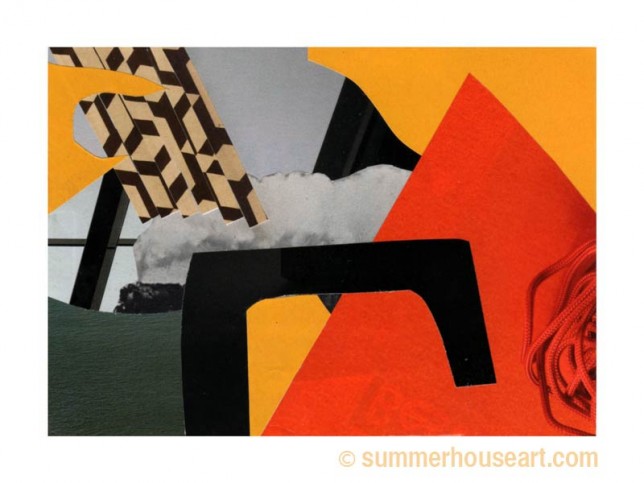
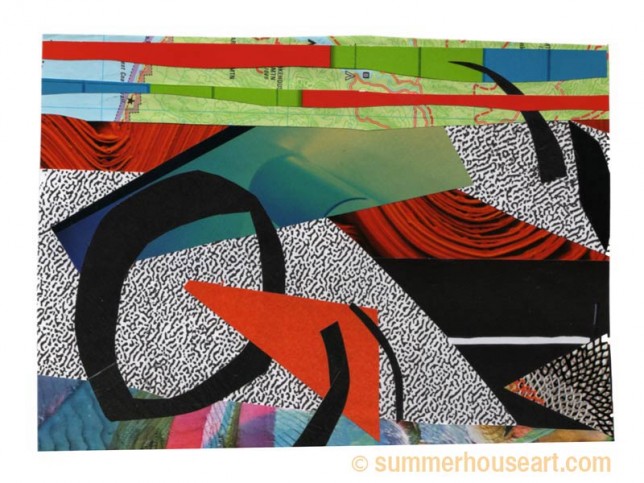
I’ve decided to have a bit of fun, work small (around 5.5 x 6in or 14 x 15 cm), do them up, 6 collages at once on mixed media paper. This approach has had the added benefit of keeping me loose and intuitive as I work, each piece is not getting too precious. So I’ve been taking my time, playing with each arrangement, fiddling with details, and enjoying the process. But they’re starting to pile up a bit and I’m planning on putting them up on our FoundMadeArt shop. Some will also be scanned for use on products on our Print on Demand shops too and may become prints, pillows, clothing, furniture, all sorts of things. I’ll be posting each group as they become scanned and ready. Hope you enjoy! Here’s batch #1.

Collage on Paper, by Helen Bushell, summerhouseart.com
Share

Meanderings in Creativity

I haven’t posted much on our blog for quite some time. My excuse is that I had to find out how to use the new blog editor on the website, and wouldn’t you know, it really wasn’t that difficult, once I finally , finally stopped procrastinating and dived in. Don’t you just love those youtube tutorials? Not posting doesn’t mean I haven’t been up to something in the meantime. No really.

If you check out my Pinterest boards, you’ll find I’m a great fan of Pinterest. Lots of boards and pins. I love it because I can visually bookmark things I find on the net and very often I also discover things that I may never have found any other way. So, I have been meandering and poking about in new areas of media to use.

I’ve always been quite interested in collage and have posted a bit of my paper collage work in the past. But, I’ve also done a bit of quilting and sewing in the past too and have quite a few bags of fabric stashed in various closets. Most of my fabric is in the form of old shirts I find at Thrift stores, a really thrifty way of collecting fabric for projects, by the way. One of my discoveries on Pinterest was “free motion sewing”. Now that’s a cool “rabbit hole” to wander down. I have discovered that you can actually, on some machines, put the “feed dogs” down and draw with thread. Too cool for an artist….so I treated myself to a sewing machine that has that ability. It’s not too fancy, not got all the bells and whistles that the expensive computerized machines have, but it has just enough to have some fun and hey, why not?

One of my first forays into free motion was creating jewelry with fabric. It started in the form of making a couple of cuffs from some lovely shiny bits and pieces in sort of a Boho style. The first one shown here, is just as I was piecing together the bits and stitching them in place… And the second image below shows it as finished piece.

Floral Fabric Collage Cuff by Helen Bushell, summerhouseart.com

The next was a bit more jazzy and abstract, with bits of gold netting and lovely jewel tones again. I had a bit of fun playing with the zig zag on both as well.

Abstract Fabric Collage Cuff by Helen Bushell, summerhouseart.com

My next attempt was a necklace and cuff on beach theme. Most of the fabric came from a thrifty find of a men’s shirt with a Japanese fishing theme. The button on the cuff and the little dangling jewels on the necklace are actually little bits of beach pottery that we found on the beach in Sidney. A big thanks to Will for drilling holes in these little fiddly bits pottery for me. And did I mention he also created the driftwood hanger and the cording too?

"Beach" Free Motion Fabric collage Cuff and Necklace by Helen Bushell, summerhouseart.com

Still meandering and having fun, I then wandered off into taking my paper collage investigations and applying them to creating collage with fabric instead. That’s coming up next….

Share

Paper Collage Using Double Sided Adhesive

Collage on Studio table, Helen Bushell, Summerhouse Art

A while ago, in another post on collage, I said that artists aren’t hoarders, we’re just collectors with a plan. Not all the paper that comes into our home leaves by way of the paper recycling bag. Paper is, after all, for collage artists, a valuable resource. So I use old envelopes to create paint patterns on and even save envelopes with that lovely security pattern on the inside, as a rather tasty texture to use in collage. Anything out of the printer is saved as well for its textural value.

Continue reading “Paper Collage Using Double Sided Adhesive”
Share

Time for New Paper Collages in Vintage Frames

Paper collage Helen Bushell, summerhouseart.com

I like to say that artists are not hoarders, we are collectors with a plan. So while everyone else is recycling all the paper that makes its way into the home, we tend to pick through it and save some savory bits for future use. For instance, I might like the color of an envelope from a birthday card, or the texture on the inside of an envelope from the bank, or the color in a bit of junk mail that made it past the sign on the mailbox and put them aside. Or sometimes we’ve saved some cool mags found at garage sales. So it all gets tucked away, more or less in an organized manner for later use. As I say, we have a plan….

Continue reading “Time for New Paper Collages in Vintage Frames”
Share

The Lucky Finds of a Dish and a Fish

Mosaic Student Dianne's mosaic dish, summerhouseart.com

This very beautiful mosaic is the work of my Student Dianne. As the title of this post suggests, it’s the result of a couple of lucky finds; a lovely pewter dish and a dish sporting a fish.

In my mosaic classes, I teach a type of mosaic called Pique Assiette, which is making mosaics with broken dishes. On the first class, after I’ve totally overwhelmed someone ( in a good way of course ) with all the mosaic possibilities, given them a very brief taste of how dishes break, and what to look for, we set off to Thrift stores to shop. And that’s when the fun begins. First, it’s all about looking for dishes and colors that spark something for you. Then second, it’s all about luck and finding something that makes it all happen. Dianne was very lucky. On the shopping class she found the very unusual pewter dish. The design on the edge was fantastic and we both agreed that the dish itself would make a great place for a mosaic. Then, during the week, she was lucky again and snapped up a dish with a crackle design surrounding a fish.

The first class was a time of trying out all sorts of ideas. From creating a totally abstract design, without the fish and then finding a way to incorporate the fish at the edge of the plate and working all the other colors and textures around it.

A lot of designing is just about trying things out. Laying out pieces and looking and wondering. You have to follow your instinct. And sometimes, I’ve even taken up pieces I’ve glued down and started over. When Dianne returned the following week, the first thing she said was that she was glad I’d told her about removing pieces and starting over even after gluing them down. Because she’d done a lot of that. I could totally understand her progress since it is much like mine. I’m slow and thoughtful and I just keep rearranging until it “feels” right. So it was great to have a student who gets that idea. And as you can see, all that rearranging and listening to whether it “felt” right had a wonderful result.

The last week, we grouted and again were lucky as I’d just tested a grout called silver and it was perfect to pull together the silver of the dish with the mosaic itself. Here it is ungrouted.

Mosaic Student Dianne's mosaic dish, ungrouted, summerhouseart.com

And here is a pretty happy Dianne with her lovely mosaic…

Mosaic Student Dianne with the finished mosaic dish, summerhouseart.com


I happen to know that Dianne is already planning another mosaic and I can’t wait to see what she does next.

(BTW if you’d like to comment, and we do appreciate comments, please just click on the title to bring up the post with a spot for comments at the bottom.)

Save

Save

Save

Save

Save

Save

Save

Save

Save

Save

Share

Upcycling to Create a New Boho Daybed

Before: the old couch summerhouseart.com

Ah, Before and After. This is the story of an old hide-a-bed couch being replaced with an up-cycled Daybed very thriftily made and done up in Boho style.

After: New Daybed summerhouseart.com

 The old couch, with its unbleached cotton cover hiding stains, old age, many, many years of wear, not to mention large shreddy bits made by long gone cats, just had to go! It just so happened that we had most of the components for a new daybed, stored in the basement, waiting to be transformed. Something much more comfy and better looking than a lumpy, old hide-a-bed. We’d just been waiting for a little time to tackle it.

First, had to get the old couch hauled away by a company that would make sure it all got recycled. We had the rails of an old Ikea single bed, missing the slats. Not sure, but I think they may have been used for some other project. We had a couple of substantial wooden chair or couch arms that one of our sons had found years ago and brought home.

Will, stapling the slats made from pallets, summerhouseart.com

We had saved the two foam seat cushions from the old couch to make new back cushions from. We cut those in half with an old electric carving knife and made four cushions from them.

Old foam seats now backs for new daybed, summerhouseart.com

Will, in the mean time had ingeniously figured out a way to attach the arms of the chair to the rails of the bed. And like so many people these days…. he recycled some pallets into slats for the bed. The only new thing we ended up getting was the actual foam mattress. An Eco foam mattress, so no off-gassing etc.

The aforementioned unbleached cotton cover was sewn into “new” covers for the foam. And the material from a thrift shop duvet cover became new covers for the cushions.

And finally, a chance to get creative with all my fabric stash, collected from garage sales and thrift shops. Chaos while deciding on the fabrics I’d use.

Fabric chaos, deciding on fabrics for new pillows, summerhouseart.com

Lovely new pillows, in the Boho Style.

2 new Pillows for the Boho Daybed, summerhouseart.com

Love how the fabric looks with an iris.

Iris with new pillow fabric, summerhouseart.com

And tah dah! New daybed! We love it! Finally a place for napping where you can actually stretch right out and really relax. Makes a nice couch too.

New Daybed, summerhouseart.com

Save

Save

Share

Playing With Collage on Quiet Afternoon

Round the Bend, collage, by Will Bushell, summerhouseart.com
Round the Bend, collage, by Will Bushell

We look for old magazines at garage sales, but with a difference. Not necessarily to read, although we often do, but we are looking more for interesting papers and colors and images to use one day in collage. Lately, I’ve fallen in love with the inside of business envelopes, they often have such lovely textures to use. My favourite for now is Speckle #10.

Map line with speckle, collage, by Helen Bushell, summerhouseart.com
Map line with speckle, collage, by Helen Bushell

I’m also afraid that I hardly ever throw anything out. So I also have a box of scraps from former collage afternoons. Just in case we might need that particular letter or color or texture.

It's all in the wrist, collage by Will Bushell, summerhouseart.com
It’s all in the wrist, collage by Will Bushell,

Someone once commented on the fact that we’ve got an awful lot of stuff saved, from magazines, to scraps of stained glass, old dishes and ornaments, and even a stack of old furniture. They asked if we are hoarders. Well, I replied, artists are never hoarders, we’re just collectors with plans.

Grid with color, collage, by Helen Bushell, summerhouseart.com
Grid with color, collage, by Helen Bushell

So of course, if we decide on a quiet afternoon to make some collages, we’re ready to roll, or should I say cut and paste in minutes. We have old Train mags, old Wallpaper mags, all sorts of old magazines, we have a big glue stick and a few pairs of scissors. So the kitchen table is cleared and the fun begins! And sometimes, the chaos of magazines, scraps and glue stick might remain on the table for a few days and we eat our breakfasts around it all. Until……one day we say, let’s put it away until another collage day comes along.

Speckle #10, collage by Helen Bushell, summerhouseart.com
Speckle #10, collage by Helen Bushell

As you can see, we have very different styles, even though we are both working intuitively. I’m sort of the type who likes to keep piling it on until I like it, the more color the better. And Will, he works slowly, more deliberately, finally creating a perfectly balanced, minimal composition that I always love immediately. Even without the titles, it’s pretty easy to tell which collages are whose, right? Hope you enjoy. BTW you can find some of these images on Home decor products like pillows, wall art and even furniture in our Society 6 shop.

Tornado, collage, by Helen Bushell, summerhouseart.com
Tornado, collage, by Helen Bushell,
Share

What a Difference a Grout Makes

In the summer, Will and I often work together on a big mosaic project, facing each other across a worktable, under the pergola, which is covered in vanilla scented clematis. It’s a time that we enjoy as we chat and work, while listening to music and enjoying the aviary that is our summer garden. Usually, the project keeps us at work for a few weeks.

But this summer we didn’t get a chance to and missing that time of working together, we decided to spend some time together instead in my studio each creating a small mosaic, but still enjoying our chats and music. There is something very companionable about working with another artist even if on different projects.

We’d picked up some 8 inch x 8 inch wooden box panels at the artist supply store and after a quick gessoing to give us an undistracting ground, we set to work.  We work in a type of mosaic called Pique Assiette, which uses broken dishes.  I’d saved a lovely plate of black speckles on white, precious to me because I only had the one. I also had a small amount of black plates with a jagged white line that I’d set aside long ago for some special project. Today seemed like the time to use them. Will, on the other hand, wanted to create something with mostly white dishes, with a minimal design and color. We save the middle of dishes just for the great supply of whites, once you’ve used up the fancy edges on top of the dishes.

So after snatching time in the studio over a few weeks, we finally got to the grouting stage. And then of course, the big question is, what color grout?

I’d already pretty well decided on black since I wanted to set off the white bits with black grout and create a contrast with the lines created on the black dishes with white lines. Here is the piece without grout. I especially enjoyed how often the piece of black plate had these wonderful little x’s or crosses that I could feature in the design.

Ungrouted Speckle Mosaic by Helen Bushell, summerhouseart.comshell, summerhouseart.com

And then, voila, the difference with grout.


Speckle mosaic grouted by Helen Bushell, summerhouseart.com

And Will also decided on black grout to create even more interest in the design he’d created. And as I alluded to in the title, I’m showing how different the look of each piece is after grouting. In his piece the contrast is the greatest and I couldn’t resist showing the difference. Without the grout his white areas are as one, a white background united setting off the arcs.

Ungrouted Blue Over mosaic by Will Bushell, summerhouseart.com

With black grout the whites are suddenly set apart and create a whole new texture. A whole new composition!

Blue Over mosaic by Will Bushell, summerhouseart.com


One thing that we have learned is that with black grout you have to be ready for surprises and be able to use them. The surprise is that all those little scratches on your white dishes that you were unaware of, suddenly show up when you apply black grout. You can look at them as a blemish or you can look at them with an artist’s eyes and see them as line work that adds texture to the whites. So the latter is what we expected and used.

The other interesting design element that I like about working on this type of a panel surface is that you get to play with the top and sides too. So I thought I’d share those with you too. Love those little x’s!

Top side Speckled mosaic, by Helen Bushell summerhouseart.com

Right side Speckled mosaic by Helen Bushell, summerhouseart.com

Bottom side Speckled mosaic by Helen Bushell, summerhouseart.com

Share

The Little Mosaic Table That Caused Happy Giggling

I just love having students that just can’t wait to start making mosaics. All that enthusiasm just makes the classes all the more fun. And I also don’t mind when a student says they have never done anything creative ever before. Because I know that making a mosaic is a great way to discover your creative side. Bonnie fit both of those categories.
The mosaic classes were a gift to herself in a time of lots of personal responsibilities and often stress with elderly family and other things. It was to be a chance to just have some fun and learn something new. I assured her that the meditative aspect of making a mosaic is just what you need when life is stressful.

Student Bonnie with Helen Bushell, mosaic class at Summerhouse Art
The first class is always me overwhelming the student with all the possibilities of what they can choose to do. The more possibilities I showed her, the more Bonnie just got more excited to start. So off we went shopping and at the Sally Ann Thrift Store, as we like to call it, we found a perfect little table. And, since I always encourage everyone to only buy things that really spark for them, Bonnie found lots of really colorful dishes to break. The next two classes were lots of fun. Bonnie is a really cheerful person and also an excellent student. She picked up quickly on every little bit of instruction I gave, from creating texture and movement, to learning how to cut dishes up and how to make the pieces fit.
The last class is the grouting class. And by that time, Bonnie had made the decision to paint the table bright yellow, (it had been a rather unhappy brown), to play off all the color in the dishes on the table top. I loved her choice.
To make sure her little table looked finished she decided to paint it the week before the grouting. I’m so glad she did! It made all the work of grouting well worth it. And yes that is us using old toothbrushes to clean each of the pieces. That’s the beauty of pique assiette, you get to do a lot of recycling.

So here it is! We decided to take its picture out in the garden in the sunshine. Mosaic always looks so wonderful in the sun! And, as for Bonnie being worried about never having done anything creative before? Well, with her enthusiasm and hard work, she had surpassed that goal. She’d created her first piece and it looked good! I know she’s discovered her creative side and I’m sure she’s a natural at making mosaics. When I emailed her all the photos we took of the classes, I told her again how much we  loved how the table turned out. She wrote right back and said, “ I just love the table too. Every time I walk by it I just giggle happily.” Can’t ask for more than that!

Student Bonnie's Mosaic Table, Summerhouse Art mosaic classes
Student Bonnie’s Mosaic Table, mosaic classes, summerhouseart.com


Share

Creating Strip Quilted Cozies with Men’s Striped Shirts

fabric-up-closewm

Ok, I admit it, I do like stripes. I like it in fabric, in drawings, whatever. I recalled seeing some quilts done in men’s shirt fabric and really liked the look created when doing strip quilting.

Luckily, when it came time to create a new tea cosy, it just happened that I had a couple of striped shirts that Will didn’t want anymore in my fabric stash. Then, in a recent shopping trip to the Thrift store, I lucked out finding a striking red and yellow striped blouse.

Next, it was just setting some time aside to create some strips of stripes going every which way and basically, sewing them together creatively.  And I do mean creatively, not accurately, since I tend to be a bit of a slap dash sewer. But I just happen to like that look, so it’s ok.

strips-sewnwm

I figured, since Will has recently gotten himself a coffee press, might as well make a coffee cosy too. I think we’re both pretty happy with the results.  And yes, that is Queen Victoria poking out behind the tea cosy.  Well, the Brits do like tea, so where else would you put her?

coffee-cosywmtea-cosywm

Share