Paper Collage Using Double Sided Adhesive

Collage on Studio table, Helen Bushell, Summerhouse Art

A while ago, in another post on collage, I said that artists aren’t hoarders, we’re just collectors with a plan. Not all the paper that comes into our home leaves by way of the paper recycling bag. Paper is, after all, for collage artists, a valuable resource. So I use old envelopes to create paint patterns on and even save envelopes with that lovely security pattern on the inside, as a rather tasty texture to use in collage. Anything out of the printer is saved as well for its textural value.

Continue reading “Paper Collage Using Double Sided Adhesive”
Share

Upcycling to Create a New Boho Daybed

Before: the old couch summerhouseart.com

Ah, Before and After. This is the story of an old hide-a-bed couch being replaced with an up-cycled Daybed very thriftily made and done up in Boho style.

After: New Daybed summerhouseart.com

 The old couch, with its unbleached cotton cover hiding stains, old age, many, many years of wear, not to mention large shreddy bits made by long gone cats, just had to go! It just so happened that we had most of the components for a new daybed, stored in the basement, waiting to be transformed. Something much more comfy and better looking than a lumpy, old hide-a-bed. We’d just been waiting for a little time to tackle it.

First, had to get the old couch hauled away by a company that would make sure it all got recycled. We had the rails of an old Ikea single bed, missing the slats. Not sure, but I think they may have been used for some other project. We had a couple of substantial wooden chair or couch arms that one of our sons had found years ago and brought home.

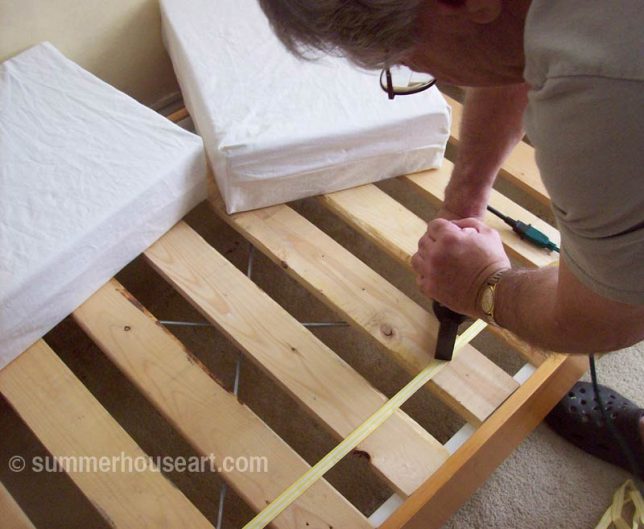
Will, stapling the slats made from pallets, summerhouseart.com

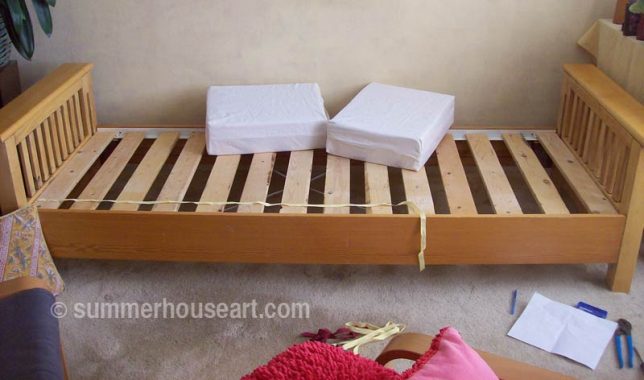
We had saved the two foam seat cushions from the old couch to make new back cushions from. We cut those in half with an old electric carving knife and made four cushions from them.

Old foam seats now backs for new daybed, summerhouseart.com

Will, in the mean time had ingeniously figured out a way to attach the arms of the chair to the rails of the bed. And like so many people these days…. he recycled some pallets into slats for the bed. The only new thing we ended up getting was the actual foam mattress. An Eco foam mattress, so no off-gassing etc.

The aforementioned unbleached cotton cover was sewn into “new” covers for the foam. And the material from a thrift shop duvet cover became new covers for the cushions.

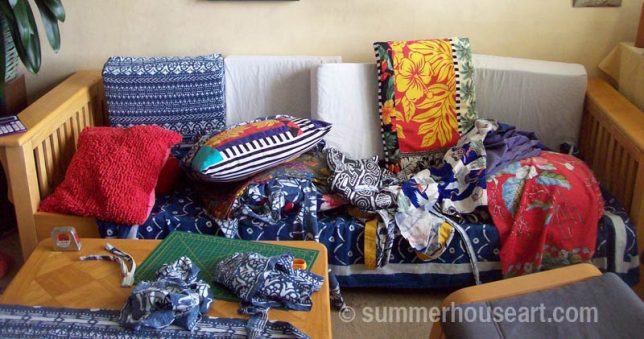
And finally, a chance to get creative with all my fabric stash, collected from garage sales and thrift shops. Chaos while deciding on the fabrics I’d use.

Fabric chaos, deciding on fabrics for new pillows, summerhouseart.com

Lovely new pillows, in the Boho Style.

2 new Pillows for the Boho Daybed, summerhouseart.com

Love how the fabric looks with an iris.

Iris with new pillow fabric, summerhouseart.com

And tah dah! New daybed! We love it! Finally a place for napping where you can actually stretch right out and really relax. Makes a nice couch too.

New Daybed, summerhouseart.com

Save

Save

Share

A Recycled Post about Recycling for Earth Day

Today is Earth Day or for many Earth Week.  I like to think that every day is really Earth Day.  In honor of the day, I’ve decided to do a bit of recycling.  The following is a post I wrote way back in 2010, but I think it still works.  I’d like to share a bit about how to recycle in the garden and even how to use recycled dishes to create art in the garden.

Actually, Recycling, could be the main theme of our lives.  Now it’s called thrifting too.  We’re a couple of old Hippie artists, who were there for the start of the recycling movement. For us it’s just a way of life. We buy everything used and we also get a lot of “good stuff” as I like to call it, absolutely free. Best price there is. And as I mentioned in other posts, it’s a pretty abundant lifestyle too.

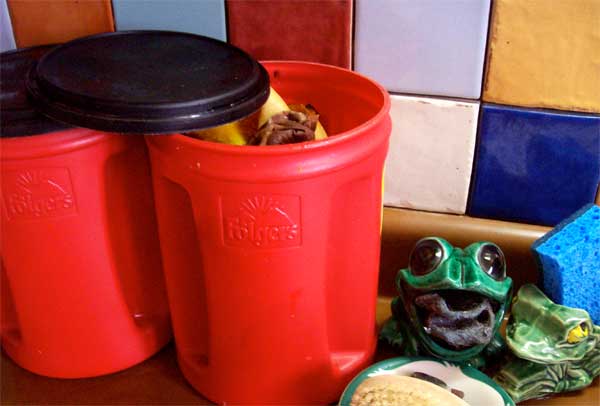
Of course we compost. Every scrap of banana peel, tea bag, coffee ground and egg shell is collected in these recycled coffee bins that I brought home from a job. The tiles on the backsplash behind them are all recycled. In fact every tile was actually free and found at garage sales or from sample boards thrown out by tile stores.

Kitchen Compost saving
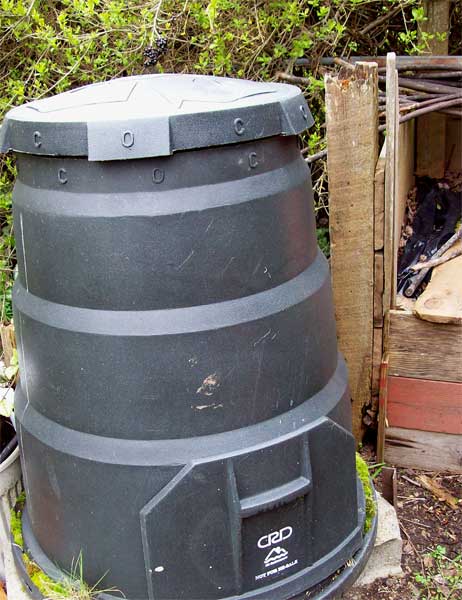
The composter the food scraps go into, was also free.  Someone in the neighborhood was tossing it. Our rainbarrel is a recycled drum formerly used for soap.

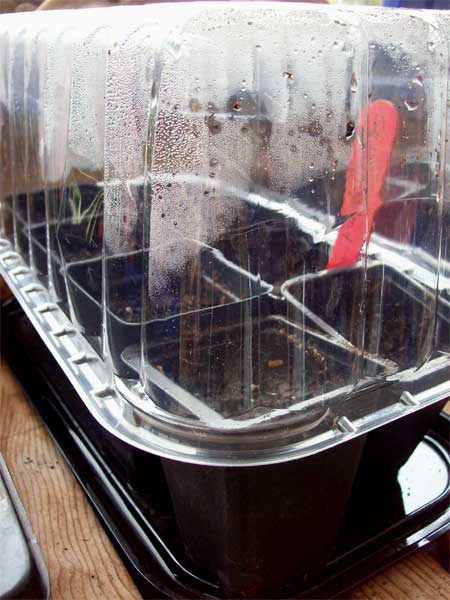
black-composterIn the green house, I recycle too. Every pot from years past is saved to be reused, trays are sometimes taped up to plug leaks but are still put to work. These Black eyed Susan vines are sprouting in cookie packaging.

cake-packaging

The seeds for the Purple Cone flower, which I am rather impatiently waiting to see sprout, are planted and living under the protection of packaging, which in its previous life housed a cake bought for my birthday a short while ago.

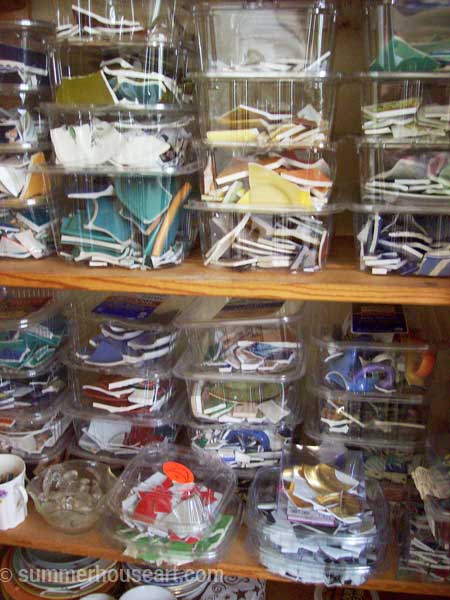
In it’s next use it may become storage for broken dish shards in my studio, like the many, many salad green containers already put to a second use.

boxes-of-shardswm
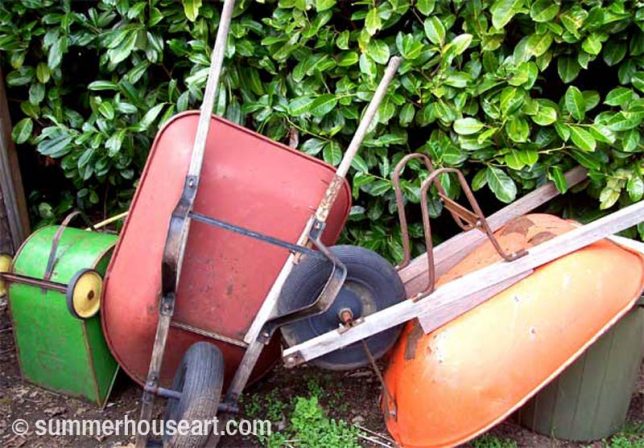
Out in the garden we have, now wait a second, I have to mentally count, at least 4 wheelbarrows. Only 3 are shown here.  All free or almost free. All recycled. I have an abundance of wheelbarrows you could say. I think they are kind of beautiful, in a sort of colorful, shabby, knocked about and used, way.

Wheelbarrow collection, summerhouseart.com


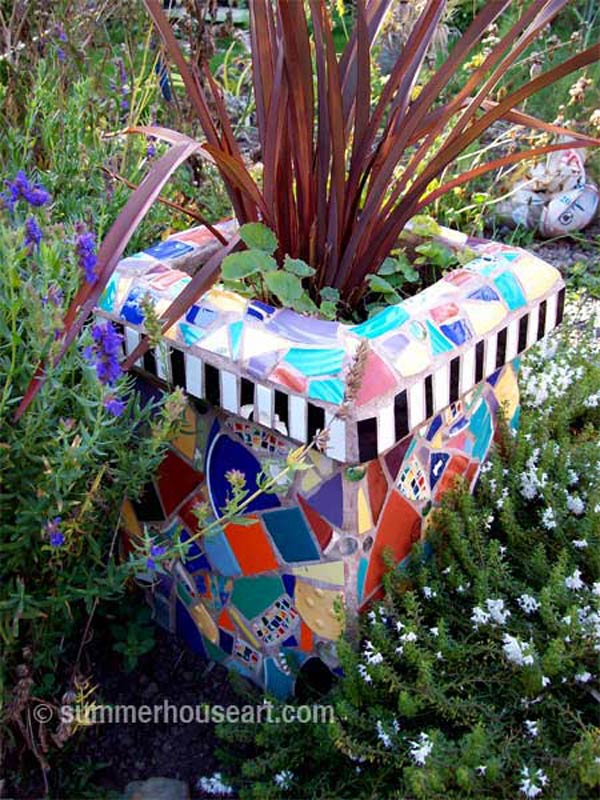
Now that I’ve reached the garden with my recycling theme, I’d like to show you a few pieces of our garden art. Now maybe art for the garden is an odd sort of theme for Earth Day but a lot of our art is made from recyled materials. The mosaic in the herb garden is a recycled chimney covered in old dishes and tiles.

Mosaic Chimney by Helen and Will Bushell, summerhouseart.com

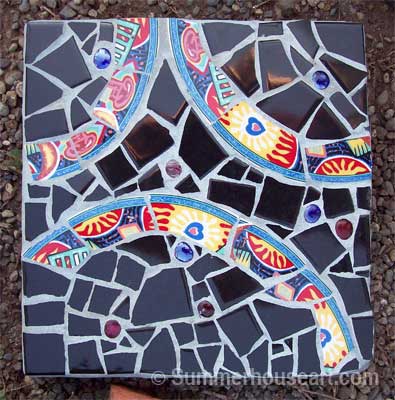
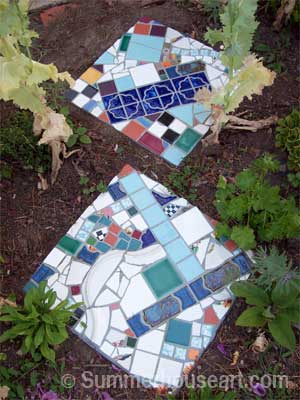
The stepping stones are all made using recycled dishes and tiles, a type of mosaic art called Pique Assiette. In fact, all of my mosaic artwork is made from recycled dishes, tiles and ornaments.  If you would like to see how to make them check my post Creating a Mosaic Stepping Stone Helen’s Way.

Stepping Stone mosaic, by Helen Bushell, summerhouseart.com

Stepping Stones by Will Bushell, summerhouseart.com

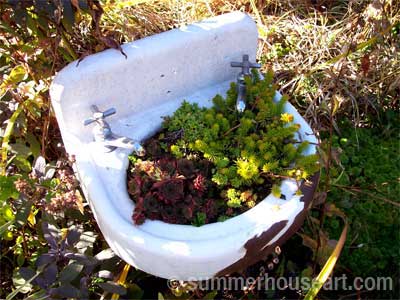
And old sink found in, I must admit, unashamedly, a dumpster dive, is home to our succulents.

Found Basin for the garden, summerhouseart.com


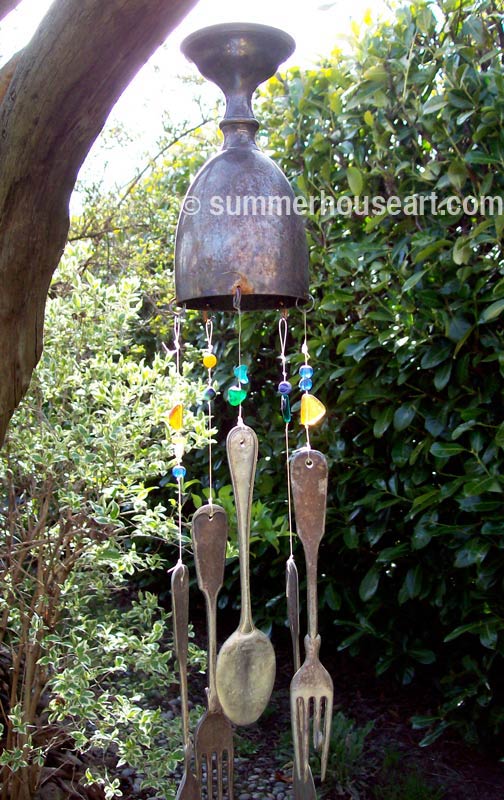
The chime that Bill fashioned out of an old anniversary cup found at a garage sale and hung with flattened silver cutlery is another recycled artwork. There’s much more art to see on one of my previous posts about garden art called Bill’s Driftwood Chair and Other Garden Art Whimsies.

Wind Chime by Will Bushell, summerhouseart.com

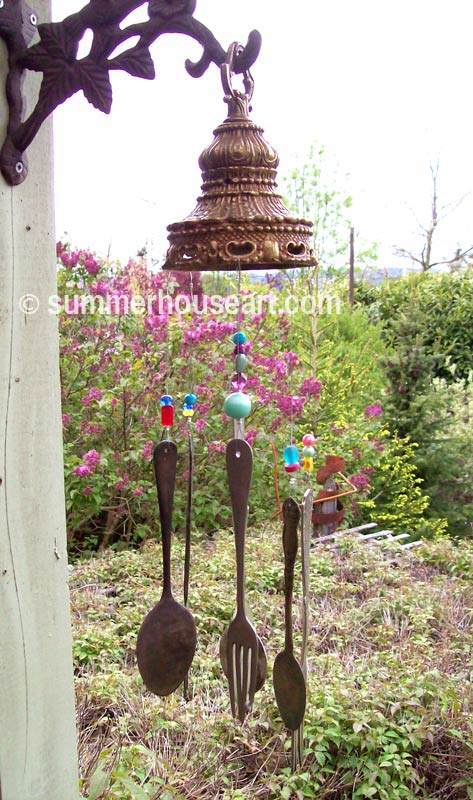
Here is another great little chime that Will made as a gift, with a metal tassel from a chandelier now no more and few beads and pieces of flattened cutlery.

Tassel Chime by Will Bushell, summerhouseart.com

There are so many things that we can recycle and reuse for our gardens from artwork to garden furniture to garden tools and implements. There really is no need to go out and buy new most of the time. I always like to say the world is an abundant place as long as you don’t mind second hand. Not buying new saves resources and cuts pollution. Buying used saves more stuff from ending up in landfills too.  And the best thing is getting out and about on the weekends looking for deals at garage sales ( we always plot the most efficient course to save gas), enjoying the  sun at a beach on the way from one sale and the next.   Life is good.  So that’s my little, I hope, upbeat, message in honor of Earth Day.  Even the post is recycled.

(BTW, if you’d like to make a comment, just click on the title.  It’ll take you to comments….and we do appreciate comments )

Save

Share

Helen’s 10 Recycled Earth-Friendly, Pocket Book Friendly, Guilt Free Gift Giving Idea or How to Avoid “the Mall”

10-gift-ideas

xmasheader

Yesterday we had to go to “the Mall”. No, not to shop for Christmas, but for some things that were needed from the pharmacy etc. I haven’t done Christmas shopping at a Mall for so long that I can’t remember when I did. The place was packed! The parking lot was packed. You know the scene.   Where you have to follow someone back to their car and lurk until they pull out, putting your indicator light on to let others know that this spot is TAKEN and grab their parking spot. It is rather aggressive. Then there are the line ups! OMG! I’m just so happy that I don’t work as a cashier. My back starts aching just thinking about it and all for minimum wage too.

But the worst part of it is the sheer consumerism of it. All that new stuff which will eventually be discarded as the wrong color or the wrong style or just not right somehow. The amount of goods going out is mind boggling, the amount of resources used, and the amount of money spent and a lot of it spent by people who really really can’t afford it. Well, what if there is an alternative? And of course there is…

In past years on this blog I’ve written about Abundance at Christmas and written about the fun we’ve had finding Decor and Music for Xmas all from second hand sources. I’ve shown my HUGE Santa collection, in the post, Revisiting my Santa Collection,  all also second hand for the most part.

santa1

So with that done, for 2011, I’d like to present some gift ideas that don’t require going to the Mall. Think of it as Helen’s Recycled Earth-Friendly, Pocket Book Friendly and Guilt Free List of Gift Giving Ideas. These ideas are tried and true. In fact, we have a rule and all our friends and close family also follow it in regard to presents for each other. The rule is the present must be second hand or hand made. It should be fun, lovely or useful and most of all it should be CHEAP! ** So no worries about how much to spend, no worries about the credit card maxing out and no worries about having to go to a Mall. Wow that’s a lot less worries eh?
(** Cheap is a subjective term. Inexpensive is different things to different people. Our rule is literal, no more than $10, less if possible. That said, my list offers a wide range of “inexpensive” according to your budget. )

santaplane

OK here goes.
1• Go to the Used Book Store and look for books that are in nice shape, and would interest your friend, relative etc. This year we’ve found Cook Books galore. And believe me there is something for everyone. I even found a Weight Watchers one for a friend who goes there and a Diabetic one for another friend with Diabetes. Don’t forget about Decor books and Books about Crafting and Creative Arts.  There really isn’t any subject or interest that isn’t covered somewhere in a book.

2• Still at the Used Bookstore? Well, there are an awful lot of Kids books, Craft and Art books, and books about any possible interest that a friend could have. Actually, books are one of the things we look for at Garage sales all summer ( yes, I’m one of those people who are looking for gifts all year). You can get great deals. And if the book is already inscribed with a sentiment by the original gift giver, no matter… just add yours as well. Our friends have no worries about giving away a gift to someone else after they’ve read it and just adding another inscription. The more times given, the better, we all agree.

santajack3• Go to your local Thrift Stores. There is an absolute abundance of gifts here.
I’ll break it down by age and gender

Gifts for Little kids
Kids grow out of clothing so fast, that very often you can find almost new things of good quality too. In fact, some were gifts and never worn and still have the tags since Sally or Sam was already too big for the gift when it was given. So…. there it is in the Thrift shop ready to be a gift again.

Toys, there are just huge amounts of old toys ready to be played with by a new child. That sounds nice doesn’t it? Just check for broken parts, make sure it’s age appropriate and clean.

Gifts for Mother in Law or Moms are sometimes difficult to buy for. Well, see #1 and #2, books. But don’t forget things like vintage jewelry, or scarves. There’s so much out there in signed and artsy textiles and jewelry that you ‘ll be tempted to buy some for your self too.

Gifts for Guys of all ages; Guys are hard to buy for. Unless you look for interests. Like cooking, or sports or collections or gardening but more about that later. You can find T-shirts with great graphics on them. If you know how to silkscreen or can use a transfer go for it, on a used T and have some fun making some home made designs. Cooks can always use aprons. Collections are always a good bet too. Bill collects Elephants, Dave collected Buddhas for a while too. We kept finding them everywhere.

4• Ok you’ve done Used Book store and Thrift stores, how about Garden Centres? Try to find a centre that locates it’s products from greener eco sources and you’ve got an earth friendly gift for sure. Potted plants for indoors that bloom are nice. An Amaryllis is always a good gift. I used to give one to my Mother in Law for a few years and we’d compete in a friendly fashion as to who got the most blooms. It’s easy to ship and there’s the fun of planting and waiting for the Gorgeous blooms too.

caroller5• Art Supply stores are a great source of prezzies. Not just for those artists on your list but for the ones you know really want to try something creative. There are lots of sketch books made with 100% recycled paper, acid free and archival quality. And if you do a bit of stealthy investigative interviewing of your giftee, you might even find that they would love to take a course in something or other. Most artists are like me and are quite happy to provide gift certificates to their courses.

6• Art Galleries. Ok I know a lot of people are intimidated by Art Galleries but go on, be brave, venture in. You’ll find a lot of interesting things there. Many public galleries have a Gift Shop full of wares made by local artists. And a lot of it is in very very affordable. Most galleries put on shows of smaller pieces at Christmas just to highlight all their artists and offer a start into collecting art. A lot of emerging artists be they young or old, have some amazing work for sale.

7• Art and Craft shows are usually in November, but there are still a few “last Minute shows” to be found showing local artists. Keep art and gift giving in mind in the summer too when many artists and artisans are showing their stuff in local Art and Craft shows. There you will find something for everyone, literally. They have food gifts, herbal makeup, prints, clothing and jewelry, sculpture, art work of all kinds. You will be spoilt for choice and supporting Local Artists as well. I collect their business cards too so that I can look up their web sites later for other gift ideas. A lot of them have Etsy stores or their own web sites. You would be amazed at how much artwork these days is made from recycled materials.

sledboy8• Another gift worth considering is materials for art works. My last birthday was perfect partly because two friends gave me discarded stained glass shards for a present knowing that I’d use them somehow in my mosaics or other artworks. Along that line, give used beads and necklaces to a someone who is into beading, used or scrap material to a quilter, or used dishes and tiles to a mosaic artist. There are so many hobbies and interests that your friends and relatives indulge in that the list of possibilities of materials is endless.

9• Look around your home for gifts. Yes, things you already own. Ornaments that you no longer enjoy may be loved by someone else. Maybe you have a collection that is too big and there are some pieces that you know would be welcomed by a friend. Along that line, have a gift exchange party and have everyone bring something that they no longer want but that would make a lovely gift for someone else. Swap or sell to each other. It’s a good excuse for a party and recycles too. You could even throw in a Cookie exchange which brings me to my next gift idea.

santacook

10• Get in the kitchen and start cooking or baking. I’ve been going to the library and picking up lots of books about Christmas cooking and baking. The library is a great free resource and one day I’m going to do a blog just about libraries. I take out tons of magazines every month. I figure I’m saving some trees and hey, I don’t have to store them. A lot of the December mags can’t be taken out but last years Christmas edition is there to peruse and get lots of ideas from. I love the ones that go all out with Christmas baking ideas. In fact, at garage sales I snatch those Xmas editions up really fast. Ok to get back to the kitchen…. Baking is always a great gift. I find lots of vintage tins at thrift stores  and garage sales all year and give presents of baking. Just line the tin with wax paper or other nice paper and fill to the brim with goodies. One of these years I’m going to learn how to make chocolates too. Another idea to give.

Which brings me to recycled wrapping paper. We save all the gift bags and wrapping paper and use it over again. I’ve also sewn gift bags that get passed around from year to year. This year I’m planning on finding some Chinese newspapers and using them to wrap presents with some lovely ribbon and maybe some lucky people will get one of the many used Xmas broaches I found at the Thrift store adorning their packages. But changing your gift wrap ideas is another way to stay out of the Mall. Maybe this should be # 11.

Hope my little list has given you some good last minute ideas. And with that, we wish you and yours a lovely, recycled, creative,artistic and mall-Free Christmas! That’s the best present yet.  BTW if you liked the little vintage Christmas Illustrations I’ve peppered throughout,  look for Vintage Christmas by Dover Publications for royalty free illustrations.  Which I found at the Library, of course.  But if you want to buy it, it’s a Green Planet Friendly publication.

endpic

Share

How to Create a Pique Assiette Mosaic Stepping Stone – Helen’s Way

There are probably lots of ways to do stepping stones. I have my way and it works for me. There are lots of things you can put on stepping stones for your garden, like dishes, stones, marbles, keys, whatever you think will look good in a stepping stone.  This type of mosaic is actually called Pique Assiette, which roughly translates to “stolen dishes”. The beauty of doing a stepping stone is that the same method works for most outside mosaic projects.  Check out more of our garden stepping stones.
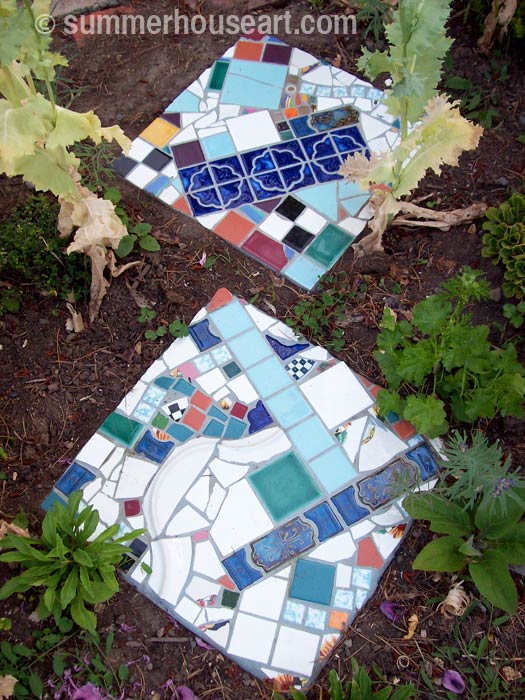
Tutorial, Pique Assiette Stepping Stones, summerhouseart.com

I’m not a big fan of really orderly designs, with symmetrical elements or tidy circles of pieces arranged in a regimented way. No, I tend to go for the intuitive and fast method of working.

First of all, although I’ve seen lots of sites that say otherwise, this is not suitable for children. It has sharp shards from dishes, it has caustic cement and requires some strength and lots of common sense. I am cutting myself all the time and keep bandages handy and I’m way past childhood.

Secondly, I’d like to say, if you are going to make these, use the proper precautions with mortar and grout. These are caustic materials, they require that you use dust masks when mixing to avoid breathing in the caustic dust. They require that you use rubber gloves to avoid getting the caustic mortar on your skin. That said, read the package, note the cautions. Please don’t go leaving this stuff around children and pets! Please remember to clean up as soon as you are done and make sure not to leave this stuff in bowls to harden into cement that you will never ever get off.
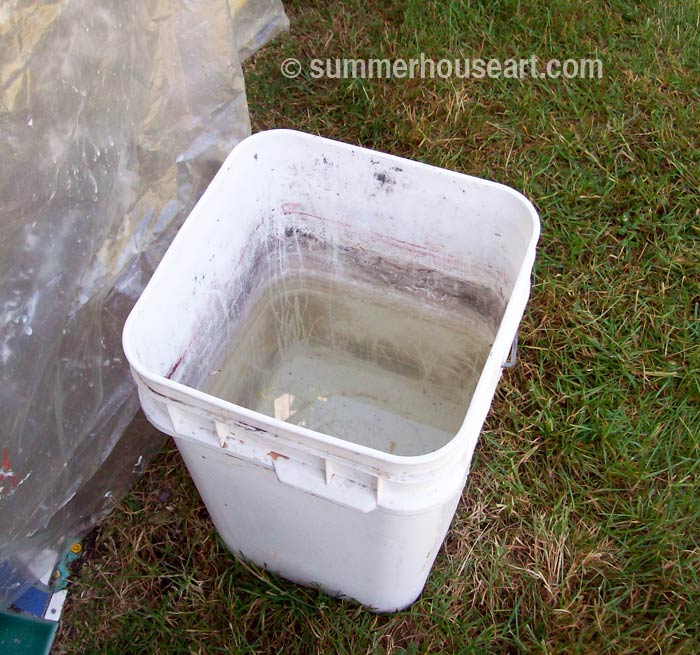
Process, Stepping Stone Tutorial, summerhouseart.com

You may wonder why I have a photo of a pail of water? Well, the next precaution is NEVER NEVER rinse off anything with cement on it down a drain. It will set and your drains will be plugged! Ok, so why the pail? That’s where I do all my rinsing of gloves, mixing bowls and implements. I let the cement settle for a day or so and then gently pour off the water into a garden path and scrape the cement that settled into the bottom of the pail into a bag and put it in the garbage. There won’t be much but, hey, better in the bag than in your drain.  Both mortar and grout have cement in them.

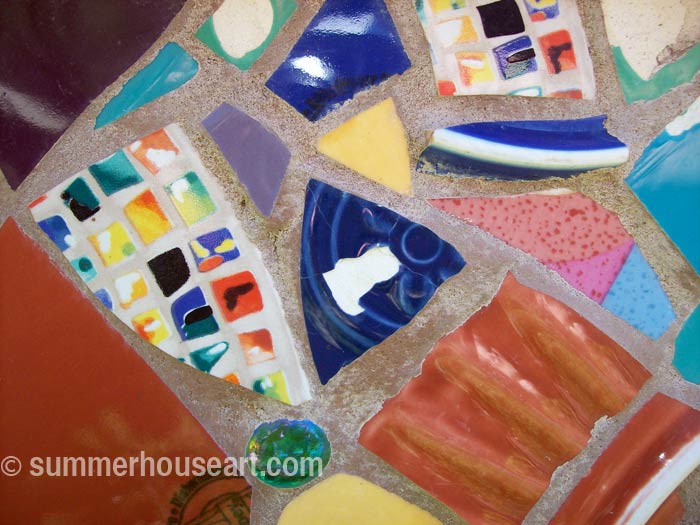
An important note about dishes and tile to use. If you use tile that is meant for indoor use or dishes that are porous under the glaze you will have this nasty thing happen.
Process, Mosaic Stepping Stone Tutorial, summerhouseart.com

The moisture will seep under the glaze and when it’s cold the water will expand and pop the glaze right off the dish or tile. I know, because it’s happened to us. So make sure the dish is really dense and not porous and use tile that is very dense and meant for outside use.

The last important note. Wear goggles when snipping dishes. Broken pieces have a way of flying out and hitting someone. Be careful, for obvious reasons with shards. Don’t wipe away little shards with your bare hands, use a dust brush.

OK enough warnings. On to the fun stuff. As I said, I like the intuitive way of creating stepping stones. But having said that I don’t judge what others may like. Creativity is self-expression after all.

You will need:
A concrete stepping stone
Dishes and/or tile
a work table
a pail of water
rubber gloves
dust mask

old cotton socks

Gray or White Mortar or thin set ( I use it in powder form and add water)
a jar of clean water
a bowl for mixing mortar and grout in ( I use old stainless steel mixing bowls)
a trowel for applying the mortar
something to scrape between the pieces to remove too much mortar, like an old knife.
two-wheeled glass cutter or tile nippers
tile cutter
sanded grout ( it comes in colors, so have fun)

Step 1- Getting ready to start
I buy concrete stepping stones from the local home building supply store. We used to make our own, but honestly, it wasn’t worth the effort. Stones are about $2 or $3 to buy. They come round or square.

Put a concrete stepping stone on a work table so you don’t have to be bent over the whole time while creating it. You’ll thank me later. I like to cover the work table with plastic first to save it for other uses. Also, it’s a good idea to put the cement stepping stone up on a few little blocks of wood to raise it off the table surface. It’ll make it easier to get your fingers under when you finally pick it up to move it.
Process, Mosaic Stepping Stone Tutorial, summerhouseart.com

Step 2- Cut up the dishes and tiles
Please put on your eye protection! I wear glasses anyway so that’s mine but really protective goggles are worth it.

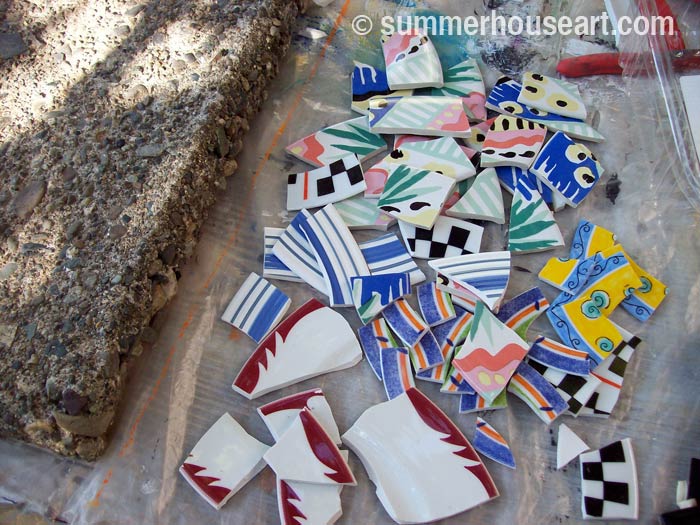
Cut up the dishes into bits and pieces using nippers or two-wheel cutters or tile cutters. For cutting up tile, use the scoring wheel on the tile cutters to score the tile and then break it with the tile cutters. If you don’t know how to use one ask the clerk in the tile store, they’ll usually be happy to demonstrate.
Play around a bit with the arrangement. You could arrange them all before hand on an area approximately the same size as the stepping stone. More about this later.

Since mortar sets in about 20 minutes max, laying out your pieces on another surface will cut down on the time it takes.  Or you could do it my way and just arrange them right on the mortar and wing it.  Keeping in mind that the mortar loses its stickiness and you may have to make a little new mortar to finish sticking down pieces.
Process, Mosaic Stepping Stone Tutorial, summerhouseart.com

Step 3- Mixing the mortar
Put on your Dust mask! Put on your Rubber gloves! Seriously!
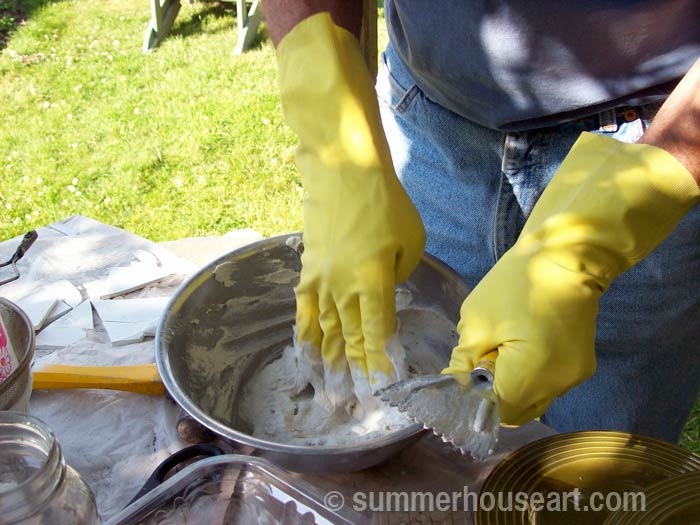
Wear your rubber gloves! I like to mix with my hands, encased in rubber gloves of course. Don’t do this bare handed! It’s caustic. see warnings above!

Put the powdered mortar in the mixing bowl. You will have to guess-timate here for the amount of mortar. Add water from the clean water in the jar, a tiny bit at a time. Mix up the mortar to a peanut butter consistency.

I like to use stainless steel mixing bowls that I find in thrift shops, they work well, and are reusable.

Get it to a peanut butter or just slightly thinner consistency by adding the water to the mortar ( this applies to grout also) very slowly as it will become too thin very quickly if you add too much.
Process, Mosaic Stepping Stone Tutorial, summerhouseart.com

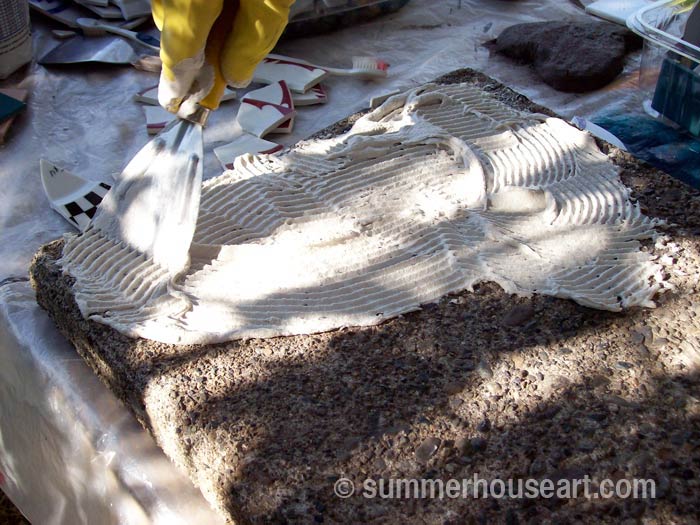
Spread the mortar over the stone using a toothed trowel.
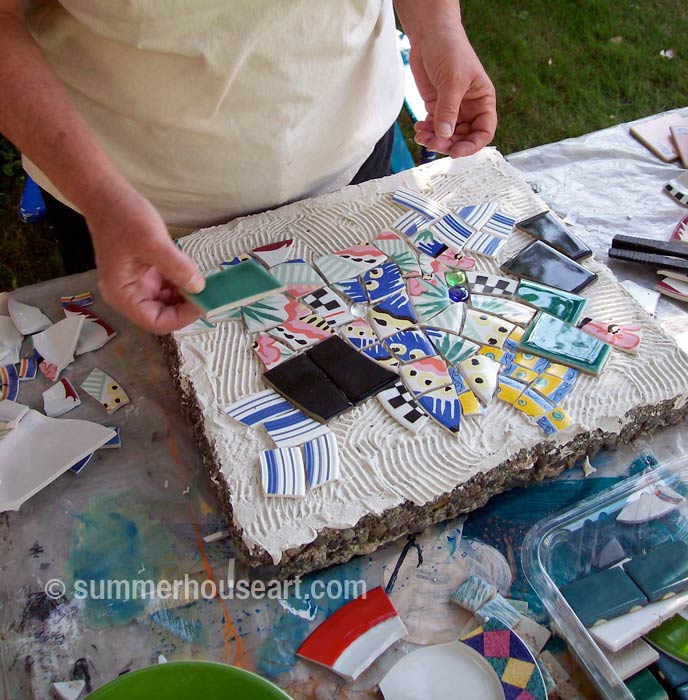
Process, Mosaic Stepping Stone Tutorial, summerhouseart.com

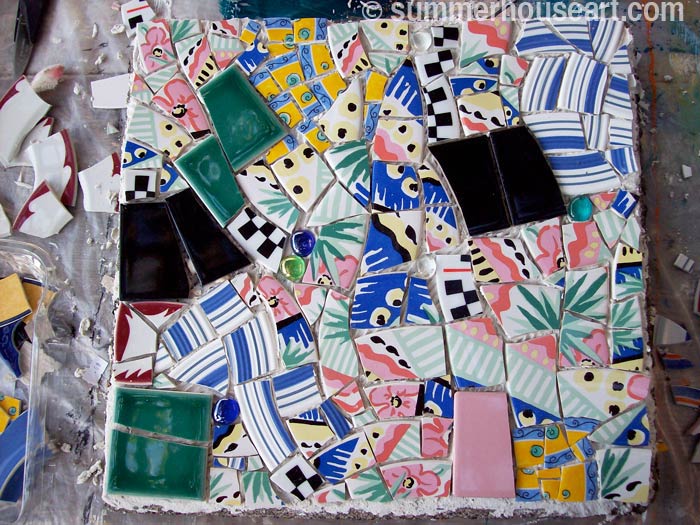
Lay each piece on the mortar and try not to squish up mortar between the pieces. You’ll need that space to put grout in later. If it happens, and it will, just remove it with a blade like tool. I cut and fit dishes as I need to as I go along.

You’ll have to move fast, mortar sets up on a hot day really fast, you’ll have only about 20 minutes! In fact I wasn’t fast enough on this one and it started to dry out and nothing stuck. So I scraped off the dry mortar and just buttered a bit on, for each section I had left to finish. Ok, it’s cheating a bit, but it did work.

BIG NOTE: watch out that when you put pieces down on the mortar that you don’t leave nasty points sticking up. You’ll know you did, painfully, later when you are smoothing grout over the pieces and snag your fingers on a point. And you wouldn’t want to step on a point later.

Be careful, this stuff is sticky and keep the top of your dish pieces clean and wiped off.  Once mortar sets it’s cement and you won’t be able to remove it from the surfaces of the dishes!

NOTE FOR BIG PROJECTS: When we are doing a big project, or if we want to take our time designing a piece, we work a bit differently.  We glue down each piece with a bit of mortar buttered on to the back of each piece.  We just mix up tiny amounts of mortar at a time in a small bowl and apply it to each piece as we stick it down. When the mortar gets too hard, we just clean out the bowl and mix up another fresh tiny amount. 
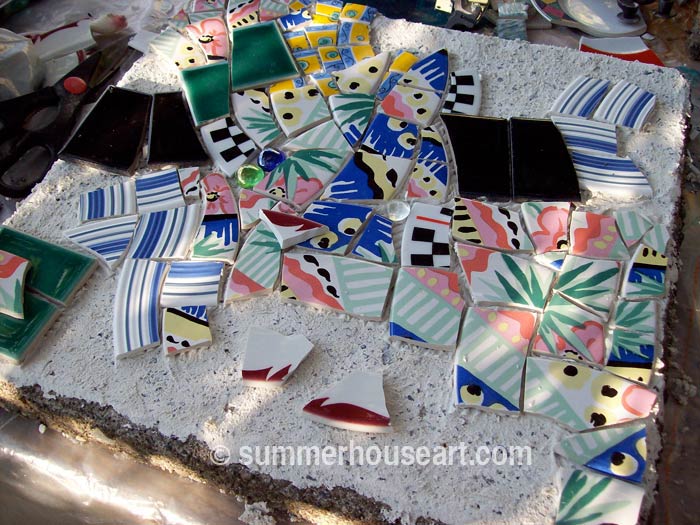
Process, Mosaic Stepping Stone Tutorial, summerhouseart.com

Process, Mosaic Stepping Stone Tutorial, summerhouseart.com

Step 4 -Take a break
Now that you have all the pieces mortared down, take a break and enjoy a cool iced tea. When you can’t move the pieces with your fingers, the mortar has set. We’d actually done the mortaring in the evening after a long day and stopped altogether to go in and watch movies. Of course, we cleaned up all the mortar mess like the bowls and implements first in the bucket of water! Then the next morning I was ready to grout.
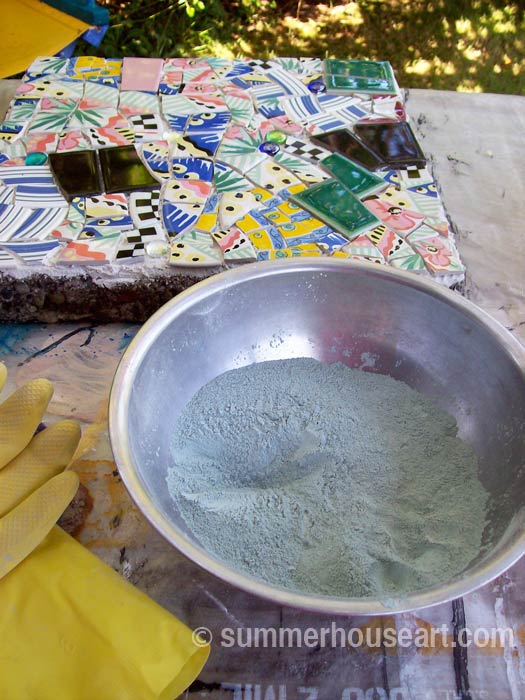
Process, Mosaic Stepping Stone Tutorial, summerhouseart.com

Step 5 -Grouting
Put on your dust mask and rubber gloves!! Mix the grout in a bowl adding just a little bit of water from the jar at a time. Again I like to mix with my hands.

Get it to a peanut butter or just slightly thinner consistency.
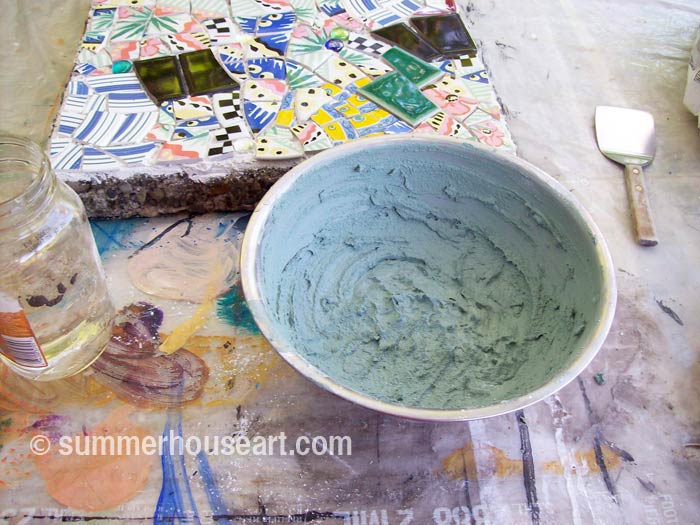
Process, Mosaic Stepping Stone Tutorial, summerhouseart.com

Let the grout “slake” for a few minutes, no more than 5 and with your gloves on still from mixing it by hand pick up a handful and start “smushing ” it all over the surface.
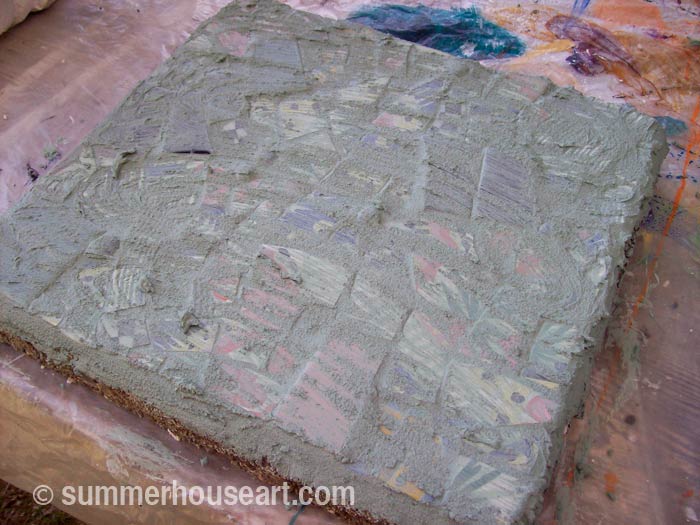
Process, Mosaic Stepping Stone Tutorial, summerhouseart.com

Be sure to fill in each space between the pieces well. I use sanded grout always.

Step 6, or Why should I save old cotton socks?
I like to use old cotton socks to remove the grout from the surface. Some people like to use old sponges but I’ve found it’s just too easy to remove the grout from between the pieces with sponge. Dry old socks work well and you can turn them inside out and use the inside too. Once you have most of the grout removed from the surface leaving only a bit of hazy layer, let it sit. Break time again! Not too long, just 5 minutes and then back to work! Come back and with a clean sock shine up the pieces.
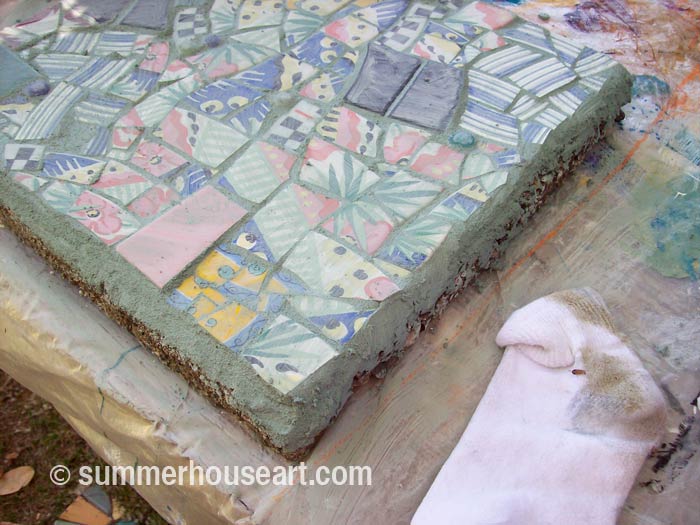
Process, Mosaic Stepping Stone Tutorial, summerhouseart.com

Step 6, Enjoy!
Enjoy the work you’ve just produced. Sit back and tell yourself what a genius you are! Then after your new wonderful stepping stone has had overnight to set and cure, dig it in to your chosen spot in the garden path. Hope you’ve enjoyed my tutorial.  You can use this method for other outdoor projects like bird baths too.  Check out our Mosaic bird baths too, if you’re interested.   you can find them here:  A Serendipitous Mosaic Bird bath  and also A Beach Pottery Bird Bath.   Bird baths are done a little differently.  We create small batches of mortar and butter each piece as we go along.  We set up under a pergola and make a summer project of it.  They do take some time, so be patient and enjoy.

Mosaic Stepping Stone Tutorial, summerhouseart.com

(BTW, if you’d like to make a comment, just click on the title.  It’ll take you to comments….and we do appreciate comments )

Save
Share

How to Paint a Rug on a Deck Floor or at Least How I Did It…

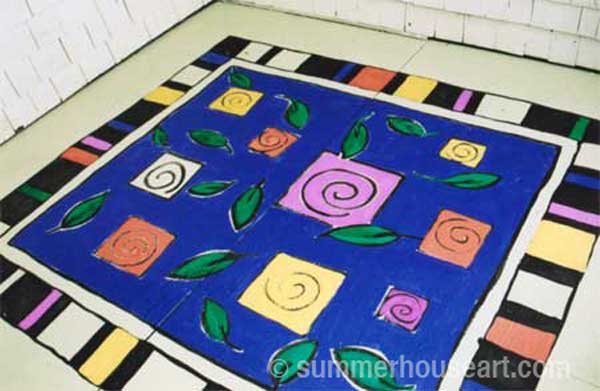
I’d painted a rug on our deck when we first moved in. But one day, due to some rotting of old plywood part of the deck had to be replaced. Now the deck been repaired and repainted and it looked wrong. Just a flat color and there was nothing to hold the area together visually. Obviously, we needed to paint on a new rug!  So today I’m going to have a post all about how to paint a rug on a deck floor, or at least how I painted one…

The deck was already clear of furniture and plants so we had a clean slate. What colors? Well that was easy.  As color inspiration, I just chose all my favourite colors at the time. The beauty of that is that they always go together. Everyone gravitates to certain colors naturally, and we tend to buy our clothes and accessorize our lives in these colors. Don’t fight it, just go with the flow and you will find you have a pallet of colors without having to think too hard. My colors have changed a bit since then and if I’d done the rug today I might have chosen deep purple, lime green, turquoise, majenta and touches of red and orange. Hmm, maybe I should change those colors. Oh don’t tempt me!
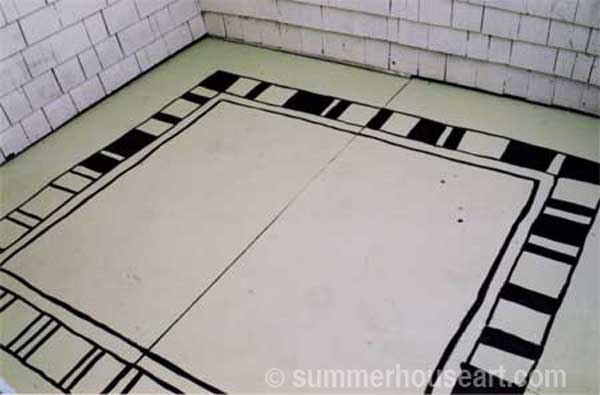
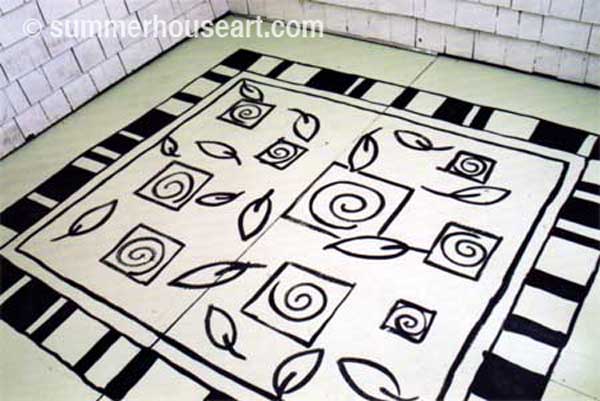
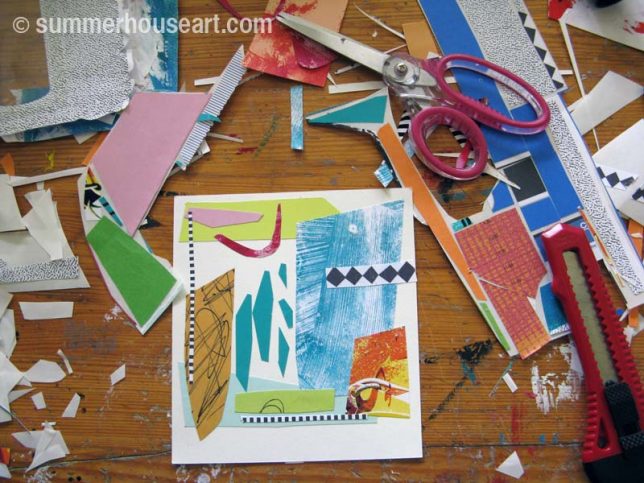
A very simple design was quickly sketched out on paper and off we went.   I drew out the design in pencil and then outlined it all in black paint. By the way, the whole rug is done in acrylic paint, just the paint we get from the art supply store, which we, as painters, had on hand. It dries very quickly (about 20 minutes on a sunny day) and we took lots of  tea breaks between colors. Artist acrylic paint stands up very well to sun and weather and in fact this rug has been on the deck for more than 5 or 6 years and it’s stood up better than the deck paint from the paint store!

How to paint a rug on Deck floor tutorial, Helen Bushell, summerhouseart.com

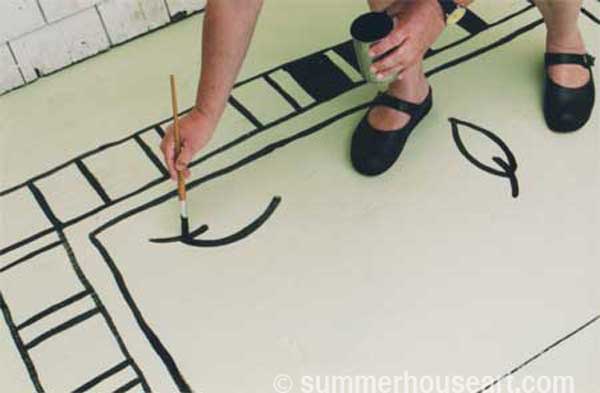
The black outline was done freehand in paint because I wanted a loose and energized feel to it. First the border was done and then I added leaves in a very simple design and squares that punctuated the overall space in a free handed way. Each square held my fave motif, the spiral.

How to paint a rug on Deck floor tutorial, Helen Bushell, summerhouseart.com

Just go with some design element you like. Maybe it’s paisley or maybe flowers, whatever. Just take that element and toss it all over the surface. I kept it very loose and didn’t worry too much about being symmetrical. I don’t  really like things that are too balanced.

How to paint a rug on Deck floor tutorial, Helen Bushell, summerhouseart.comFrom there I started with the central color, a deep purple-blue, leaving the leaves and squares free of color to be applied later.
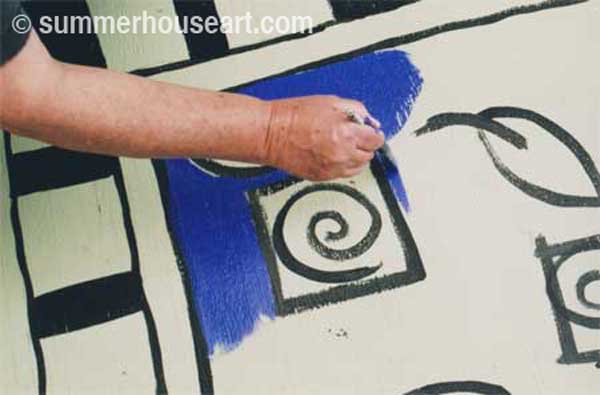
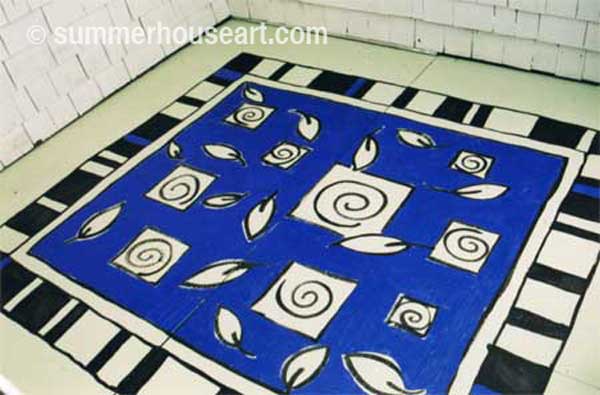
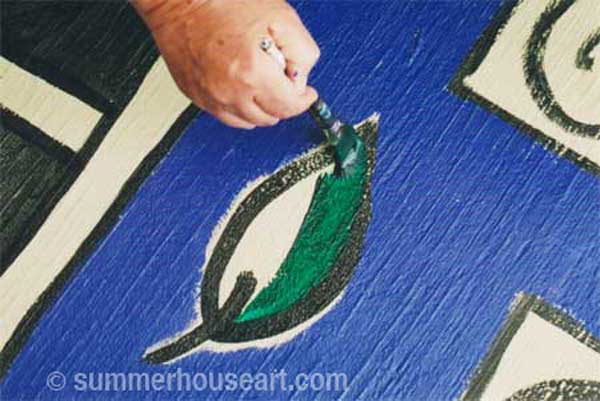
How to paint a rug on Deck floor tutorial, Helen Bushell, summerhouseart.com

How to paint a rug on Deck floor tutorial, Helen Bushell, summerhouseart.com

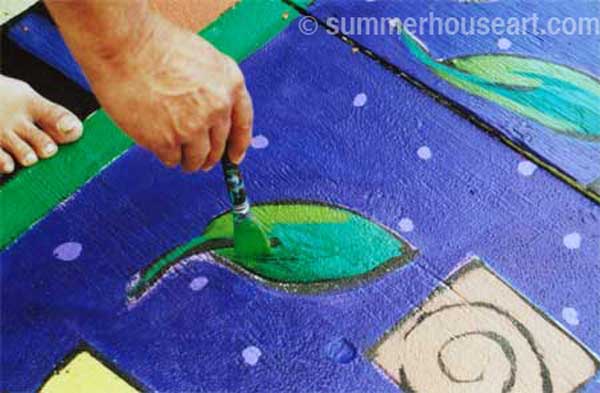
Then the leaves were filled with one shade of green. I would later add a touch of another shade of green to give them more depth.

How to paint a rug on Deck floor tutorial, Helen Bushell, summerhouseart.com

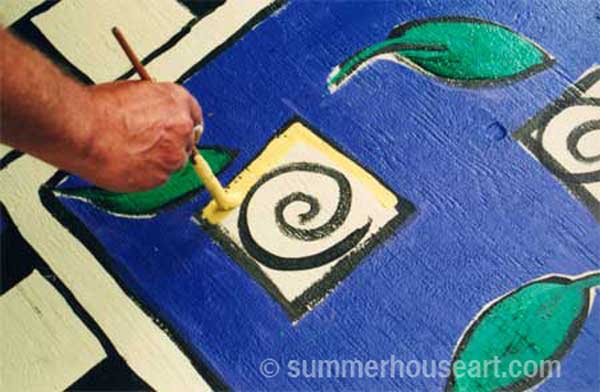
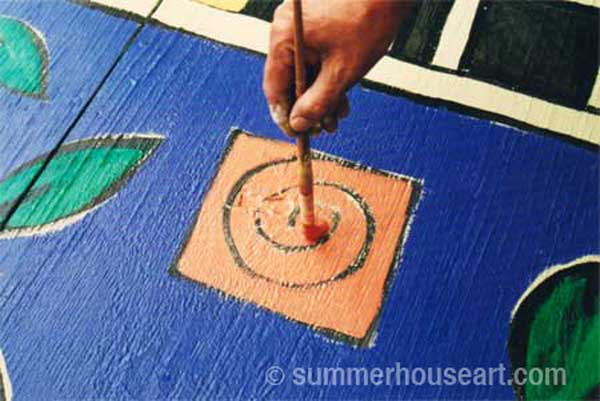
Then each spiral color was mixed and I filled in the squares around the black spiral without worrying too much about being even.

How to paint a rug on Deck floor tutorial, Helen Bushell, summerhouseart.com

How to paint a rug on Deck floor tutorial, Helen Bushell, summerhouseart.com

Whatever was left of that color was added to the spaces in the border.

How to paint a rug on Deck floor tutorial, Helen Bushell, summerhouseart.com

How to paint a rug on Deck floor tutorial, Helen Bushell, summerhouseart.com

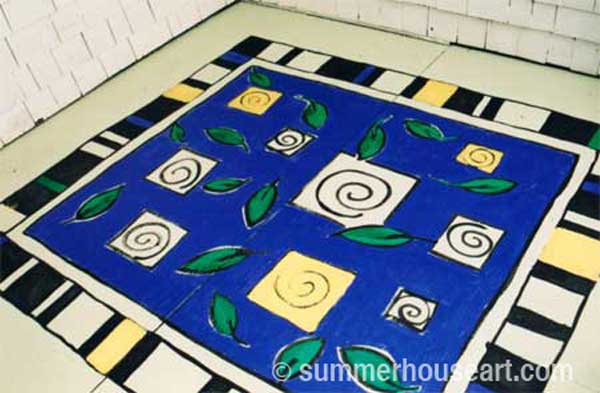
I added a light green to the dark green leaves to give them a bit of a pop.

How to paint a rug on Deck floor tutorial, Helen Bushell, summerhouseart.comThen it almost seemed done. But the blue needed something to keep it from visually sinking, something to bring the design right up at the surface. Ah, dots! Little mauve dots were randomly added to the surface. This made the whole area become more animated.
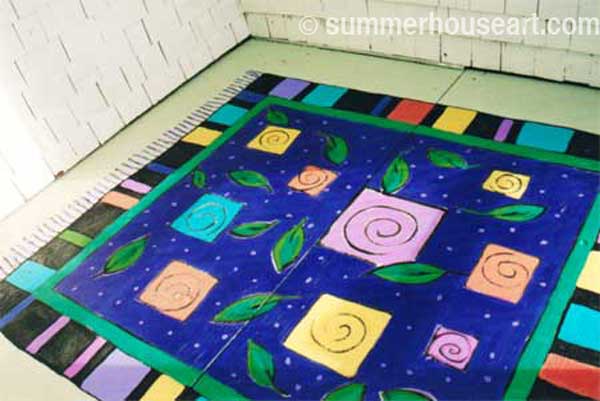
Still something missing? I’d almost forgotten. A rug needs tassels. The tassels were first painted on in black and then a thin line of mauve was added to give them a rounded look.

How to paint a rug on Deck floor tutorial, Helen Bushell, summerhouseart.comTah dah! The whole rug was a hit. After leaving it overnight to allow the paint to cure, all the plants were moved back as well as the chairs and table. We’ve enjoyed it for years now.
How to paint a rug on Deck floor tutorial, Helen Bushell, summerhouseart.com

Every spring, even though this is a covered deck, after all the winter storms, it’s covered with dirt and leaves. I just wash it off, sometimes even using a scrub brush, and hose it down. It’s become very nicely worn looking. And if I want, I may even one day change the colors just for fun. So as you can see, pretty easy and fun. And I don’t have to worry about corners of the rug rolling up and tripping myself!

Please feel free to leave comments or questions. I’d love to hear from you.

Share